Installing a mobile amateur radio setup in your vehicle is a rewarding project that provides communication on the go. The specific setup shown, with Yaesu FT-2900 and FT-1907 radios, is a great example of a dual-band VHF/UHF installation. Here’s a breakdown of how to approach a similar project and what to consider.
The Gear: Radios and Mounting
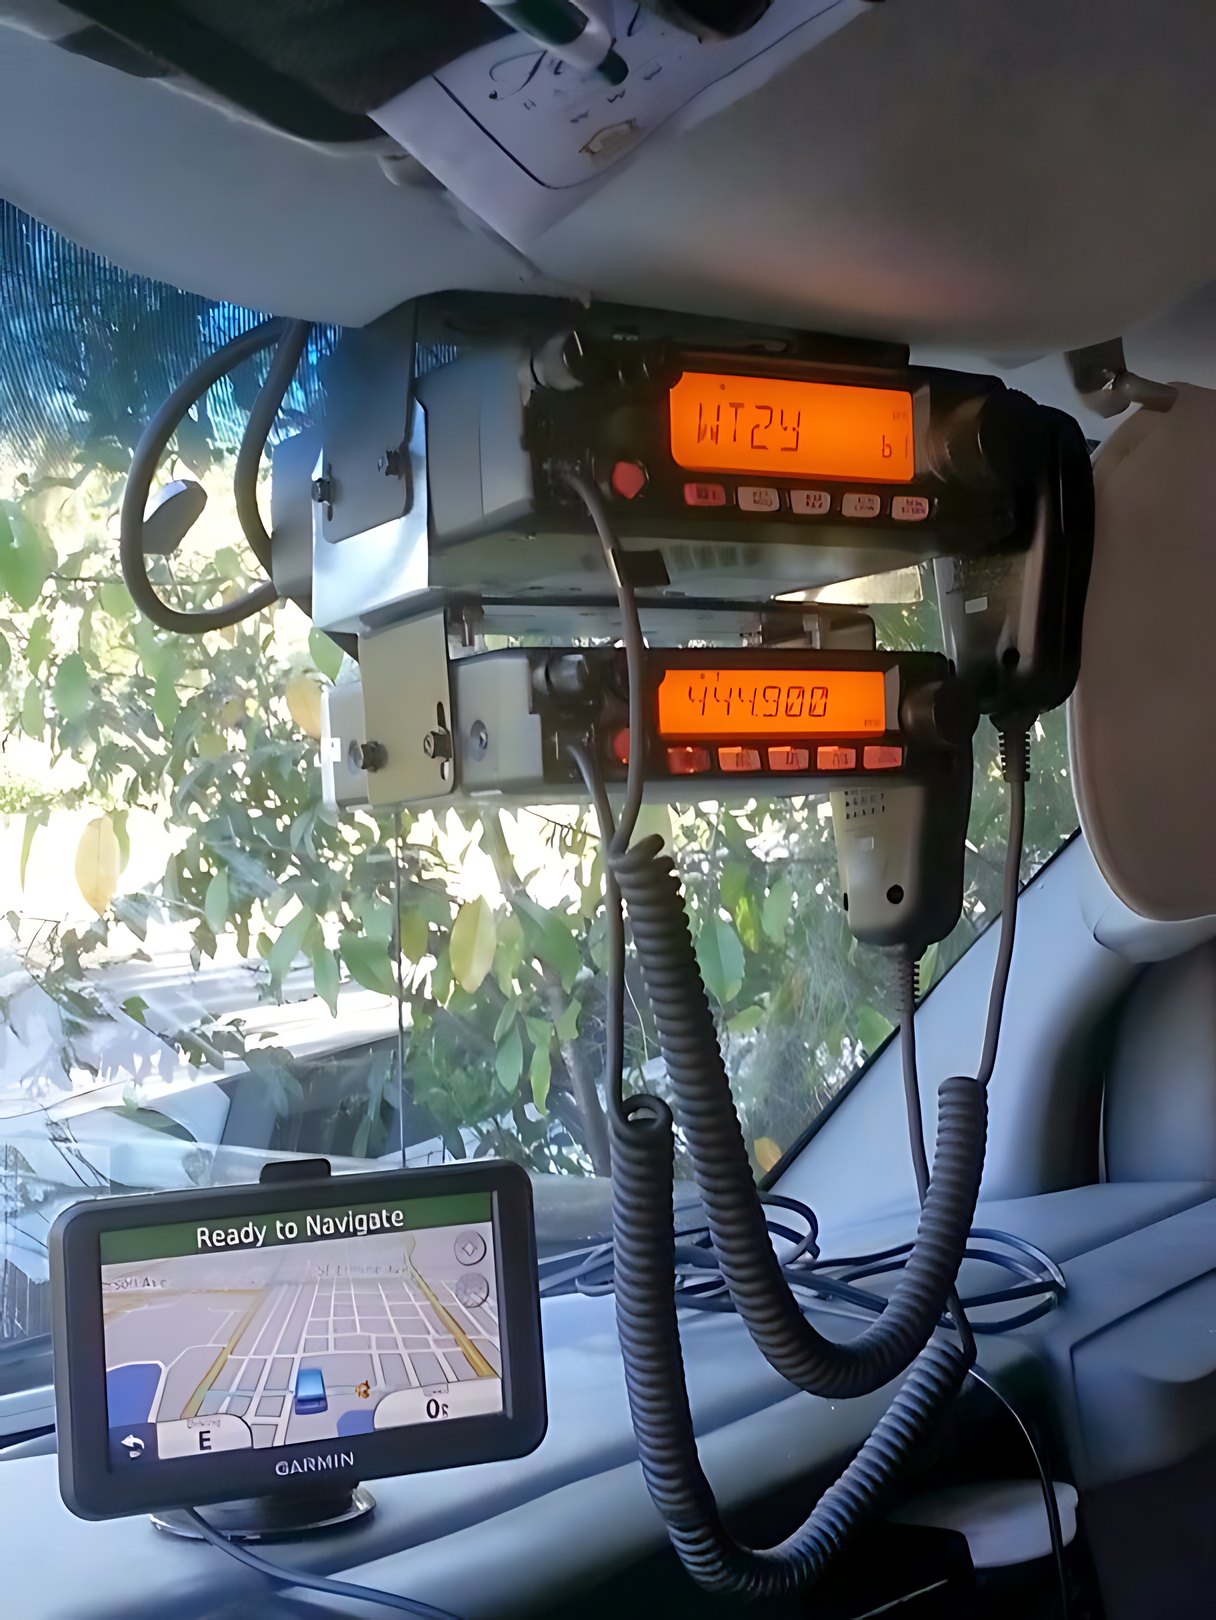
The photo shows two separate radios, a Yaesu FT-2900 (a 2-meter, or 144 MHz, single-band radio) and a Yaesu FT-1907 (a 70-centimeter, or 440 MHz, single-band radio). Many amateurs choose separate radios for a few reasons, including the ability to operate on both bands simultaneously (one on receive, one on transmit) and often higher power output from single-band units. The mounting solution is a custom-made metal bracket that secures the radios to the roof console. This location keeps the radios within easy reach and sight while minimizing dashboard clutter.
To build a similar setup, you’ll need:
- Radios: Two single-band radios (like the Yaesu models shown) or a single dual-band radio (which combines both bands into one unit).
- Mounting Bracket: While you can buy universal brackets, a custom-fabricated one from aluminum or steel is often the best way to get a clean, secure fit for your specific vehicle and radio models. This can be a DIY project using simple tools or a job for a local metal shop.
- Antennas: You’ll need at least one antenna designed for the 2-meter and 70-centimeter bands. For the best performance, it’s recommended to use a permanent roof mount. You’ll also need a separate antenna for each radio if you’re using two.
- Coaxial Cable: High-quality coaxial cable (like RG-58 or RG-8X) to connect the radios to the antennas. The length should be just what you need to avoid excess coils.
- Power Cable: A heavy-gauge, fused power cable to connect the radios directly to the vehicle’s battery.
Installation Instructions
Step 1: Planning and Mounting 🛠️
Before you start drilling, plan the installation. Choose a location that is secure and doesn’t interfere with airbags, your view, or vehicle controls. A roof-mounted console or a bracket attached to the center console are common choices.
For a DIY mounting bracket:
- Measure the radios precisely, including any cooling vents or side ports.
- Using sheet metal or aluminum stock, cut and bend the pieces to create a cage or shelf for the radios.
- Drill holes in the bracket that align with the radio’s mounting holes.
- Secure the bracket to the vehicle’s frame or a sturdy, non-movable surface. Never attach a heavy object to a plastic or flimsy part of the car’s interior.
Step 2: Power and Wiring 🔋
This is the most critical step. The radios require a direct connection to the vehicle’s battery to prevent voltage drops and noise.
- Run the positive (red) and negative (black) power wires through the firewall into the engine bay. Use a rubber grommet to protect the wire from chafing.
- Connect the positive lead to the positive battery terminal and the negative lead to the negative battery terminal or a solid chassis ground point.
- Install fuses on both the positive and negative leads as close to the battery as possible, following the manufacturer’s recommendations.
Step 3: Antenna Installation 📡
The antenna is what makes your radio work. Its placement is crucial for good performance.
- The ideal location is the center of the vehicle’s roof. This provides a full, unobstructed ground plane for the antenna, ensuring an even signal pattern.
- Drill a hole and use a permanent NMO (New-Motorola) mount, which is waterproof and provides a secure electrical connection.
- Route the coaxial cable from the antenna mount, through the headliner, and down to the radio. Keep the cable away from ignition wires or other sources of electrical noise.
- Before transmitting, you must tune the antenna for the lowest possible SWR (Standing Wave Ratio) using an SWR meter. An SWR of 1.5:1 or less is typically ideal.
The most important part of any mobile radio install is doing it safely and securely. Taking the time to plan and execute a clean installation ensures your equipment works reliably and you can operate without distraction.
If you are looking for an example of a similar installation, this video shows how to mount a radio in a vehicle. Mobile Radio Install in My Truck.