For hunters, properly aging and storing game is a crucial step to ensure the meat is tender and flavorful. While commercial meat lockers can be expensive, a resourceful and effective solution is to create your own venison cooler out of a repurposed refrigerator.
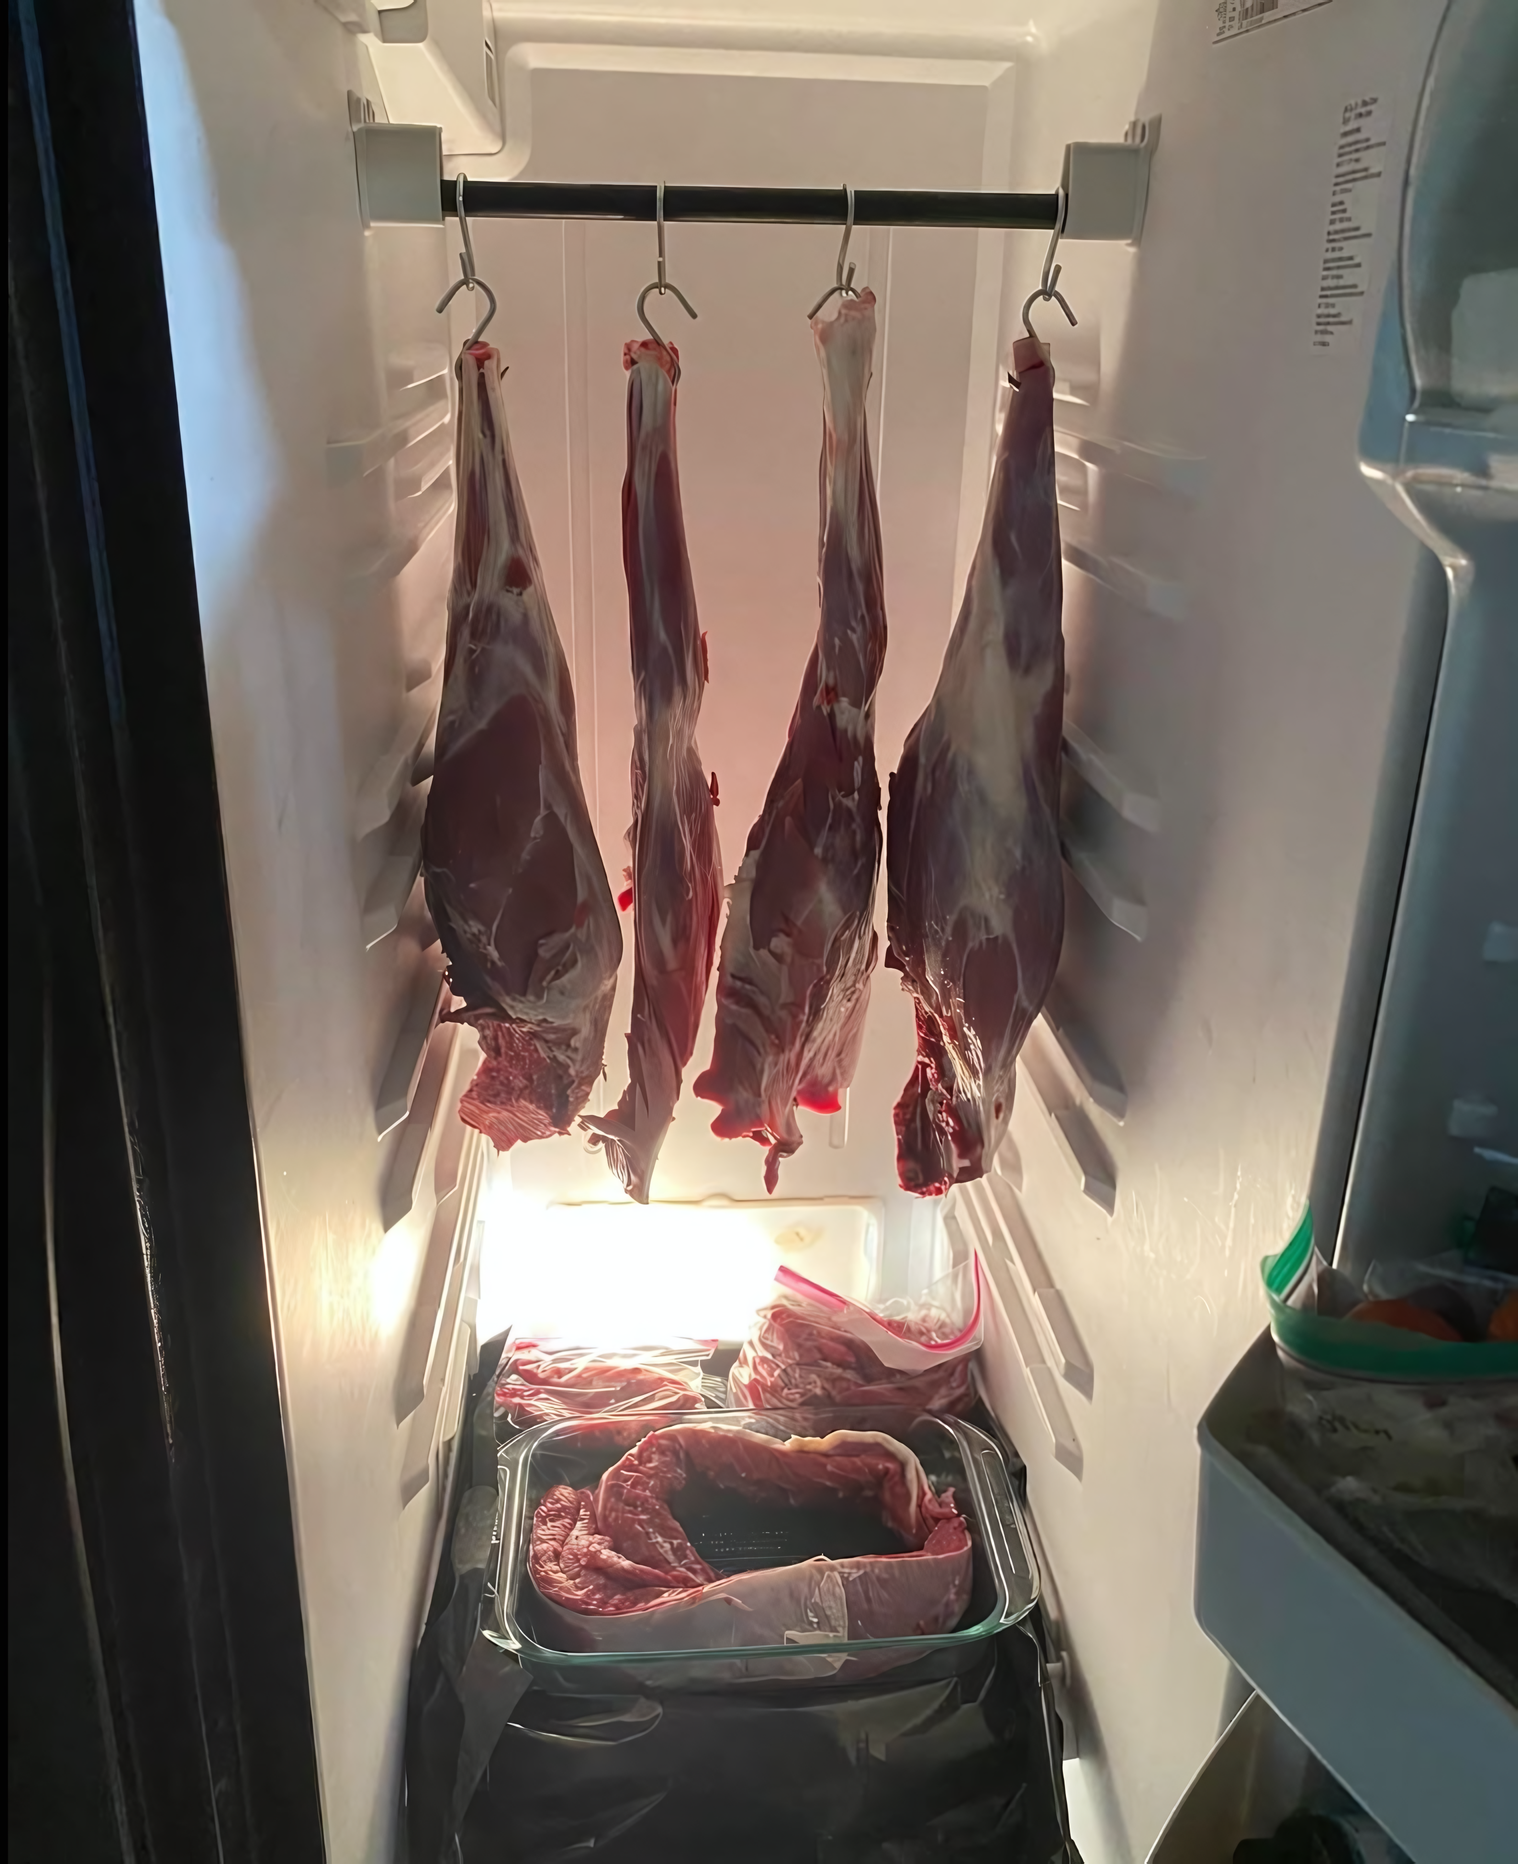
This image perfectly illustrates this DIY project in action. You can see several cuts of venison hanging from a rod, with additional meat stored below. This setup allows for proper air circulation and temperature control, which are essential for aging meat.
Why Age Venison?
Aging meat involves letting it rest in a controlled, cool environment for a period of time after harvest. This process has a few key benefits:
- Tenderization: Natural enzymes in the meat break down muscle fibers, which significantly tenderizes the venison.
- Flavor: As the meat ages, moisture evaporates, concentrating its natural flavors.
The ideal conditions for aging venison are a temperature between 34-40°F (1-4°C) and a humidity level of about 70-80%. A standard refrigerator, with a few modifications, can easily achieve this.
How to Make Your Own Venison Cooler
Building this project is simpler than you might think. Here’s a step-by-step guide.
Materials
- A Repurposed Refrigerator: An old, clean refrigerator or chest freezer will work. A standing fridge like the one in the photo is ideal because it provides vertical space for hanging.
- A Sturdy Rod: You’ll need a rod to hang the meat from. A closet rod, a piece of metal conduit, or even a thick dowel will do.
- S-Hooks or Butcher Hooks: These are used to hang the meat from the rod.
- Drill and Bits: For mounting the rod.
- Meat Thermometer: To monitor the internal temperature of the refrigerator.
Instructions
- Clean the Refrigerator: This is the most important step. Thoroughly clean the inside of the refrigerator with soap and water, then disinfect it with a solution of bleach and water (1 tablespoon of bleach per gallon of water). Make sure it’s completely dry before you proceed.
- Mount the Hanging Rod:
- Measure the inside width of your refrigerator.
- Cut your rod to fit, leaving a little room for the mounting brackets.
- You can mount the rod directly into the refrigerator walls or use brackets. The photo shows simple plastic holders attached to the top of the fridge. For a sturdier setup, you can drill a hole on each side of the interior top and secure the rod. Be careful not to drill into any cooling lines.
- Make sure the rod is secure enough to hold a significant amount of weight.
- Prepare the Meat: After field dressing and skinning your venison, and separating the hindquarters, you can hang the whole hindquarters or smaller primal cuts. Use the S-hooks or butcher hooks to hang the meat from the rod.
- Control Temperature: Place a thermometer inside the fridge. Adjust the temperature setting until you consistently achieve a temperature between 34-40°F (1-4°C). This is the “sweet spot” for aging.
- Monitor the Meat:
- Leave the meat to hang for 7-14 days. The longer you age it, the more tender it will become, but you must monitor it for any signs of spoilage.
- The exterior of the meat will form a dark, dry “crust.” This is normal and protects the interior. You will trim this away before butchering.
This DIY venison cooler is a simple, cost-effective way to elevate your wild game processing, resulting in a more tender and delicious final product.