What is a Wort Chiller?
When you’re done boiling your wort, you need to cool it down to fermentation temperature as quickly as possible. This rapid cooling is crucial for a few reasons:
- It prevents unwanted bacterial growth. The sooner you get the wort out of the “danger zone” (the temperature range where bacteria thrive), the safer your brew will be.
- It creates a better “cold break.” This is when proteins and other materials coagulate and settle out of the beer, leading to a clearer final product.
- It preserves hop flavor. Lingering at high temperatures can cause your hops to lose their aroma and flavor.
A wort chiller works by running cold water through a coiled copper tube that’s submerged in your hot wort. The heat from the wort is transferred to the copper and then to the water flowing through it, cooling the liquid down in a matter of minutes.
How to Make Your Own Wort Chiller
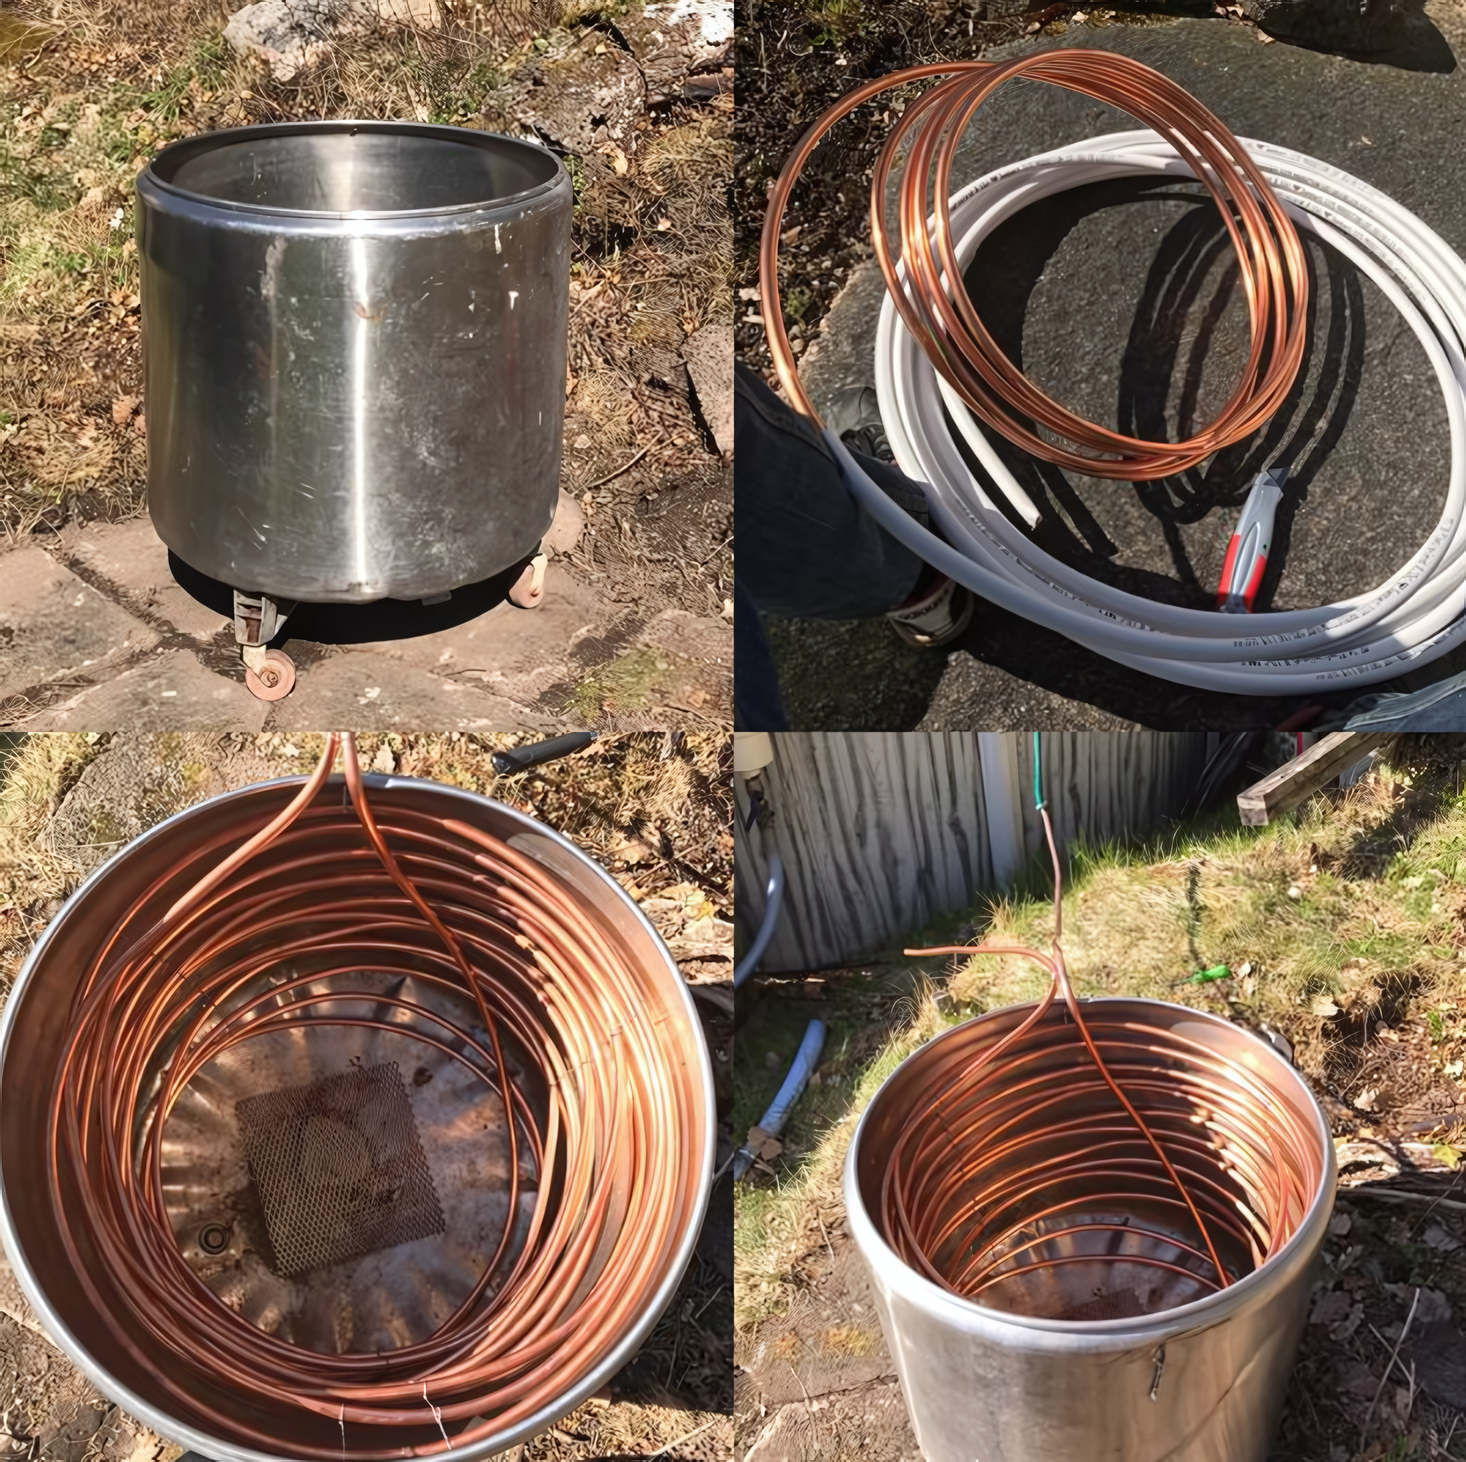
The photos you shared show a simple and effective design for a DIY wort chiller. Here’s what you’ll need and how to put it together.
Materials
- Copper tubing: This is the most important part. You’ll want a length of soft copper tubing, typically around 25 to 50 feet, with a diameter of about 3/8 of an inch. The longer the tubing, the more surface area you have to cool the wort, which means a faster chill.
- A bucket or pot: You need something to use as a form to coil the copper tubing. The stainless steel pot on wheels shown in the photo works perfectly. Choose a bucket that’s a similar size to your brewing kettle.
- Hose clamps and fittings: You’ll need fittings to connect the copper tubing to your garden hose and another to drain the hot water.
- Tubing cutter or utility knife.
Instructions
- Create the coil: Carefully unroll the copper tubing. Wrap it around the outside of your chosen bucket or pot. The goal is to create a tight, even coil. The soft copper bends easily, so take your time to avoid kinking it. The more uniform your coil is, the better it will sit inside your brewing kettle.
- Form the inlets and outlets: Once you’ve coiled the main body of the chiller, you’ll have two straight ends left. Gently bend one end so that it comes up and out of the center of the coil. This will be your water inlet. Do the same with the other end, making sure it extends far enough to connect to your water source.
- Prepare the fittings: Attach the hose fittings to both ends of the copper tubing. Use hose clamps to secure them tightly. You’ll connect one end to a cold water source (like a garden hose) and the other will serve as the outlet for the hot water.
- Test the chiller: Before using it in your wort, test the chiller by hooking it up to a hose and turning on the water to check for leaks.
Using Your New Wort Chiller
Once your brew has finished boiling, turn off the heat and carefully submerge the wort chiller into your kettle. Connect your garden hose to the inlet and run the water. The hot water will begin to flow out of the outlet. As the wort cools, you can gently stir it with a sanitized spoon to help speed up the process. Continue running the water until the wort reaches your desired fermentation temperature, typically around 65-70°F (18-21°C).