In a power outage or off-grid situation, electricity is a lifeline. But what if you could create your own? This DIY guide shows you how to build a reliable, sustainable power source using a car alternator and an exercise bike. It’s a fun and practical project that will empower you to charge devices and run essential electronics, no matter what.
Step 1: Gather Your Materials
Before you begin, you’ll need to gather your components. Most of these can be sourced from your garage or a local hardware store.
- Exercise Bike: This will be your primary power source.
- MDF (Medium-Density Fiberboard): For a sturdy base.
- Magnetic Trainer Stand: To secure the bike.
- Car Alternator: The core of your generator, which converts mechanical energy to electrical energy.
- Drive Belt: To connect the bike wheel to the alternator pulley.
- 12V Battery: To store the generated power.
- 12V Socket: To connect your devices.
- Power Inverter (optional): To convert DC power to AC for household appliances.
- Multimeter, Screwdriver, and Insulation Tape: For assembly and testing.
- Cable Connectors: To wire everything together.
Step 2: Mount Everything to the Base
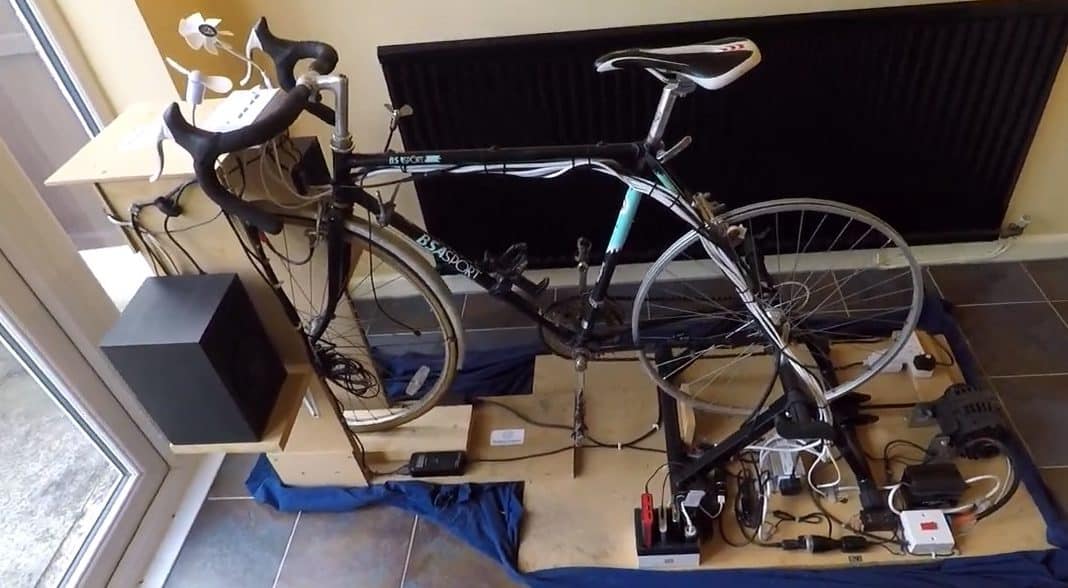
A stable foundation is key. Start by mounting the rear of the bike and all other components onto a thick MDF board. An extension may be needed at the front to keep the bike level.
Next, securely mount the alternator to the board using brackets and bolts. This is a critical step because the alternator will experience significant force while in use, and you need to ensure it’s firmly in place to prevent damage.
Step 3: Align the Bike and Alternator Pulleys
Proper alignment is crucial for an efficient generator. Make sure the bike wheel is perfectly in line with the alternator’s pulley.
Choose a drive belt that fits snugly in the internal rim bed of your bike wheel and the grooves of the alternator pulley. A car’s drive belt is likely too short, so find a longer one that can wrap around both. A correctly sized and aligned belt will prevent slipping and maximize power output.
Step 4: Configure the Alternator
A car alternator has three wires: a thick output wire and two smaller ones. One of the smaller wires is for voltage sensing and connects directly to your 12V battery. The other is the field coil ignition wire.
Unlike generators with permanent magnets, an alternator needs a small voltage applied to its field coil to create a magnetic field and start generating power. The field coil wire connects to a master switch, allowing you to turn the circuit on and off.
Once the alternator is generating its own power from your pedaling, it will continue to do so without needing the small voltage from the battery. Connect the alternator’s negative output to the battery’s negative terminal and the positive output to the battery’s positive terminal to begin charging.
Step 5: Connect the Battery and Socket
Connect a standard 12V cigarette lighter socket to the battery terminals. When you need power, the socket will draw from the battery.
As soon as you start pedaling and generating electricity, the system will seamlessly switch to drawing power from the alternator. This allows you to simultaneously power your devices and recharge the battery, as long as you keep pedaling.
Step 6: Add an Inverter and Master Switch
To power devices that use alternating current (AC), like a laptop or a small fan, you’ll need a power inverter. Connect a 150W inverter to the circuit. The alternator has a built-in rectifier that converts its AC output to DC, and the inverter converts it back to AC.
Finally, add a master switch to control the entire system. This allows you to turn the generator on and off, preventing the battery from draining and ensuring safety during maintenance or transport.
Remember to check your alternator’s manufacturer guidelines for its minimum operating speed. Running it below this speed can create resistance and make pedaling more difficult.
What kind of devices would you power with your own pedal-powered generator? Share your ideas in the comments!