We’ve all been there: a pantry so cluttered with canned goods that finding the right one feels like a treasure hunt. Cans are stacked precariously high, and you inevitably discover a few expired cans hiding in the back. But what if you could change all that? Imagine a system so organized that your cans automatically rotate, ensuring you always use the oldest ones first.
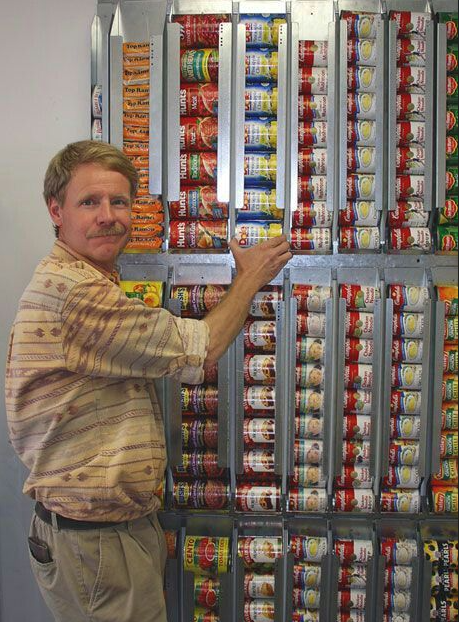
The solution is a gravity-fed can dispenser, and as the photo shows, it’s a game-changer. This brilliant pantry organizer uses a simple inclined design to keep your canned goods in a neat line. When you pull a can from the bottom, the next one in line rolls into its place. This not only eliminates clutter but also implements a perfect “first-in, first-out” (FIFO) rotation, so you never waste food again. It’s a simple, effective, and surprisingly easy DIY project that will revolutionize your kitchen.
How to Build Your Own DIY Can Dispenser
Ready to bring this level of organization to your home? You can build a custom can dispenser to fit your pantry space perfectly.
What You’ll Need:
- Plywood or MDF board: This will form the structure of your dispenser. The thickness will depend on how sturdy you want it to be.
- Circular saw or table saw: For making precise, straight cuts.
- Wood glue and screws: To assemble the pieces securely.
- Tape measure and pencil: For marking your cuts.
- Drill: To create pilot holes before screwing.
- Sandpaper: For smoothing rough edges.
Step-by-Step Instructions:
- Measure and Design: First, measure the cans you plan to store. A standard soup can is about 4 inches tall and 2.5 inches in diameter. Design your dispenser with tracks that are slightly wider than your cans. Decide on the overall height, width, and depth based on your pantry and the number of cans you want each track to hold. Remember, each track needs a slightly angled base so the cans can roll down.
- Cut Your Pieces: From your plywood or MDF, cut the main components: a back piece, two side pieces, a base, and dividers for each track. You’ll also need to cut the slanted shelves for the cans to rest on. A gentle downward angle of 10-15 degrees works well to ensure a smooth roll without the cans rushing down.
- Assemble the Frame: Using wood glue and screws, attach the back and side pieces to the base. This forms the primary structure of your dispenser. Use a drill to create pilot holes to prevent the wood from splitting.
- Install the Dividers and Shelves: Securely glue and screw the dividers into place on the base. Then, install the angled shelves. The top of one shelf should line up with the bottom of the shelf above it, creating the tracks. Ensure the distance between the shelves is a little bit more than the height of your cans.
- Finish the Build: Once all the pieces are secured, sand down any rough edges to prevent splinters. You can also paint or stain the wood to match your kitchen’s aesthetic.
After your dispenser is complete and the glue has dried, you can start loading it up from the top. Then, simply pull out a can from the bottom whenever you need one. It’s that easy.
Are you tired of cluttered pantries? This simple project could be the solution you’ve been looking for. What canned goods would you put in your new organizer?