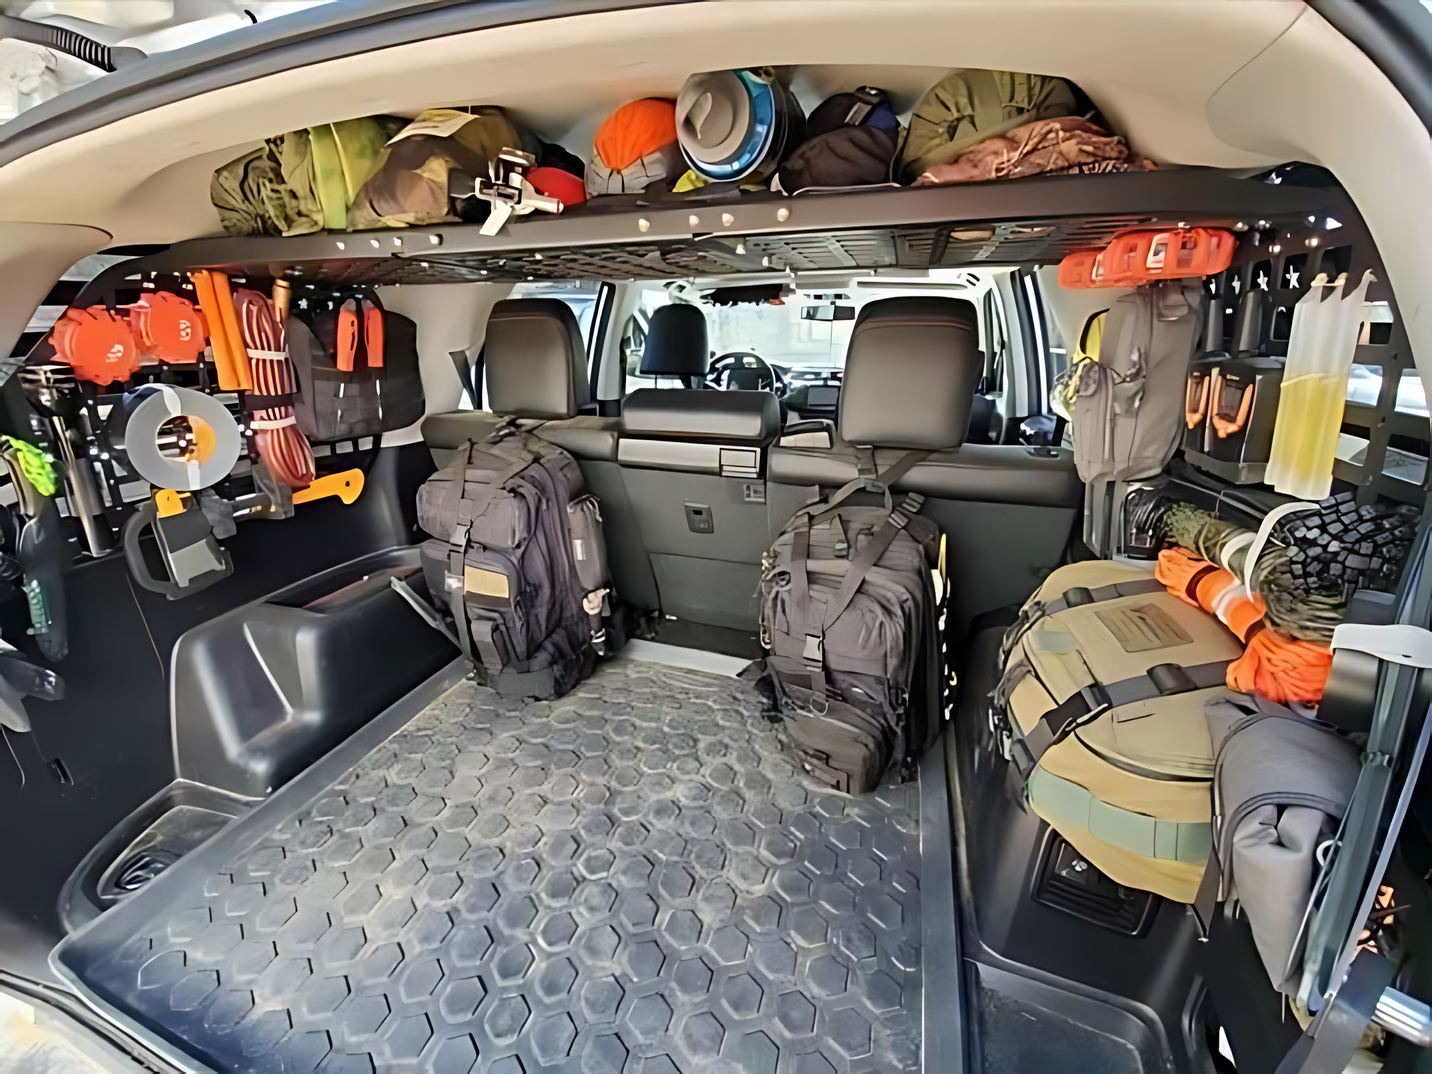
Overlanding is all about self-sufficiency and having the right gear at your fingertips. But let’s be honest, an unorganized vehicle can turn a great adventure into a frustrating mess. That’s where a well-designed, modular storage system like the one pictured comes in. It’s a game-changer for anyone serious about off-roading, camping, or just keeping their gear organized.
This setup, often seen in a Toyota 4Runner or similar SUV, utilizes a series of MOLLE (Modular Lightweight Load-carrying Equipment) panels to transform the rear cargo area into a highly functional “gear wall.” A similar overhead rack provides a space for larger, lighter items.
The Gear: MOLLE and Modular Panels
The core of this system is the MOLLE panel. Originally a military standard, it’s a grid of laser-cut slots or heavy-duty webbing that allows for endless customization. You can attach everything from tool pouches and first-aid kits to axes and shovels using dedicated MOLLE straps, quick-release clamps, or simple carabiners.
To build a similar system, you’ll need:
- MOLLE Panels: These are typically made from steel or aluminum for durability. They can be bought as vehicle-specific kits (e.g., for a 4Runner, Jeep, or Tacoma) or you can find universal ones and custom-fit them.
- Overhead Rack: This is a fantastic way to utilize unused space. Many companies make “attic” racks that fit into the rear of an SUV.
- Storage Accessories: This is where you get to personalize your setup. You’ll need MOLLE pouches, tool clamps (like Quick Fists), straps, and other containers to hold your specific gear.
- Tools: Basic hand tools like a ratchet set and wrenches, and possibly a drill if the panels require new mounting points.
Installation Instructions: How to Build Your Own
While you can purchase pre-made kits, a DIY approach allows for a custom fit and can save you money.
Step 1: Research and Planning
Before you buy anything, take a good look at your vehicle. Measure the cargo area, especially the rear side windows and the roof. Note any existing mounting points, such as cargo hooks or seatbelt anchors. Many commercial panels are designed to use these factory holes, which means no drilling is required.
Step 2: Choose Your Materials
For the side panels, you can either buy a pre-cut, vehicle-specific kit or, if you’re a DIY enthusiast, create your own from a sheet of aluminum. The latter option requires careful measuring and a bit of metalwork. You can create the MOLLE grid pattern by drilling a series of holes or having them laser-cut. For the overhead rack, the easiest and safest option is to buy a pre-made one designed for your vehicle, as they are engineered to handle the load and vibrations of off-road travel.
Step 3: Mounting the Panels
Start with the side panels. Most kits will come with brackets that attach to factory mounting points. Follow the instructions carefully, ensuring all bolts are tightened securely. The panels should be rigid and not rattle. If you’re building your own, use solid points on the vehicle’s frame, not just the plastic interior trim, to secure the panels.
For the overhead rack, it will typically attach to the rear grab handles or other roof-mounted anchor points. This is usually a straightforward process of bolting the rack into place.
Step 4: Organize and Attach Your Gear
This is the fun part. Start with the items you need to access most frequently, like a fire extinguisher, first-aid kit, and a shovel. Place them on the panels where they are easy to grab. Use dedicated clamps for tools and a variety of MOLLE pouches for smaller items. This system allows you to pack everything neatly and securely, so you don’t have loose gear flying around in a sudden stop or on a bumpy trail.
With a little planning and effort, you can transform the back of your vehicle into an organized, expedition-ready command center, ensuring every piece of gear has a home and is ready for your next adventure.