Clean water is one of the most important supplies to have during an extended power outage, well failure, storm, or other emergency.
Stored drinking water should always be the first line of defense. However, a small distillation system can provide an additional way to process certain water sources when ordinary supplies are limited.
The principle is simple:
- Water is heated until it produces steam.
- Steam moves through a cooling coil.
- Cold water surrounding the coil removes heat.
- The vapor condenses back into liquid.
- The distilled water drips into a clean container.
Because many contaminants do not evaporate with water, they remain in the boiling pot.
Distillation can remove parasites, bacteria, viruses, salts, minerals, and many chemicals. However, it does not reliably remove every volatile solvent, volatile organic compound, or pesticide. It also consumes considerable energy and normally produces water more slowly than many filtration systems. (CDC)
This makes a homemade distiller a useful supplemental preparedness project—but not a universal answer for every contaminated water source.
First: Do Not Modify a Pressure Cooker
Some online projects use a pressure cooker as the steam generator. They remove the weighted regulator, connect a flexible hose to the pressure outlet, and direct the steam into a copper coil.
That may appear convenient, but it interferes with equipment designed to operate under pressure.
Pressure cookers depend on correctly functioning lids, regulators, locking devices, vents, gaskets, and pressure-release systems. CPSC has documented numerous incidents in which failures allowed pressurized steam or hot contents to escape, causing serious burns. (U.S. Consumer Product Safety Commission)
For this project:
- Do not drill a pressure-cooker lid.
- Do not remove or alter a safety valve.
- Do not cover a regulator opening with a hose.
- Do not block an emergency pressure-release path.
- Do not operate the system under pressure.
Use either:
- A purpose-built atmospheric steam-distillation kettle, or
- A stainless-steel stockpot fitted with a distillation lid designed to remain at atmospheric pressure.
The steam path must remain unrestricted from the pot to the open collection outlet. There should be no shutoff valve capable of trapping steam inside the system.
What Distillation Can and Cannot Do
Distillation can remove many contaminants
CDC states that distillation can remove:
- Parasites
- Bacteria
- Viruses
- Sodium and other dissolved salts
- Calcium and magnesium
- Lead
- Arsenic
- Nitrate
- Many additional chemicals
The water is separated from much of the original contamination when it becomes steam and later condenses. (CDC)
Distillation does not remove everything
Some substances evaporate at temperatures near or below water’s boiling point. They may travel through the condenser and appear in the collected liquid.
These can include certain:
- Volatile organic compounds
- Industrial solvents
- Fuel components
- Pesticides
- Other low-boiling chemicals
Never use this project with water that smells like gasoline, diesel fuel, paint thinner, solvent, pesticide, or industrial waste.
Water suspected of chemical or radioactive contamination should be avoided entirely. Use bottled water or another officially approved source. (CDC)
Clear water is not proof of safety
Distilled water may look clear even when volatile contamination has carried through the system.
Likewise, cloudy source water may produce clear distillate without proving that every hazardous substance has been removed.
When a water source is questionable, laboratory testing and local public-health guidance remain more reliable than appearance, smell, or taste.
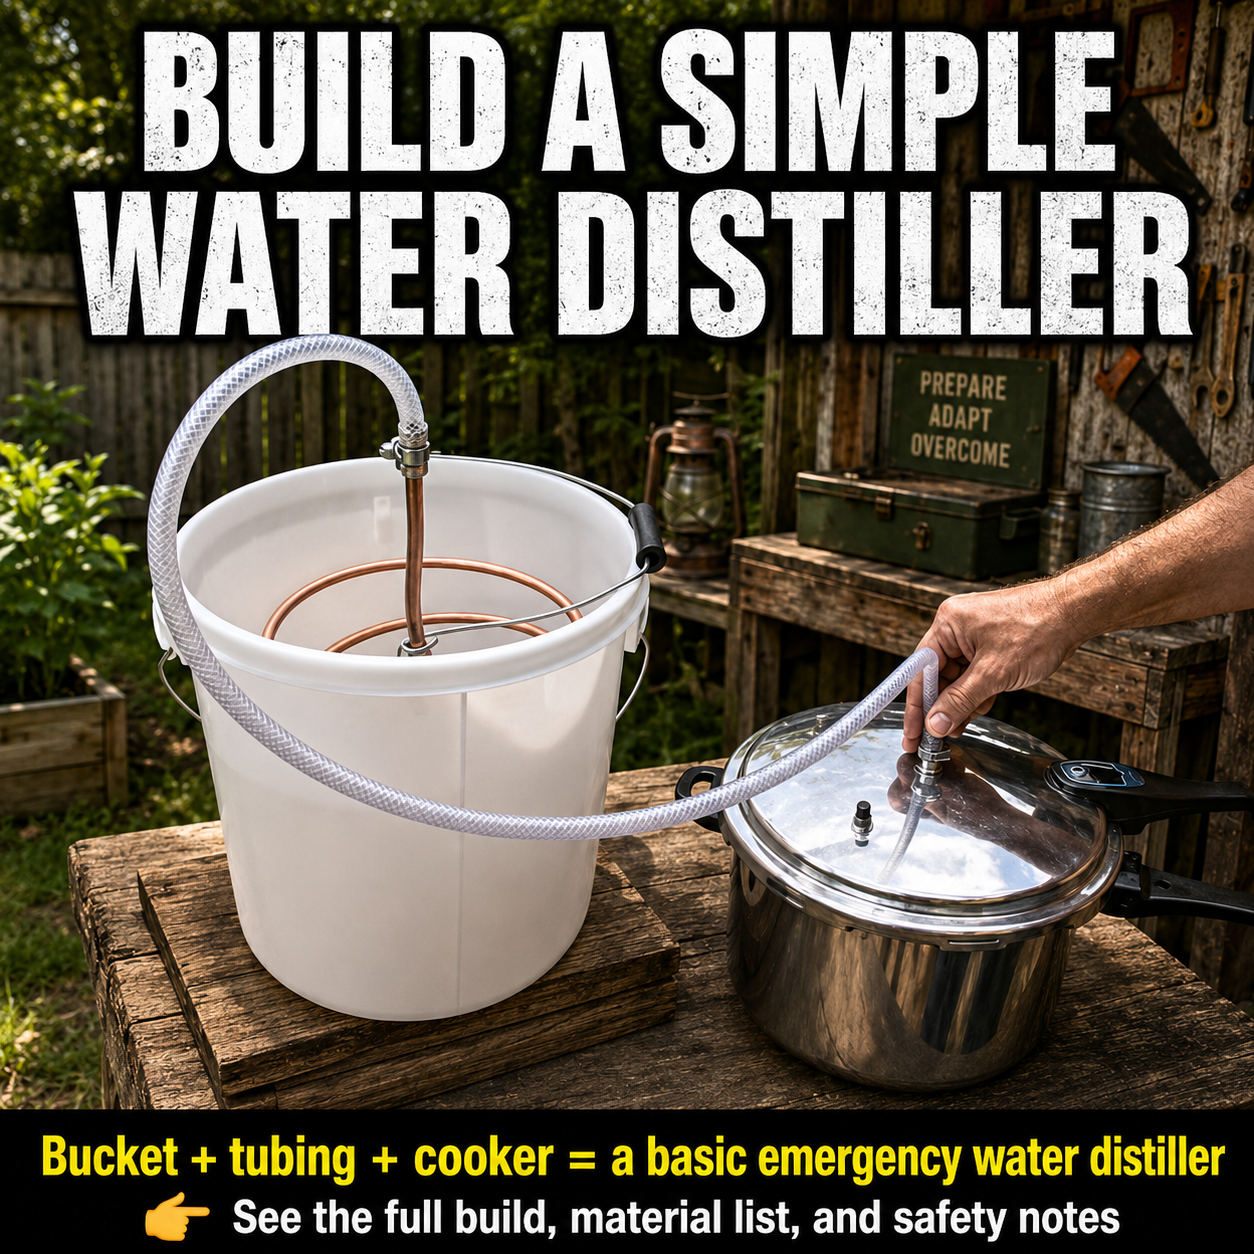
How the Distiller Is Arranged
The complete system has four main parts:
1. Steam pot
A stainless-steel pot holds the source water and produces steam.
2. Steam line
A temperature-rated tube carries steam from the pot to the condenser.
3. Copper cooling coil
The coil is submerged in cold water. Steam cools as it travels through the tubing and becomes liquid.
4. Collection container
The condensed water exits the lower end of the coil and enters a clean, covered container.
The system should always slope downward toward the collection outlet. Low points can trap liquid, restrict steam flow, and cause pressure to build behind a blockage.
Materials
Steam generator
- Stainless-steel stockpot or purpose-built steam-distillation kettle
- Atmospheric-pressure distillation lid
- Unrestricted steam outlet
- Separate open relief path when required by the lid manufacturer
- Heat-resistant handles
- Removable internal rack, optional
Do not use an airtight improvised lid.
Do not clamp a standard stockpot shut.
Condenser
- Approximately 10 to 13 feet of ⅜-inch soft copper tubing
- Large bucket, approximately 5 to 8 gallons
- Rubber bulkhead grommet
- Potable-water-rated sealant
- Short length of high-temperature food-grade silicone tubing
- Stainless-steel hose clamps
- Cold water
- Ice, optional
Use new copper tubing intended for water-contact applications. Do not use salvaged refrigeration or air-conditioning tubing because it may contain compressor oil, refrigerant residue, solder contamination, or other substances.
NSF notes that only products carrying the applicable certification mark are certified for drinking-water contact, and some water chemistry can increase copper leaching. (NSF)
Collection equipment
- Clean glass jar
- Food-grade stainless-steel container
- Food-grade lid
- Optional activated-carbon post-filter certified for the intended use
- Labels and permanent marker
Tools
- Tubing cutter
- Tape measure
- Drill
- Hole saw or step bit
- File
- Sandpaper
- Adjustable wrench
- Pliers
- Safety glasses
- Work gloves
- Thermometer, optional
Step 1: Form the Copper Condenser Coil
Find a round object approximately six to eight inches in diameter.
A small bucket, paint can, or piece of large pipe can serve as the forming guide.
Leave approximately 12 to 18 inches of straight tubing before beginning the coil. This upper section will connect to the steam line.
Slowly wrap the copper around the form.
Work gradually and support the tubing with both hands. Soft copper bends easily, but a sharp bend can flatten or kink it.
Aim for:
- Evenly spaced turns
- A gradual downward spiral
- No upward loops
- No flattened tubing
- No tight bends
Leave another 12 to 18 inches straight at the bottom for the outlet.
Every turn should descend slightly toward the collection end. Condensed water must be able to flow downhill without pooling inside the coil.
Do not attempt to straighten a severe kink repeatedly. Cut out and replace the damaged section or form a new coil.
Step 2: Prepare the Cooling Bucket
Place the completed coil inside the empty bucket.
The upper steam connection should remain above the rim. The lower outlet should reach the bucket wall near its base.
Mark the point where the outlet will pass through the wall.
Drill the outlet hole approximately one to two inches above the bottom. Positioning it slightly above the floor prevents the fitting from interfering with the bucket’s base.
Support the inside of the plastic bucket with a block of wood while drilling.
Smooth the opening with a file and sandpaper.
Remove every plastic shaving before continuing.
Step 3: Install the Coil Outlet
Pass the lower end of the copper tubing through the hole.
Install the correctly sized rubber grommet or bulkhead fitting around the tubing.
Apply only a sealant that is documented as suitable for:
- Potable-water contact
- The expected temperature
- The bucket material
- Long-term immersion
Keep excess sealant out of the interior of the copper tube.
Allow the sealant to cure fully according to its instructions.
The outlet should extend several inches beyond the bucket wall so a collection container can sit beneath it without touching the bucket.
Tilt the cooling bucket slightly toward the outlet and confirm that the coil continues descending from top to bottom.
Step 4: Stabilize the Coil
The coil may float, shift, or twist when the cooling bucket is filled.
Secure it using:
- Stainless-steel clips
- Copper-compatible brackets
- A removable crossbar over the bucket
- Food-safe plastic restraints rated for the temperature
Do not use rusty wire, painted metal, or unidentified adhesive inside the cooling water.
The coil must not rub against sharp bucket edges.
Keep enough space around each turn for cooling water to circulate.
Step 5: Connect the Steam Line
Connect the steam outlet on the atmospheric distillation lid to the upper copper tube.
Use high-temperature tubing explicitly rated for hot steam or the maximum temperature expected in the system.
Secure both ends with correctly sized stainless-steel clamps.
The connecting hose should:
- Be as short as practical
- Slope toward the condenser
- Remain away from the burner
- Avoid contact with sharp metal
- Contain no shutoff valve
- Have no collapsed or pinched sections
Do not use ordinary vinyl aquarium tubing, garden hose, braided utility hose, or plastic tubing without a documented steam-temperature rating.
Never attach the hose to a modified pressure-cooker regulator or safety valve.
Step 6: Check the Entire Vapor Path
Before heating water, inspect the complete path from the pot to the collection outlet.
You should be able to confirm that:
- The boiler is not sealed under pressure.
- The steam outlet is open.
- The connecting hose is unobstructed.
- The copper tube is not kinked.
- Every coil turn slopes downward.
- The outlet is completely open.
- No valve can trap steam.
- The collection jar does not seal around the outlet.
Never submerge the collection end beneath the collected water. That could create back pressure.
The outlet should drip freely into an open, clean container.
Step 7: Conduct a Cold-Water Flow Test
Disconnect the steam line from the pot.
Slowly pour clean water into the upper end of the condenser.
The water should:
- Enter the upper copper tube.
- Travel through the entire coil.
- Exit smoothly from the lower outlet.
- Leave no obvious trapped pools.
- Produce no leaks around the bucket wall.
When flow stops partway through, inspect the coil for:
- Kinks
- Upward loops
- Flattened sections
- Sagging turns
- Blockages
Correct these problems before applying heat.
Flush several gallons of clean water through new tubing to remove manufacturing debris.
Step 8: Test the System With Clean Water
The first heated test should use ordinary potable tap water—not questionable source water.
Place the equipment outdoors or in a well-ventilated workspace appropriate for the selected heating appliance.
Set the cooling bucket below the steam pot so condensate can flow downhill.
Fill the cooling bucket with cold water, leaving enough space to add ice without overflowing.
Fill the steam pot no more than approximately halfway for the initial test. This leaves headspace and reduces the chance of boiling water being carried directly into the vapor line.
Install the atmospheric lid and connect the steam hose.
Place the open collection container beneath the outlet.
Begin with low heat.
Step 9: Watch the First Distillation Run
As the water warms, vapor should move through the steam line and enter the copper coil.
The cooling water will remove heat from the vapor. Condensed liquid should eventually begin dripping from the outlet.
Remain beside the system throughout operation.
Watch for:
- Steam escaping from unintended joints
- A swelling or softening hose
- No flow from the outlet
- Unusual noises
- Tubing movement
- Cooling-water overflow
- Strong chemical odors
- Excessive boiling
- Liquid surging through the steam line
Stop heating immediately when the outlet stops flowing while the pot continues producing steam.
Do not touch or dismantle the system until it has cooled completely.
Step 10: Keep the Condenser Cold
The cooling bucket gradually becomes warm as it absorbs heat.
Periodically check the water temperature.
To improve condensation:
- Remove some warm water from the top.
- Add cool replacement water near the bottom.
- Add small amounts of ice.
- Stir gently without disturbing the coil.
- Keep the coil completely submerged.
Do not overfill the bucket.
Keep cooling water away from the collection outlet so it cannot contaminate the distilled water.
A larger cooling container or slow supply of replacement water may be more convenient for longer runs.
Step 11: Collect the Distilled Water
Use a clean glass or stainless-steel container.
Keep the outlet above the container and avoid touching it with:
- Hands
- The jar rim
- Dirty cloths
- The ground
- Untreated source water
The first heated test batch should be discarded because it may contain residue from new tubing, sealant, manufacturing oils, or cleaning materials.
For later runs, never assume that discarding an initial portion will remove all volatile chemical contamination. Avoid chemically contaminated source water entirely.
Once collected, transfer the distilled water to a clean, sanitized container with a tight cover. CDC recommends protecting treated water from recontamination through clean, covered storage. (CDC)
Label it with:
- Source-water description
- Processing date
- Batch number
- Intended use
Expected Water Output
A homemade distiller is not fast.
Output depends on:
- Heat supplied to the steam pot
- Coil length
- Coil diameter
- Cooling-water temperature
- Steam-line insulation
- Ambient temperature
- Amount of leakage
- Source-water temperature
A small system may produce a slow but steady stream rather than gallons every hour.
Distillation is normally more energy-intensive and time-consuming than filtration. (CDC)
Measure your own system before depending on it.
Record:
- Starting water volume
- Processing time
- Collected volume
- Fuel or electricity consumed
- Cooling water used
This will show whether the unit is practical for your household’s emergency plan.
Suitable and Unsuitable Source Water
Potentially suitable sources
Depending on local guidance and the known contamination, distillation may be useful for:
- Salty water
- Hard water
- Water containing dissolved minerals
- Certain microbiologically contaminated sources
- Water requiring small-scale laboratory-style purification
Pretreat visibly muddy water by allowing sediment to settle and filtering it through a clean prefilter before distillation. This reduces residue inside the boiling pot but does not make the water safe by itself.
Sources to avoid
Do not process water suspected of containing:
- Gasoline
- Diesel fuel
- Kerosene
- Paint thinner
- Industrial solvent
- Concentrated pesticide
- Chemical spill runoff
- Radioactive material
- Unknown oily residue
- Toxic algae
- Unidentified industrial waste
CDC states that no single household treatment method protects against every possible contaminant. When chemical contamination is suspected, another approved source should be used. (CDC)
Using the System for Essential-Oil Steam Distillation
The same condenser principle can be used to collect aromatic hydrosol and small quantities of essential oil from plant material.
However, use a separate dedicated system whenever possible.
Essential oils can coat:
- Copper tubing
- Flexible hoses
- Gaskets
- Collection containers
- Sealants
Residual oil may affect the taste, smell, and cleanliness of future drinking-water batches.
Basic arrangement
For botanical steam distillation:
- Place clean water in the lower portion of the atmospheric steam pot.
- Position plant material in a perforated basket above the water.
- Prevent the botanicals from blocking the steam outlet.
- Heat gently.
- Direct vapor through the condenser.
- Collect the condensed hydrosol and oil in a proper oil separator or laboratory-style separatory vessel.
Do not use a cut plastic beverage bottle as a long-term essential-oil separator. Concentrated oils can interact with some plastics, and an unstable improvised container is easy to spill.
Important restrictions
Do not use this equipment for:
- Alcohol distillation
- Fuel production
- Solvent recovery
- Unknown plants
- Toxic botanicals
- Pressurized extraction
This article covers only water and botanical steam distillation.
Do not ingest homemade essential oils or apply undiluted oils to skin. Keep oils away from children, pets, eyes, flames, and food-storage areas.
Cleaning the Distiller
Clean the equipment after every use.
Steam pot
Once completely cool:
- Empty the concentrated residue.
- Rinse the pot.
- Wash it with detergent and clean water.
- Remove mineral scale.
- Rinse thoroughly.
- Dry before storage.
Do not continually add new source water to old concentrated residue.
As water leaves the pot, salts and nonvolatile contaminants remain behind and become increasingly concentrated.
Copper condenser
Flush the coil with clean warm water.
When mineral buildup is present, use a cleaning method appropriate for the tubing and rinse until no odor or residue remains.
Allow the coil to drain fully.
Store it with both ends open so trapped moisture can evaporate.
CDC notes that bacteria may grow on cooling coils while distillation systems are not being used, making cleaning and dry storage important. (CDC)
Cooling bucket
Empty the cooling water.
Wash away algae, sediment, and sealant debris.
Allow the bucket to dry with the lid removed.
Cooling water is not distilled water and should never be added to the collection container.
Common Mistakes
Modifying a pressure cooker
Never remove, drill, plug, cover, or repurpose its safety components.
Use an atmospheric steam system designed for distillation.
Creating a sealed vapor path
The outlet must remain open from the boiler through the collection point.
Never install shutoff valves on both sides of a heated section.
Using incorrect hose
Ordinary plastic tubing may soften, collapse, release unwanted compounds, or detach when exposed to steam.
Use documented high-temperature food-contact tubing.
Kinking the copper coil
A restricted tube can block condensate and increase back pressure.
Form the coil slowly and test it with water before use.
Allowing upward loops
Every coil turn should descend toward the outlet.
Low pockets can fill with condensate and interrupt steam flow.
Using contaminated scrap copper
Do not use tubing from refrigeration, automotive, industrial, or unknown systems.
Use new water-rated tubing.
Letting the cooling bath become hot
Warm condenser water reduces condensation and may allow hot vapor to escape from the outlet.
Refresh the cooling bath as needed.
Collecting into a sealed container
The collection jar must remain open to atmospheric pressure during operation.
Cover the water only after collection has ended.
Leaving the system unattended
A disconnected hose, dry pot, blocked coil, or overheated fitting can become dangerous quickly.
Remain present throughout the run.
Assuming all clear distillate is safe
Some volatile contaminants can travel with the vapor.
Know the source water and avoid chemical contamination.
Optional Improvements
Add a certified carbon post-filter
A properly certified activated-carbon stage may reduce certain volatile compounds and improve taste.
Choose a filter with specific contaminant-reduction claims rather than relying on generic charcoal.
Add a thermometer
A thermometer at the steam outlet or condenser can help monitor operation.
It does not replace visual inspection or unrestricted vapor flow.
Use stainless-steel tubing
Food-grade stainless steel avoids some copper-related water-chemistry concerns but is harder to form and more expensive.
Add a continuous cooling supply
A slow cold-water inlet near the bottom of the condenser bucket and overflow near the top can maintain a stronger temperature difference.
Keep cooling water completely separate from the distillate.
Insulate the steam line
Temperature-rated removable insulation can reduce condensation before vapor reaches the main coil.
Do not cover joints that need regular inspection.
Add an oil separator
For dedicated botanical use, a purpose-built hydrosol and essential-oil separator is safer and more effective than improvised plastic containers.
Is This Project Worth Building?
A small distiller can be useful for:
- Understanding water-treatment principles
- Producing limited quantities of distilled water
- Removing salts and many nonvolatile contaminants
- Processing water for batteries, irons, or similar non-drinking uses
- Botanical steam-distillation experiments
- Developing practical off-grid skills
Its limitations are significant:
- It requires heat.
- It operates slowly.
- It cannot make every chemical source safe.
- The boiling pot accumulates concentrated residue.
- The condenser requires cleaning.
- Steam can cause serious burns.
- A restricted system can become pressurized.
- Homemade equipment is not independently certified.
Build and test the system before an emergency.
Start with safe tap water.
Measure the output.
Inspect every fitting.
Practice cleaning it.
Only then should you decide what role it deserves in your preparedness plan.
Final Safety Note
This project must operate at atmospheric pressure.
Never modify a pressure cooker, disable a regulator, block a safety valve, clamp an improvised lid shut, or trap steam between closed valves. Use a purpose-built atmospheric distillation kettle or an unpressurized steam pot designed for the task.
Steam, boiling water, hot copper, and heated fittings can cause severe burns. Operate the equipment on a stable surface, keep children and pets away, and allow every part to cool before touching or disassembling it.
Distillation removes many contaminants but not every volatile chemical. Never process water suspected of containing fuel, solvents, pesticides, radioactive material, or unidentified industrial contamination.