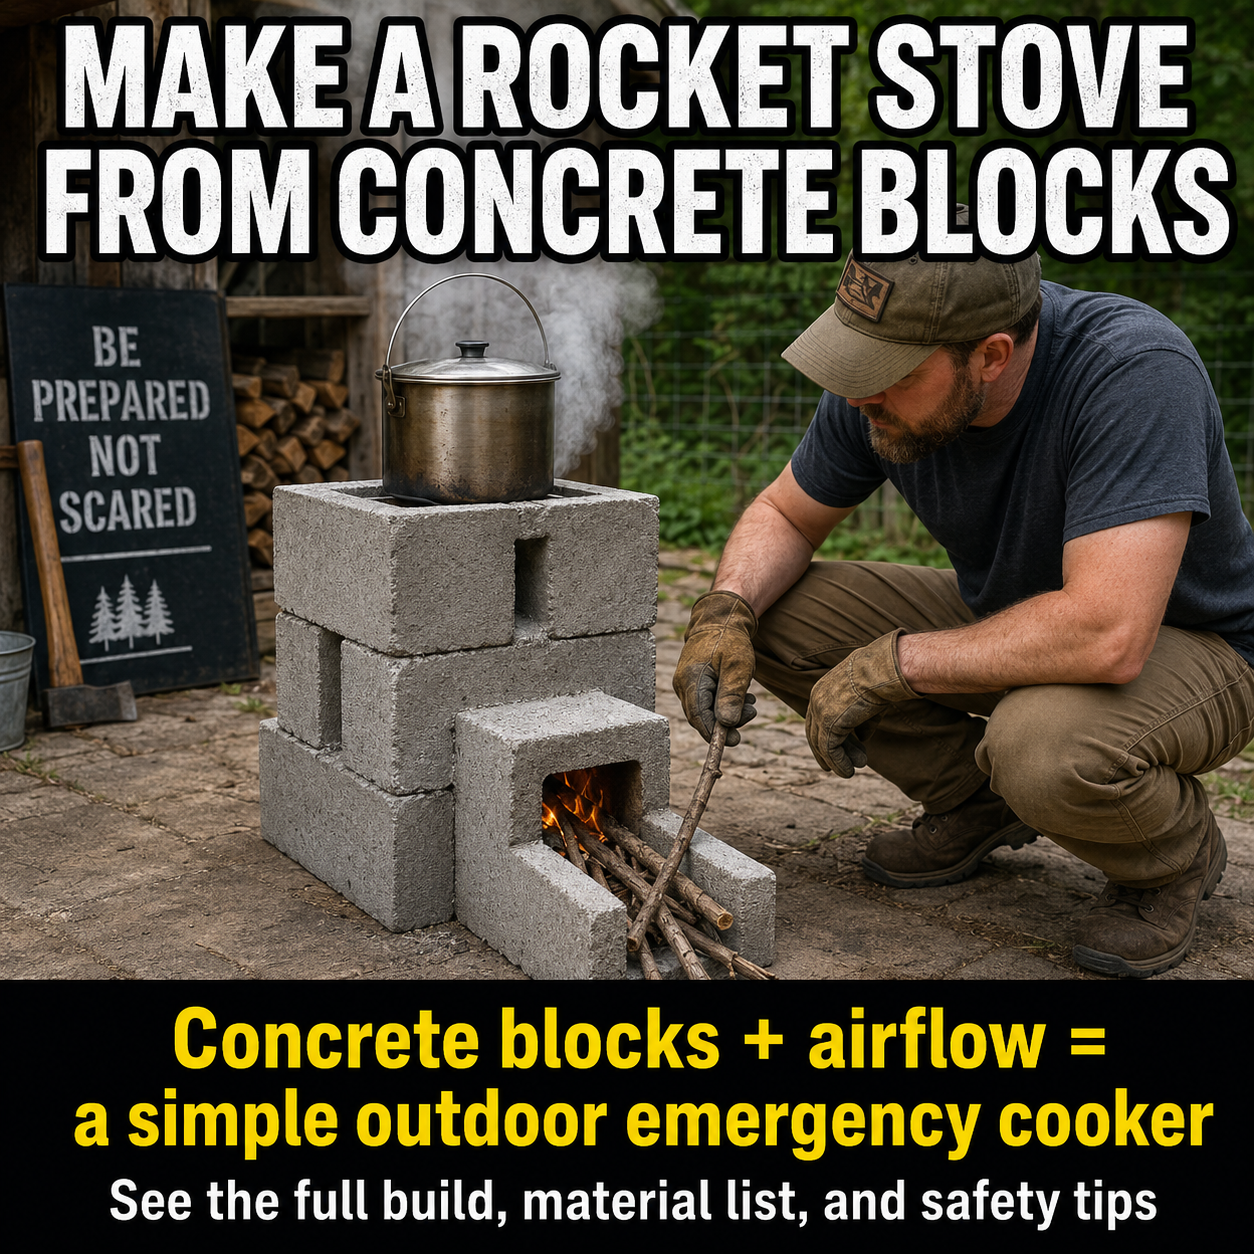
A few masonry blocks and a bundle of dry sticks can become a compact outdoor cooking station during a blackout, camping trip, or other emergency.
Unlike a large campfire, a rocket stove directs heat through a small combustion chamber and toward the bottom of a cooking pot. The concentrated flame can heat water and prepare simple meals while using relatively small pieces of wood.
However, the popular social-media version often leaves out an important safety issue:
Ordinary concrete blocks are not the same as refractory firebrick.
Concrete exposed to intense, rapidly rising temperatures can crack or shed fragments. NIST explains that elevated heat can cause pressure to build inside concrete as trapped moisture turns to vapor, contributing to spalling—the separation of pieces from the concrete surface. (NIST)
For a safer build, use ordinary concrete blocks as the outer support structure and line the actual fire path with refractory firebrick or a purpose-made solid-fuel stove core.
That small improvement makes this project more durable, predictable, and trustworthy.
What Is a Rocket Stove?
A true rocket stove generally includes:
- A small fuel-feed opening
- An L-shaped or J-shaped combustion path
- An insulated vertical heat riser
- Controlled airflow beneath or around the fuel
- A small gap allowing hot gases to pass beneath and around the pot
The restricted fuel opening prevents the user from loading an unnecessarily large fire. The vertical riser creates draft, drawing fresh air through the fuel while directing flame and hot gases toward the cooking surface.
Technical guidance from the Clean Cooking Alliance describes rocket-stove principles as combining an insulated L-shaped combustion chamber, a limited fuel-feed opening, strong draft, and a controlled gap between the stove and cooking pot. (Clean Cooking Alliance)
A random stack of blocks with a fire inside may function as a basic outdoor stove, but it will not necessarily provide the airflow, insulation, or combustion efficiency associated with a well-designed rocket stove.
Important Safety Rules
Before gathering materials, understand these non-negotiable rules.
Outdoor use only
Never operate this stove inside:
- A house
- A basement
- A garage
- A carport
- A breezeway
- A tent
- A camper
- An enclosed porch
- A shed
Wood, charcoal, and other combustion fuels produce carbon monoxide. Outdoor cooking equipment should remain outdoors in a genuinely open, well-ventilated location—not merely beside an open garage door. CPSC specifically advises using grills outdoors only and never in garages, breezeways, carports, porches, or beneath combustible coverings. (U.S. Consumer Product Safety Commission)
CDC likewise warns that grills, camp stoves, and other fuel-burning appliances should never be operated inside a home, basement, garage, or camper, or near an open window or window air conditioner. (CDC)
Check local fire restrictions
A stove containing an open wood fire may be legally treated like a campfire.
Check:
- Local burn bans
- Wildfire danger
- Municipal regulations
- Park or campground rules
- Permit requirements
- Weather and wind conditions
Fire restrictions can prohibit wood-burning stoves even when propane appliances remain permitted. Public-land rules vary, and local restrictions override ordinary permits. (US Forest Service)
Do not operate it in dry or windy conditions
Do not light the stove when gusts could carry sparks toward grass, leaves, fences, roofs, or nearby vegetation.
Smokey Bear guidance recommends checking restrictions and weather first, avoiding hazardous dry or windy conditions, and choosing an open, level location away from combustible objects. (Smokey Bear)
The Concrete-Block Safety Problem
The blocks shown in many viral images are standard hollow concrete masonry units, often called concrete blocks or cinder blocks.
They are inexpensive and strong under normal construction loads, but they were not necessarily manufactured to serve as direct-flame combustion chambers.
Risk increases when blocks are:
- Wet
- Recently exposed to rain
- Frozen
- Cracked
- Chipped
- Previously damaged by heat
- Made from unknown lightweight aggregate
- Heated unevenly and rapidly
NIST research documents that moisture and rapid heating can contribute to pressure buildup and concrete spalling. (NIST)
For this project:
- Keep ordinary concrete blocks away from direct flame whenever practical.
- Use dry, undamaged blocks.
- Line the fire tunnel and vertical riser with refractory firebrick.
- Never use blocks recovered from floodwater or left soaking in rain.
- Do not stand with your face directly over the stove during ignition.
- Stop using the stove if a block cracks, shifts, pops, or sheds material.
This recommendation is a safety inference from documented concrete behavior under elevated temperatures. It does not mean every block will fail, but an inexpensive firebrick liner reduces unnecessary uncertainty.
Materials
This design uses concrete blocks as a removable outer frame and refractory brick as the hot inner core.
Outer structure
- Six to ten dry, undamaged concrete masonry blocks
- Two large concrete pavers, fire-rated patio slabs, or a thick steel base plate
- Optional additional pavers to widen the surrounding noncombustible area
The exact number of blocks depends on their dimensions and the height of the cooking surface.
Combustion core
- Twelve to sixteen refractory firebricks
- Optional refractory half-bricks
- Optional refractory mortar for a permanent core
- One plain-steel fuel shelf or narrow cast-iron grate
- Two plain-steel rods or a stable cast-iron pot trivet
Use firebrick intended for fireplaces, ovens, kilns, or wood-stove repair.
For a portable emergency build, dry-stack the bricks rather than permanently mortaring everything together. This allows inspection, cleaning, and replacement.
Cooking supplies
- Stable metal pot with a fitted lid
- Cast-iron skillet, optional
- Heat-resistant gloves
- Long metal tongs or poker
- Food thermometer
- Metal spoon or ladle
- Clean water
Avoid using oversized cookware that extends far beyond the stove and makes the structure top-heavy.
Fire-control supplies
Keep these beside the stove before lighting it:
- Large bucket of water
- Shovel
- ABC-rated fire extinguisher
- Metal ash container with a lid
- Phone for calling emergency services
CPSC recommends keeping an extinguisher nearby and ensuring that users know how to operate it. (U.S. Consumer Product Safety Commission)
Fuel
Use only:
- Clean, dry sticks
- Dry split kindling
- Untreated hardwood scraps
- Small pieces of seasoned firewood
Do not burn:
- Pressure-treated lumber
- Painted wood
- Plywood
- Particleboard
- Plastic
- Foam
- Household trash
- Food wrappers
- Gasoline-soaked material
- Construction waste
EPA recommends burning only dry, seasoned wood and warns against burning garbage, plastic, pressure-treated wood, and other materials that can release harmful pollutants. (US EPA)
Suggested Dimensions
The following measurements create a compact stove suitable for a medium cooking pot.
Internal combustion path
- Width: approximately 4½ to 6 inches
- Height: approximately 4½ to 6 inches
- Horizontal feed tunnel: approximately 12 to 16 inches long
- Vertical riser: approximately 16 to 24 inches high
- Pot clearance above the riser: approximately ½ to 1 inch as a starting point
Exact dimensions depend on your firebrick and cookware.
The most important principles are:
- Keep the internal cross-section reasonably consistent.
- Avoid sudden narrow points that restrict exhaust.
- Make the vertical riser at least as tall as the horizontal feed tunnel is long.
- Leave a clear route for hot gases to escape beneath the pot.
- Keep the overall structure low and stable.
Do not allow the pot to sit directly over the riser in a way that completely seals the opening.
Step 1: Choose the Site
Place the stove on a flat, noncombustible surface such as:
- Bare mineral soil
- A clean gravel area
- A concrete patio
- Large masonry pavers
- A dedicated outdoor cooking pad
Do not build it directly on:
- A wooden deck
- Dry grass
- Pine needles
- Leaves
- Mulch
- Tree roots
- Asphalt that may soften
- A plastic table
- A combustible outdoor rug
Smokey Bear recommends keeping campfires at least 15 feet from tents, vegetation, and low branches, with clear overhead space measuring at least three times the flame height. (Smokey Bear)
For a home installation, increase that separation whenever space permits.
Also keep the stove away from:
- Fences
- Vinyl siding
- Vehicles
- Propane cylinders
- Fuel cans
- Woodpiles
- Open windows
- Air-conditioning intakes
- Children’s play areas
Step 2: Prepare a Wide Base
Place two large pavers side by side to create a level foundation.
The base should extend beyond the stove on every side so falling embers cannot land directly on vegetation or combustible flooring.
Check the pavers with a level.
Correct any rocking before adding blocks. Do not use loose wood, folded cardboard, or plastic shims beneath the stove.
Place the first concrete blocks flat on the base. Their hollow cells should generally remain vertical for stability unless a manufacturer-approved design requires another orientation.
Do not begin by placing fire directly inside a horizontally positioned hollow block.
Step 3: Lay the Firebrick Floor
Create the bottom of the horizontal feed tunnel with two or three firebricks laid end to end.
The bricks should form a level path from the front fuel opening toward the rear of the stove.
Leave the front end open.
This firebrick surface protects the ordinary concrete base from direct coals and provides a smoother channel for air movement.
The feed tunnel should be long enough to support several short sticks without allowing burning ends to fall onto the ground.
Step 4: Build the Feed-Tunnel Walls
Stand firebricks on edge along both sides of the firebrick floor.
Keep the internal space approximately the same width from front to rear.
Use additional firebricks across the top to create a short enclosed tunnel. Leave enough space near the entrance to insert and adjust fuel safely.
Do not create a long, narrow tunnel that is difficult to clean.
The tunnel should lead into the bottom of the vertical riser, forming an L-shaped path.
Step 5: Build the Vertical Heat Riser
At the rear of the feed tunnel, stack firebricks to create a vertical square or rectangular chimney.
Keep the internal dimensions similar to those of the horizontal tunnel.
Offset the brick joints when possible so the riser is less likely to shift.
The riser must remain:
- Vertical
- Open at the top
- Free of loose fragments
- Separate from the concrete-block shell
- Wide enough to avoid choking the draft
Do not make the riser excessively tall. A very tall, narrow tower may draft strongly but become unstable under a heavy pot.
The refractory bricks form the stove’s working core. The concrete blocks added around them serve primarily as support and wind protection.
Step 6: Build the Concrete-Block Shell
Dry-stack the concrete blocks around the firebrick core.
Do not place ordinary blocks directly across the flame path.
The shell should:
- Keep the riser upright
- Protect the core from accidental impact
- Create a broad base
- Leave the front fuel opening accessible
- Avoid obstructing the exhaust
- Remain below the cooking-pot supports
Offset the block joints between courses when possible.
Do not force blocks tightly against the refractory core. Leaving a small space allows the inner bricks to expand when heated without pushing directly against the outer shell.
Check the structure from every side.
Push it gently with both hands. It should not rock, twist, or shift.
Step 7: Add a Fuel Shelf
Place a narrow plain-steel plate or cast-iron grate inside the fuel opening.
The shelf separates the fuel from the tunnel floor, allowing some incoming air to move beneath the burning sticks.
The metal should:
- Extend partially into the tunnel
- Remain stable
- Avoid blocking the full opening
- Support several small sticks
- Be removable after the stove cools
Do not use thin painted metal, aluminum siding, or unidentified coated material.
Keep the fuel small enough that air can circulate around it.
A tightly packed tunnel may smolder and produce heavy smoke rather than creating a clean, strong draft.
Step 8: Install the Pot Support
Place two plain-steel rods across the top of the stove or install a stable cast-iron trivet.
The supports must leave a gap between the top of the vertical riser and the bottom of the pot.
That gap allows flames and exhaust gases to spread beneath the cookware before escaping.
Before lighting anything:
- Place the empty pot on the support.
- Push the handles gently.
- Rotate the pot.
- Confirm that it cannot slide into the chimney.
- Fill it halfway with cold water.
- Repeat the stability test.
A full pot can be extremely heavy. Rebuild the support when there is any movement.
Keep pot handles turned away from walkways and fuel openings.
Step 9: Perform a Cold Inspection
Use a flashlight to examine the entire internal path.
Look through the fuel opening and confirm that you can see the base of the riser.
Remove:
- Loose brick fragments
- Sand
- Leaves
- Insects
- Old ash
- Metal scraps
- Packaging material
Check that the vertical riser remains open.
Confirm that the pot supports do not block the exhaust.
Set out the water, shovel, gloves, extinguisher, and cooking utensils before lighting the stove.
Step 10: Conduct the First Burn
The first fire should be small.
Do not fill the chamber immediately.
Start with:
- A small amount of natural tinder
- Several pencil-thick dry sticks
- A few slightly larger pieces nearby
Use an appropriate fire starter before ignition. Never pour gasoline, kerosene, alcohol, or lighter fluid into a burning or warm stove. CPSC advises using appropriate starters only before ignition and never adding liquid fuel after an attempt to light the fire. (U.S. Consumer Product Safety Commission)
Light the tinder at the front of the tunnel.
As the fire strengthens, push the burning material gradually toward the base of the riser.
A functioning stove should begin drawing flame and smoke inward and upward.
Stop immediately when:
- Smoke repeatedly flows out of the fuel opening
- Flames roll toward the operator
- A block cracks or pops
- The structure shifts
- The pot support bends
- Sparks escape uncontrollably
- Wind begins carrying embers
Allow the stove to cool completely before making adjustments.
How to Operate the Stove
Use a small fire
A rocket stove works through concentrated combustion, not by holding a large pile of wood.
Add one or two sticks at a time.
Let their ends burn inside the tunnel while the unburned portions remain supported by the fuel shelf.
Do not push long branches so far through the stove that they protrude into the vertical riser.
Keep an air path open
Avoid packing fuel across the entire opening.
Incoming air must reach the fire.
When the stove smokes heavily:
- Reduce the amount of wood.
- Use drier, smaller fuel.
- Remove excessive ash.
- Check the vertical riser.
- Confirm that the pot is not sealing the exhaust.
- Stop operating when wind is disrupting the draft.
Control heat with fuel
Increase heat by adding a small amount of dry fuel.
Reduce heat by allowing the current sticks to burn down.
Do not control the stove by blocking its exhaust with the pot or covering the fuel opening completely.
Use a lid
A fitted lid reduces heat loss and shortens cooking time.
It also limits ash and sparks entering the food.
Use heat-resistant gloves when lifting the lid because steam can cause serious burns.
What You Can Cook
A stable rocket stove is best suited to uncomplicated meals such as:
- Boiled water
- Soup
- Oatmeal
- Rice
- Pasta
- Canned food
- Stew
- Coffee or tea
- Skillet vegetables
- Eggs
- One-pot emergency meals
Begin with boiling water during your first cooking test.
Record:
- Amount of water
- Time required to boil
- Approximate amount of fuel used
- Wind conditions
- Pot stability
- Amount of smoke
This gives you a realistic understanding of the stove before an emergency.
Tasks This Stove Is Not Ideal For
Avoid using a temporary block stove for:
- Indoor cooking
- Heating a room
- Overnight unattended burning
- Deep-fat frying
- Large pressure canners
- Very heavy stockpots
- Long cooks during high fire danger
- Precision baking
- Any process requiring tightly regulated heat
- Drying clothing
- Burning household waste
Deep frying is particularly risky because the stove’s heat can fluctuate and the pot may be exposed to flame. Spilled oil can ignite rapidly.
Use a commercially manufactured appliance for tasks requiring precise control or very heavy cookware.
Cooking Food Safely
A strong flame does not prove that the center of the food is fully cooked.
Use a food thermometer, especially for meat, poultry, fish, casseroles, and reheated leftovers.
USDA minimum internal-temperature guidance includes:
- Whole cuts of beef, pork, veal, and lamb: 145°F, followed by a three-minute rest
- Ground meats: 160°F
- Poultry: 165°F
- Fish: 145°F
- Leftovers and casseroles: 165°F (Food Safety and Inspection Service)
Keep raw meat separate from cooked food, clean utensils, and ready-to-eat ingredients.
Do not place cooked food back onto the same unwashed plate that held it raw.
Extinguishing the Stove
Never walk away while the stove contains active flames, glowing wood, or hot coals.
When cooking is finished:
- Stop adding fuel.
- Allow the remaining sticks to burn down while supervised.
- Separate larger pieces using metal tongs.
- Apply water carefully to the coals.
- Stir the wet ashes.
- Add more water.
- Stir again.
- Continue until no steam, glow, or heat remains.
Smokey Bear recommends the “drown, stir, drown, and feel” method and warns that a fire too hot to touch is too hot to leave. (Smokey Bear)
Direct most of the water onto the coals and ash rather than suddenly flooding the faces of extremely hot concrete blocks. Rapid cooling can add thermal stress. In an emergency or spreading fire, however, controlling the fire takes priority over protecting the stove.
Do not handle the blocks merely because the flames are gone. Masonry can retain heat for hours.
Cleaning and Maintenance
Wait until the stove is completely cold.
Remove:
- Ash
- Charcoal fragments
- Partially burned sticks
- Food spills
- Grease
- Loose masonry pieces
Place cold ash in a metal container with a tight lid. Keep the container away from buildings and combustible materials until you are certain no hidden embers remain.
Before every use, inspect:
- Firebricks
- Outer concrete blocks
- Pot supports
- Fuel shelf
- Base pavers
- Surrounding ground
Replace any piece showing:
- A new crack
- Severe chipping
- Crumbling
- Warping
- Heat distortion
- Loose joints
- Exposed sharp metal
- Significant rust
Never repair a hot stove.
Common Mistakes
Using ordinary concrete blocks as the unlined firebox
Concrete can crack or spall under intense heat, especially when moisture is present. Use firebrick or a suitable metal core in the direct-flame area. (NIST)
Building with wet blocks
Allow masonry to dry thoroughly after rain or washing.
Do not try to “dry it out” by lighting a large fire inside it.
Using the stove in a garage
An open garage door does not make combustion appliances safe for indoor use. CPSC specifically warns against charcoal cooking in garages even with the door open. (U.S. Consumer Product Safety Commission)
Letting the pot seal the riser
Exhaust must escape.
Use a stable trivet or steel rods to maintain a clear gap beneath the cookware.
Overloading the tunnel
Too much wood restricts air, creates smoke, and may send flames toward the operator.
Feed a few small pieces at a time.
Burning treated lumber or trash
Painted, glued, pressure-treated, and plastic-containing materials can produce harmful smoke. Burn only clean, dry wood. (US EPA)
Operating beneath a roof
Heat and sparks can ignite rafters, awnings, tree branches, or porch ceilings.
Use an open overhead area.
Building on dry grass
A small coal falling from the feed opening can start a ground fire.
Use a wide, noncombustible base.
Leaving the stove unattended
A wind change, shifting block, falling stick, or boiling pot can turn a controlled fire into an emergency within seconds.
Moving it while hot
Do not reposition blocks or lift the stove after ignition.
Allow it to become fully cold first.
Optional Improvements
Add a removable wind shield
Install a freestanding sheet-metal shield on the side facing the wind.
Leave generous space around the stove and do not enclose it. The shield should reduce gusts without trapping exhaust or radiant heat.
Add a taller refractory riser
A modest increase in riser height may strengthen the draft.
Do not make the structure so tall that it becomes unstable.
Add an ash-cleanout opening
Design the front firebrick floor so one brick can be removed after cooling.
This makes ash removal easier without dismantling the complete shell.
Add an adjustable fuel shelf
A two-level metal shelf allows more or less primary air beneath the sticks.
Test each position using a small fire.
Add a dedicated cooking platform
Build a permanent gravel or concrete pad with space for:
- The stove
- Water
- Extinguisher
- Fuel
- Food-preparation table
Keep the food table far enough away that sparks and smoke cannot reach it.
Build a lightweight metal core
A fabricated L-shaped combustion core can replace the firebrick tunnel.
Use material intended for high-temperature solid-fuel service rather than thin galvanized ductwork or painted metal.
Is This Project Worth Building?
Yes—when it is built as a small outdoor cooker rather than an improvised indoor survival heater.
Its practical advantages include:
- No electricity
- Small fuel requirements
- Inexpensive outer structure
- Concentrated cooking heat
- Easy disassembly
- Replaceable components
- Useful backup for simple meals
- Hands-on emergency cooking practice
Its limitations are equally important:
- It contains an open fire.
- Weather affects performance.
- Local restrictions may prohibit it.
- Ordinary concrete is not an ideal direct-flame material.
- Pot stability requires careful testing.
- It cannot be used indoors.
- It requires constant supervision.
Build and test the stove before an emergency.
Boil a measured pot of water.
Cook a simple meal.
Practice extinguishing it.
Inspect the masonry after it cools.
You should learn its limitations while your normal kitchen is still available—not during the third night of a blackout.
Final Safety Note
This project is for outdoor emergency cooking only.
Use ordinary concrete blocks as a stable outer support, not as an unquestioned direct-flame chamber. Line the combustion area with refractory firebrick or a suitable high-temperature stove core.
Never operate the stove indoors, in a garage, on a porch, beneath a combustible roof, near an open window, or during a burn ban. Keep water, a shovel, and an appropriate fire extinguisher nearby. Supervise the stove continuously and keep children and pets away.
When local fire danger is elevated, use a permitted manufactured propane stove or choose ready-to-eat food instead.