A hot shower may feel like a luxury during a blackout, extended camping trip, or off-grid stay.
Yet the basic principle behind a solar shower is surprisingly simple:
- Put water in a container.
- Move it through dark tubing exposed to sunlight.
- Allow solar energy to warm the tubing and water.
- Deliver the warmed water through a low-flow showerhead.
No electricity is required.
No fuel needs to be burned.
The system can be assembled from materials commonly found at hardware, plumbing, RV, and outdoor-supply stores.
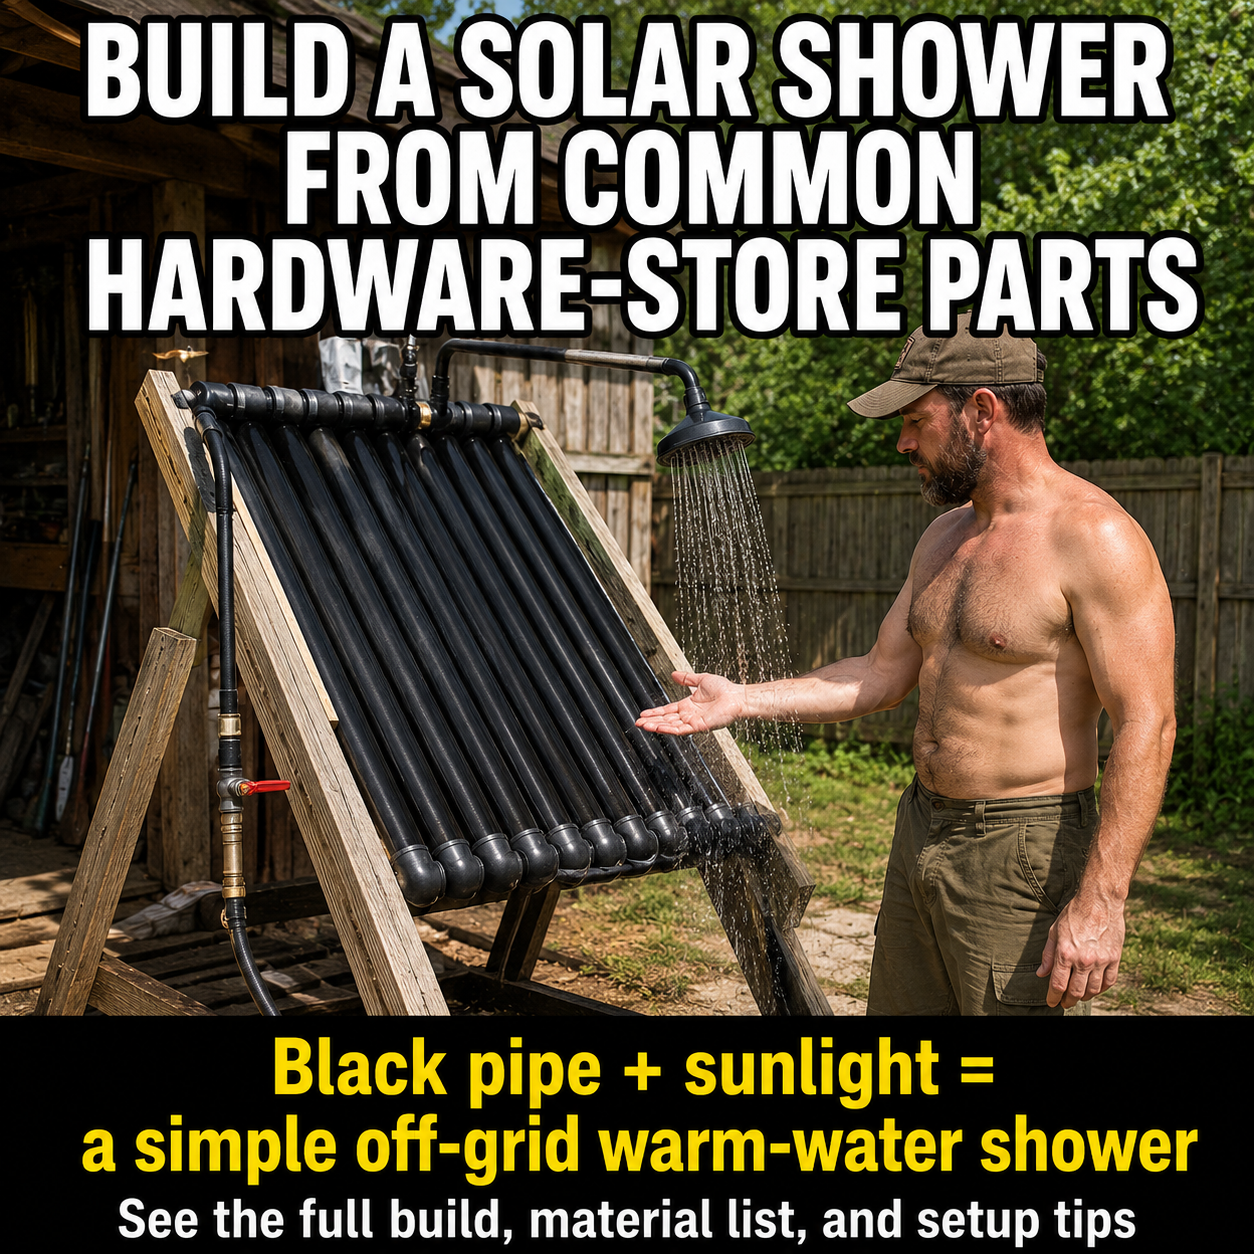
However, the dramatic black-pipe array shown in many social-media images should not be copied blindly. Solar-heated tubing can become much hotter than expected, and ordinary irrigation tubing, garden hoses, PVC fittings, adhesives, and valves may not be approved for hot water or prolonged human contact.
A safer project begins with three rules:
Use only water-contact components rated by their manufacturers for potable water, the expected temperature, outdoor exposure, and the system’s pressure.
Keep the system vented and low-pressure rather than connecting a homemade collector directly to pressurized household plumbing.
Test the water temperature every time before standing beneath the shower.
NSF/ANSI/CAN 61 establishes health-effects criteria for materials and components that contact drinking water. Certification does not automatically make a component suitable for every temperature or outdoor application, so the product’s temperature, pressure, and ultraviolet-exposure ratings must also be checked. (NSF)
What This Solar Shower Actually Does
The black collector does not create water or store unlimited heat.
It captures sunlight and transfers part of that energy into water held inside the tubing.
Performance depends on:
- Strength and duration of sunlight
- Outdoor temperature
- Wind
- Tubing material
- Collector area
- Amount of water
- Starting water temperature
- Flow rate
- Shade
- Insulation behind the collector
On a bright, warm day, a dark collector may produce comfortably warm water. Under intense summer sun, it may also create water hot enough to scald.
On cloudy, cool, or windy days, the temperature increase may be small.
This project should therefore be described as a sun-assisted outdoor shower, not a guaranteed hot-water system.
The Safer Design Used in This Guide
This project uses a simple, low-pressure arrangement:
Vented water container → black solar collector → temperature-check point → shower hose → low-flow showerhead
The container sits higher than the showerhead, allowing gravity to move the water.
The collector remains connected to the open, vented container so heated water can expand without being trapped inside a sealed pipe.
This design avoids:
- Direct connection to household water pressure
- Pumps
- Electricity
- A sealed heated vessel
- Complex automatic controls
- Permanent plumbing modifications
It is suitable for temporary outdoor use at:
- Cabins
- Campsites where permitted
- Workshops
- Homesteads
- Pool areas
- Disaster-recovery sites
- Off-grid properties
It is not intended to replace a professionally designed residential solar water-heating system.
DOE describes thermosiphon solar water heaters as passive systems that rely on natural convection, while other solar-water systems use tanks, controls, pumps, freeze protection, and additional safety hardware. A small DIY shower should remain separate from a home’s pressurized plumbing unless it is designed and installed by a qualified professional. (Building Science Education)
Materials
Water container
Choose one:
- Five- to ten-gallon vented camping-water container
- Food-grade water tank
- Potable-water-rated RV tank
- Heavy-duty solar-shower reservoir
- Clean food-grade bucket with a secure lid and separate vent
The container should be:
- Opaque or protected from prolonged sunlight
- Rated to hold water
- Easy to clean
- Equipped with a secure outlet
- Vented during operation
- Strong enough to remain stable when full
Do not use a container that previously held:
- Fuel
- Pesticides
- Paint
- Solvents
- Cleaning chemicals
- Oil
- Unidentified substances
Never seal a rigid water container completely while it is supplying a heated collector.
Collector tubing
Use tubing or hose explicitly rated by its manufacturer for:
- Potable-water contact
- Expected hot-water temperature
- Outdoor or ultraviolet exposure
- The system’s maximum pressure
Possible choices include appropriately rated:
- Potable-water hose
- RV drinking-water hose
- Flexible solar-water-heating tubing
- Copper tubing
- Manufacturer-approved polyethylene tubing
- Other certified hot-water tubing
Do not assume that tubing is safe merely because it is black.
Avoid unidentified:
- Irrigation hose
- Vinyl tubing
- Recycled hose
- Automotive hose
- Air-compressor hose
- Ordinary PVC pipe used beyond its temperature rating
- Garden hose not intended for potable water
- Painted tubing when the coating could contact the water
A single continuous tubing loop is usually simpler than the many short parallel pipes shown in the image. It requires fewer fittings and creates fewer potential leaks.
Collector frame
- Exterior-grade plywood
- Scrap 2×4 or 2×3 lumber
- Exterior screws
- Two sturdy diagonal braces
- Exterior black paint for the backing panel
- Reflective insulation for the rear, optional
- Pipe clips compatible with the tubing
- Hinges, optional
- Ground anchors or sandbags
The frame must resist wind and the weight of wet tubing.
Plumbing components
- Potable-water-rated bulkhead fitting
- Compatible hose adapters
- Full-port valve
- Shower hose
- Low-flow showerhead
- Temperature gauge or instant-read thermometer
- Pipe clamps
- Thread sealant approved for potable water
- Drain fitting
- Optional compatible mixing valve
- Optional sediment screen
Use compatible metals and fittings to reduce leakage and corrosion.
Shower area
- Stable shower arm or freestanding frame
- Nonslip outdoor mat
- Gravel or drainage platform
- Privacy curtain, optional
- Soap holder
- Towel hook
Do not create a muddy standing-water area where people may slip.
Tools
- Tape measure
- Pencil
- Saw
- Drill
- Screwdriver
- Adjustable wrenches
- Utility knife or tubing cutter
- Level
- Clamps
- Safety glasses
- Work gloves
- Bucket for leak testing
How Much Water Do You Need?
A standard showerhead may use approximately 2.5 gallons per minute. WaterSense-labeled showerheads use no more than 2.0 gallons per minute while meeting performance requirements. A lower-flow outdoor showerhead can stretch a limited solar-heated supply considerably further. (US EPA)
For example:
- A five-gallon supply provides only a brief shower.
- A ten-gallon supply offers more time but creates a much heavier elevated load.
- A shutoff button at the showerhead reduces water use while soaping.
Do not build an excessively tall platform merely to hold more water. Ten gallons of water is heavy enough to require a sturdy structure, broad base, diagonal bracing, and protection against tipping.
A smaller container refilled between users is often safer than a very large homemade elevated tank.
Step 1: Choose the Location
Select an outdoor site that receives several hours of direct sunlight.
The location should be:
- Level
- Open to sunlight
- Protected from vehicle traffic
- Away from children’s play areas
- Away from electrical equipment
- Away from septic systems and wells
- Close to appropriate drainage
- Protected from falling branches
- Accessible for cleaning and draining
Avoid placing the collector where reflected glare could affect drivers or neighbors.
The shower area should provide privacy without enclosing the collector so tightly that heat accumulates around plastic components.
Do not mount the water tank or collector on a roof unless the supporting structure and installation have been professionally evaluated.
Step 2: Build the Collector Frame
A practical collector panel can be approximately:
- Four feet wide
- Four to six feet tall
- Tilted toward the strongest sunlight
Build a rectangular frame from exterior lumber.
Add:
- A center brace
- Rear diagonal braces
- Wide feet
- Ground stakes or weights
Attach exterior-grade plywood to the front.
Paint the sun-facing surface matte black and allow it to cure completely before installing the tubing. The paint belongs on the backing panel—not inside water-contact tubing.
The collector can sit at an angle similar to a garden trellis. The exact angle is less important than full sun exposure, structural stability, and secure tubing.
Do not create the narrow, top-heavy frame shown in some viral examples without substantial anchoring.
Step 3: Attach the Tubing
Lay the tubing across the black panel in long horizontal loops or a broad coil.
Leave enough space between each run to attach clips without crushing the tubing.
Avoid:
- Sharp bends
- Kinks
- Flattened sections
- Unsupported fittings
- Contact with sharp screw heads
- Tubing rubbing against unfinished wood
- Low points that cannot drain
Secure the tubing using manufacturer-compatible clips.
Do not drive screws through the tubing.
Install the collector inlet near the lower portion and route the outlet toward the shower side. Keeping the arrangement simple makes it easier to drain, inspect, and repair.
The tubing manufacturer’s minimum bend radius must be respected. A tight bend can weaken the material or obstruct water flow.
Step 4: Install the Vented Water Container
Place the water container on a strong, separate platform above the showerhead.
The support should include:
- Four sturdy legs
- Horizontal rails
- Diagonal bracing
- A broad base
- A retaining strap around the container
- A safe way to fill it without climbing while carrying water
Do not balance the tank on:
- A chair
- A folding table
- Loose concrete blocks
- A tree branch
- A ladder
- A lightweight shelf
Install the outlet fitting near the bottom of the container.
Keep a screened vent open near the top during use. The vent permits air to replace departing water and provides a path for expansion.
The platform must remain stable when the tank is full, partially full, and empty.
Step 5: Connect the Tank to the Collector
Route potable-water-rated hose from the tank outlet to the collector inlet.
Use compatible adapters and approved thread sealant.
Do not add a check valve that traps heated water inside the collector unless the complete system includes properly designed expansion and pressure-relief protection.
For this low-pressure project, heated water should always have an open path back toward the vented container.
A service valve may be installed near the tank, but leave it open whenever the sun is heating water trapped inside the collector. Close it only after the collector has cooled or been drained.
A sealed tube full of water can develop pressure as its contents heat and expand.
Step 6: Install the Shower Outlet
Connect the collector outlet to:
- A temperature-check point
- The shower hose
- A low-flow showerhead
A small tee fitting with an appropriate temperature gauge makes monitoring easier.
Install a valve or thumb-operated shutoff close to the showerhead so the user can control flow without reaching toward the hot collector.
Secure the shower hose to a stable post.
The showerhead should be high enough for comfortable use but low enough to inspect and clean without a ladder.
Use a showerhead designed to work at low pressure. Some household models require more pressure than a gravity system can provide.
Step 7: Add Temperature Control
The safest arrangement provides access to both warmed and unheated water.
Possible options include:
A separate cold-water container
Place a second container beside the shower and mix water manually in the main reservoir before showering.
This is simple and reliable.
A compatible low-pressure mixing valve
Some mixing valves require a minimum pressure or balanced hot and cold supplies. Use one only when its manufacturer confirms that it is appropriate for your gravity-fed arrangement.
A collector bypass
Install a tee and valves allowing part of the water to bypass the heated collector.
This permits cooler water to blend with the heated outlet, but the valves must be clearly labeled and arranged so the collector cannot become sealed between two closed valves.
Regardless of the method, always test the final shower temperature directly.
Step 8: Conduct a Cold Leak Test
Before exposing the system to sunlight:
- Fill the tank partly with cool water.
- Open the tank outlet.
- Allow water to enter the collector.
- Open the shower valve.
- Flush the system.
- Close the shower valve.
- Inspect every connection.
- Leave the system filled for at least 30 minutes.
- Check the platform and frame for movement.
Look for:
- Drips
- Swollen tubing
- Loose clamps
- Distorted fittings
- Water inside structural wood
- Sagging collector sections
- Leaks around the tank outlet
Correct every leak before heating the system.
Do not tighten plastic fittings excessively. Overtightening can crack or deform them.
Step 9: Flush the New Components
New hose and tubing may contain dust, manufacturing residue, odors, or loose particles.
Flush several full volumes of clean water through the system according to each component manufacturer’s instructions.
Do not use the first heated water for bathing.
Continue flushing when the water has:
- A strong plastic odor
- Visible particles
- Unusual color
- Oily residue
- Persistent foam
Replace any component that continues releasing an objectionable odor or residue after proper flushing.
Step 10: Perform the First Solar Test
Choose a mild, sunny day.
Begin with the tank only partly full.
Record:
- Starting water temperature
- Outdoor temperature
- Time
- Weather conditions
- Collector outlet temperature after one hour
- Temperature after two hours
- Temperature near the end of the day
Do not stand beneath the shower during the initial flow.
Open the valve while directing the water into a bucket. The first water leaving the collector may be considerably hotter than the water that follows.
Mix the bucket and test it with a thermometer.
CPSC has warned that shower water above 120°F presents a scalding risk and should be corrected. Children, older adults, and people with reduced mobility or sensation can be injured more quickly. (U.S. Consumer Product Safety Commission)
For comfortable bathing, target a considerably lower temperature and confirm it immediately before use.
How to Use the Solar Shower
Before heating
- Inspect the tank platform.
- Check the collector frame.
- Confirm that the vent is open.
- Open the expansion path between collector and tank.
- Check the tubing for damage.
- Fill with clean water.
- Confirm that the shower valve works.
Before stepping under it
- Direct the initial flow away from people.
- Flush the hottest first water into a bucket.
- Measure the temperature.
- Blend with cold water when needed.
- Test the stream with your hand and forearm.
- Enter only after the temperature stabilizes.
During use
- Keep children supervised.
- Keep the tank lid secure.
- Use the shutoff while soaping.
- Avoid touching the heated collector.
- Do not pull on the shower hose.
- Stop if the flow becomes unexpectedly hot or weak.
After use
- Shut off the water supply.
- Drain the collector.
- Empty standing water from the shower hose.
- Clean the showerhead when needed.
- Allow the area to dry.
Never Drink From the Solar Shower
Even when every component is potable-water-rated, the outdoor collector is not a controlled drinking-water system.
Warm water may remain stagnant inside the tubing, and outdoor fixtures can be exposed to:
- Dust
- Insects
- Soil
- Hands
- Biofilm
- Animal contamination
- Hose-end contact with the ground
CDC notes that stagnant water can lose disinfectant residual and enter temperature ranges favorable to Legionella and other biofilm-associated bacteria. Legionella can be transmitted when contaminated water becomes aerosolized into mist, including through shower-type devices. (CDC)
Use the solar shower for external washing only.
Do not use its water for:
- Drinking
- Brushing teeth
- Washing contact lenses
- Preparing food
- Cleaning wounds
- Infant care
- Filling medical devices
People at increased risk of severe Legionella illness should avoid using a poorly maintained outdoor shower that has held stagnant warm water.
Preventing Stagnant Water
Drain the collector after each use whenever practical.
At minimum:
- Do not leave warm water standing for days.
- Flush the system before each use.
- Clean the showerhead regularly.
- Remove dead-end pipe sections.
- Store hoses drained and protected from soil.
- Keep the tank covered.
- Inspect for slime or odor.
- Disassemble and clean the system between seasons.
CDC recommends flushing infrequently used fixtures and avoiding stagnant low-flow plumbing runs because increased water age creates more opportunity for microbial growth. (CDC)
When the system has been unused for an extended period, clean and flush it before showering.
Overheating Hazards
A collector can continue heating while nobody is using water.
The smallest quantity of water remaining in sun-exposed tubing may become the hottest portion of the system.
Overheating becomes more likely when:
- The collector is large
- The tank is nearly empty
- Water flow stops
- The sun is intense
- The day is unusually hot
- The panel is protected from wind
- Dark tubing rests behind a clear cover
- The water is trapped between closed valves
Prevent overheating by:
- Keeping the system vented
- Maintaining an open expansion path
- Providing shade for part of the collector
- Draining the collector when not needed
- Testing the outlet before every shower
- Using a temperature gauge
- Installing a compatible mixing device
- Avoiding transparent covers on a beginner system
Do not touch the black tubing after it has been sitting in full sun.
Freeze Protection
Drain the entire system before freezing weather.
Water trapped inside tubing, valves, fittings, or the showerhead can freeze, expand, and crack the components. Passive solar-water systems are particularly vulnerable when they contain exposed water and lack automatic freeze protection. (The Department of Energy’s Energy.gov)
To winterize:
- Close the water supply.
- Open the shower valve.
- Open the lowest drain.
- Disconnect low sections that retain water.
- Tilt flexible tubing when necessary.
- Drain the tank.
- Remove the showerhead.
- Store vulnerable parts indoors.
Do not add automotive antifreeze to a shower system.
Protecting the System From Sun Damage
Sunlight warms the collector but can also weaken unsuitable plastics.
Inspect outdoor components regularly for:
- Chalky surfaces
- Fading
- Cracking
- Brittleness
- Bulging
- Softening
- Delamination
- Loose fittings
- Leaks
A potable-water rating does not necessarily mean a hose is approved for permanent outdoor sunlight or high-temperature solar exposure.
Follow each component’s published limitations.
Replace damaged tubing immediately rather than attempting to patch multiple deteriorated sections.
Keeping the Shower Area Sanitary
Create drainage that carries water away from the standing area.
Suitable options include:
- Gravel bed
- Removable slatted platform
- Nonslip drainage mat
- Approved gray-water route
- Existing outdoor drain
Do not direct soapy water toward:
- A well
- Surface water
- Neighboring property
- A vegetable garden
- A storm drain where prohibited
- A septic-system access point
Use biodegradable soap sparingly, but remember that “biodegradable” does not mean the product should be discharged directly into a stream, pond, or drinking-water source.
Check local gray-water and outdoor-shower regulations.
Water-Saving Tips
A limited solar-water supply lasts longer when you:
- Use a low-flow showerhead
- Wet your body briefly
- Turn the flow off while soaping
- Rinse efficiently
- Use a small washcloth
- Collect the first overly hot water for appropriate nonpotable use
- Repair leaks immediately
- Avoid letting the shower run unattended
EPA notes that reducing shower flow saves both water and the energy required to heat it. WaterSense-labeled showerheads use no more than 2.0 gallons per minute, compared with 2.5 gallons per minute for a standard fixture. (US EPA)
A low-pressure camping showerhead may use even less, but verify that its spray remains practical for washing.
Cleaning and Maintenance
After each use
- Drain the collector.
- Empty the hose.
- Wipe the showerhead.
- Check the ground for standing water.
- Cover the tank opening.
- Inspect visible connections.
Weekly during regular use
- Flush the complete system.
- Wash the tank.
- Clean the showerhead.
- Inspect the vent screen.
- Check the frame and anchors.
- Look for tubing damage.
- Test the temperature gauge.
Monthly
- Remove the showerhead and descale it when needed.
- Inspect tank seals and gaskets.
- Tighten loose structural fasteners.
- Check for mold or algae.
- Verify that the drain remains open.
- Examine the collector backing for rot.
Before seasonal storage
- Wash the tank.
- Flush the tubing.
- Drain everything.
- Allow the parts to dry.
- Remove detachable plumbing.
- Store the hose away from rodents and sunlight.
- Cover or relocate the wooden collector.
Replace components that remain slimy, foul-smelling, cracked, or difficult to clean.
Common Building Mistakes
Copying the black-pipe image exactly
The image is a visual concept, not a verified plumbing diagram.
A large collection of short pipes and elbows creates many potential leak points and may trap hot water. A simpler continuous loop is easier to inspect and drain.
Using ordinary PVC for heated water
Do not use piping beyond its manufacturer’s temperature and pressure ratings.
Sun-heated enclosed tubing may become much hotter than ordinary cold-water plumbing.
Assuming black irrigation tube is safe
Some irrigation products are not rated for potable water, hot water, or human exposure.
Use documented, appropriately certified components.
Connecting it to household pressure
A homemade collector connected directly to pressurized plumbing needs code-compliant pressure, temperature, backflow, mixing, and relief protection.
Keep this beginner system gravity-fed and separate.
Sealing the tank
A rigid container must be vented during operation.
Do not heat a sealed water vessel.
Trapping water between two valves
Heated water must retain a safe expansion path.
Do not close valves on both sides of a sun-heated collector.
Skipping the thermometer
Water that feels pleasant at the tank may emerge much hotter from the collector.
Measure at the shower outlet.
Leaving the system filled for days
Warm stagnant water and outdoor contamination make poor hygiene partners.
Drain, clean, and flush the system.
Building an unstable tank platform
A full water container can cause serious injury if it falls.
Use substantial bracing and a retaining strap.
Installing the collector on a roof
A roof installation introduces structural, fall, wind, leak, and plumbing risks.
Use a ground-mounted frame for this project.
Forgetting drainage
A shower built over soil without drainage quickly becomes muddy and slippery.
Prepare the ground before use.
Optional Improvements
Add an insulated hot-water reservoir
The collector can fill a separate insulated, vented container after warming the water.
This provides more consistent temperature but adds plumbing and another heavy tank.
Add a cold-water blending line
A second gravity tank can supply cooler water through a compatible mixing system.
Mark the controls clearly.
Add a solar-powered pump
A small pump can improve pressure, but it introduces electricity, wiring, waterproofing, pressure control, and component-rating requirements.
Use a complete outdoor-rated low-voltage system rather than improvising mains electricity near water.
Add a temperature indicator
A large dial or digital probe at the shower outlet allows quick checks.
Do not rely on a thermometer mounted only at the tank.
Add removable collector shade
A sliding panel or shade cloth can cover part of the collector during extreme heat.
Add an insulated rear panel
Insulation behind the black absorber can reduce heat loss on mild days.
Keep it protected from water and use material appropriate for outdoor temperature exposure.
Add a foot-operated shutoff
A foot valve reduces wasted water while keeping hands free.
Use a model compatible with low-pressure water and outdoor use.
Is This Project Worth Building?
Yes—when it is kept simple, low-pressure, vented, and closely monitored.
A well-planned solar shower can provide:
- Warm water without electricity
- Better hygiene during outages
- A comfortable camping setup
- A practical use for sunny weather
- Lower fuel consumption
- Hands-on experience with gravity-fed water systems
Its limitations must remain clear:
- Output depends on weather.
- The water can overheat.
- The system requires cleaning.
- It should not be used for drinking.
- Tubing must be selected carefully.
- Freeze damage is possible.
- A large elevated tank can be hazardous.
- It is not a replacement for code-compliant household plumbing.
Build the system before an emergency.
Test it with cold water.
Test it again in mild sunlight.
Record how quickly the water warms.
Practice mixing it to a safe temperature.
Then determine whether the collector should be enlarged, reduced, or partially shaded.
A modest system you understand is far more useful than an impressive wall of black pipe that has never been safely tested.
Final Safety Note
This project is intended as a temporary, gravity-fed outdoor shower.
Use only components rated for potable-water contact, outdoor exposure, expected temperature, and operating pressure. Keep the water container vented, maintain an open expansion path, and never connect the homemade collector directly to household plumbing without professional design and required safety controls.
Test the outlet temperature before every use. Flush and drain stagnant water, keep the system clean, and never drink from it. Drain all components before freezing weather.
Children, older adults, and anyone with reduced temperature sensation should not operate the shower unsupervised.