Fresh water can be separated from saltwater with a surprisingly simple process.
Heat turns water into vapor. The salt remains behind in the boiling pot. When the vapor passes through a cooled tube, it condenses back into liquid water that can be collected in a separate container.
That process is called distillation.
A small homemade distiller can be useful for:
- Demonstrating desalination
- Producing limited backup water
- Treating small quantities of known saltwater
- Learning how evaporation and condensation work
- Producing distilled water for certain equipment
- Testing an off-grid water-processing method
However, this is not a fast or universal water solution.
Distillation generally requires more energy and takes longer than many other household water-treatment methods. It can remove parasites, bacteria, viruses, dissolved salts, minerals, and many chemicals, but it does not reliably remove every volatile solvent, volatile organic compound, or pesticide. (CDC)
A homemade system should therefore supplement stored emergency water—not replace it.
CDC recommends storing at least one gallon of water per person per day for three days and advises keeping a two-week supply when possible. Commercially bottled water is the safest and most reliable emergency source. (CDC)
The Most Important Rule: Never Heat a Sealed Bottle
The safest small distiller operates at atmospheric pressure.
Steam must have an unrestricted path from the boiling pot, through the condenser, and out into an open collection container.
Never:
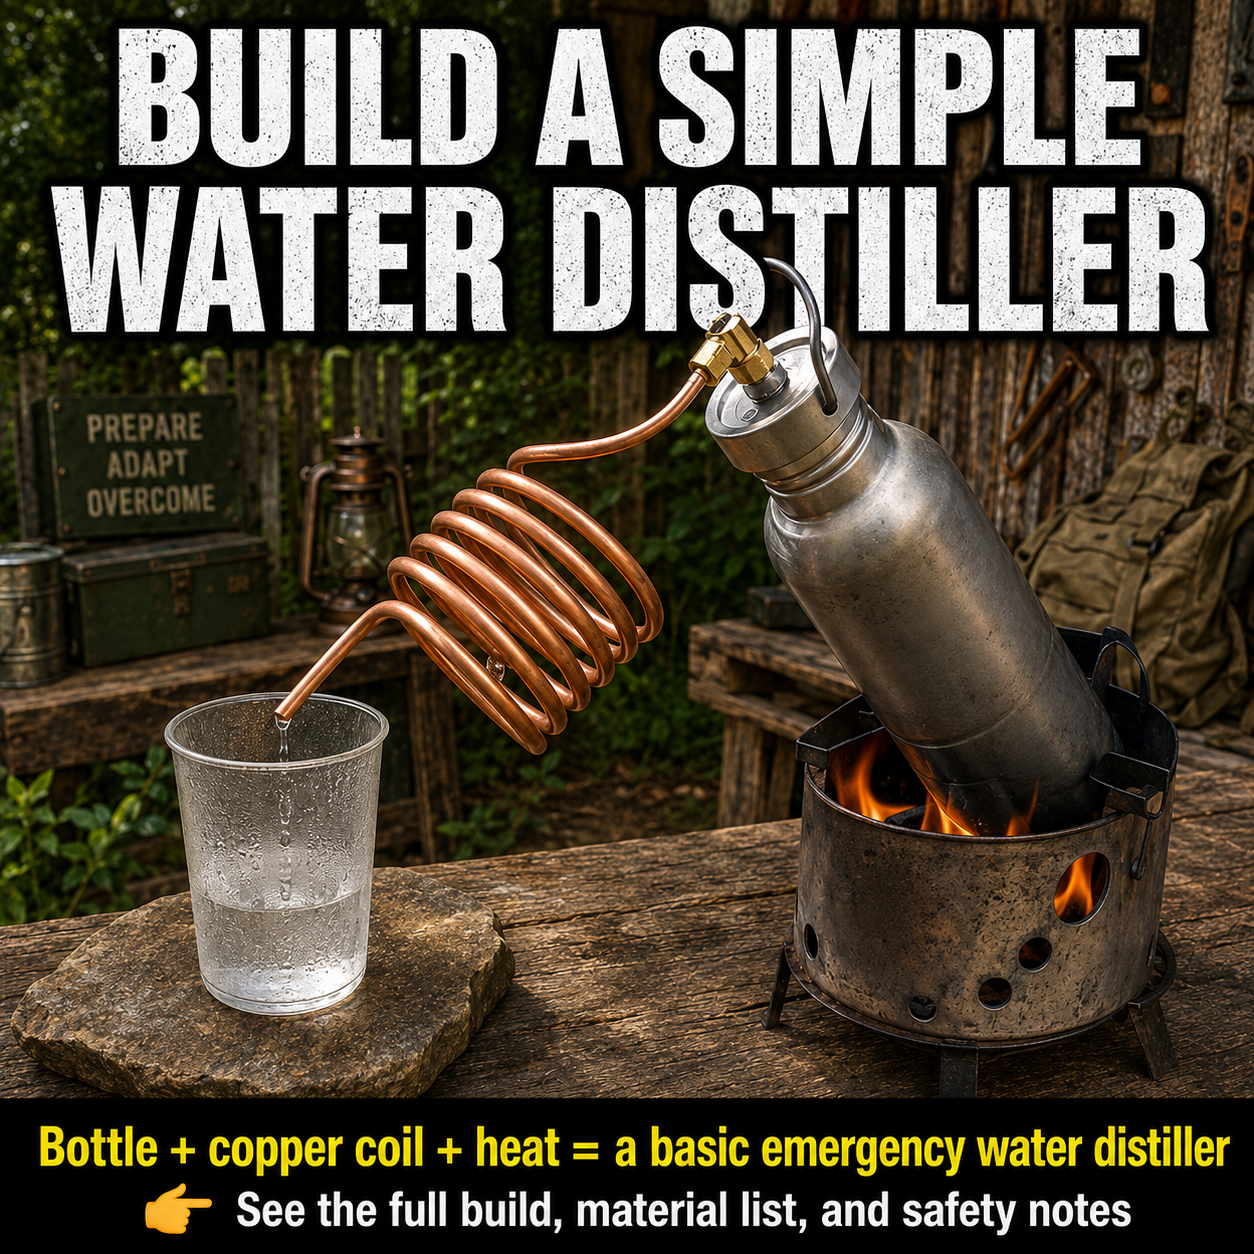
- Heat a tightly sealed stainless-steel bottle
- Clamp an ordinary stockpot lid shut
- Plug a safety or pressure-release valve
- Install a valve in the steam outlet
- Submerge the collection tube beneath the collected water
- Use a blocked, kinked, or flattened condenser tube
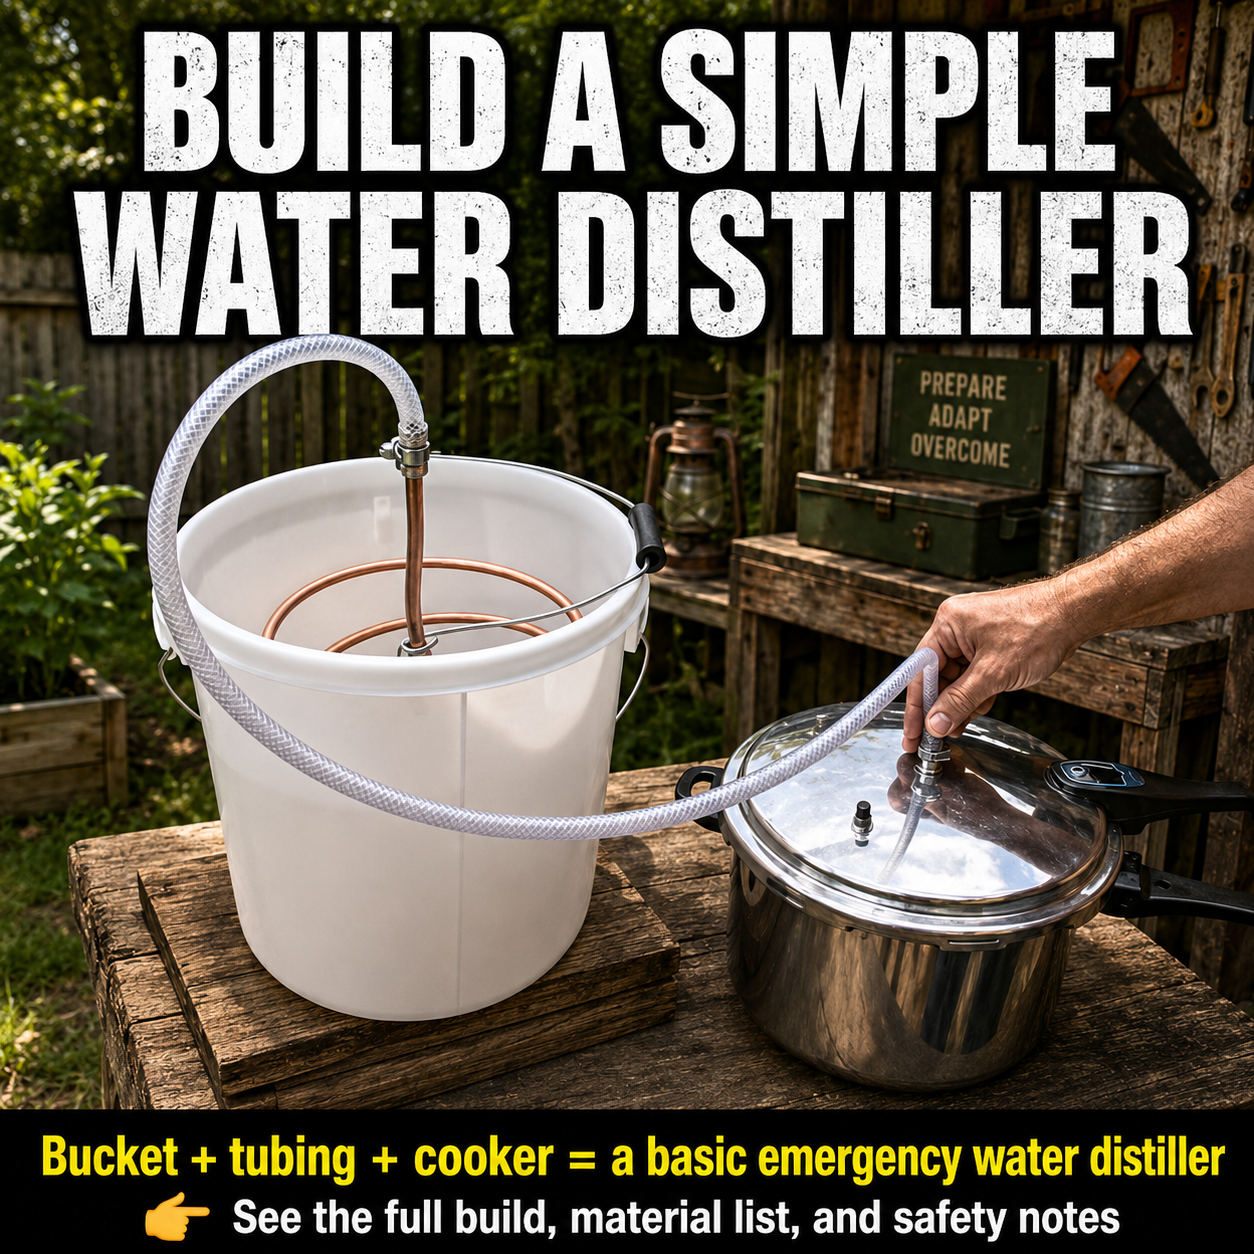
- Modify a pressure cooker for this project
Water produces increasing vapor pressure when heated in a closed container. Purpose-built pressure cookers use controlled pressure regulators and emergency-release systems because trapped steam can otherwise create a destructive failure. (USGS)
Use an atmospheric distillation lid or purpose-built steam kettle instead.
What the System Looks Like
The safer layout has four sections:
Boiling pot → unrestricted steam line → cold condenser coil → open collection container
The condenser is placed in a separate bucket of cool water.
Do not wrap the condenser tightly around the hot boiling vessel. A condenser works by removing heat from vapor. Heating the coil with the same flame or hot pot works against the condensation process.
Materials
Atmospheric-pressure boiler
Use one of the following:
- Stainless-steel stockpot with a purpose-built distillation lid
- Stainless-steel steam kettle designed for atmospheric distillation
- Commercial stovetop water-distiller boiler
- Stainless pot with a professionally fitted, unrestricted steam outlet
A practical capacity is approximately two to four gallons, although a smaller pot is easier to handle.
The lid must guide steam toward the condenser without turning the pot into a pressure vessel.
Do not use:
- An insulated drinking bottle
- A vacuum flask
- An aluminum beverage bottle
- A pressure cooker with altered components
- A container with unknown interior coatings
- A damaged or corroded vessel
Condenser coil
- Ten to twenty feet of soft copper water tubing
- Approximately ¼- to ⅜-inch outside diameter
- Large plastic or stainless-steel cooling bucket
- Water-rated compression fittings
- High-temperature food-contact hose, if needed
- Stainless-steel hose clamps
- Rubber grommet or bulkhead fitting
- Cool water
- Ice, optional
Not all copper tubing is intended for drinking-water contact. Select new tubing carrying appropriate drinking-water certification rather than reclaimed refrigeration, automotive, or industrial tubing. NSF/ANSI/CAN 61 evaluates health effects from materials that contact drinking water. (NSF)
Joining materials
Use:
- Potable-water-rated compression fittings, or
- Certified lead-free plumbing solder and flux
Do not use old electronics solder, unknown brazing material, or fittings salvaged from an unidentified system.
EPA requires pipes, fittings, solder, and flux used for water intended for human consumption to satisfy current lead-free requirements. (US EPA)
Collection equipment
- Clean stainless-steel container
- Sanitized food-grade water container
- Clean glass jar for small test batches
- Tight-fitting storage lid
- Labels and marker
The collection vessel remains open during operation and is covered only after the distillation run has ended.
Tools
- Tubing cutter
- Tape measure
- Drill
- Hole saw or step bit
- File
- Adjustable wrench
- Screwdriver
- Work gloves
- Safety glasses
- Heat-resistant gloves
- Digital thermometer, optional
Step 1: Form the Condenser Coil
Find a smooth round object approximately six to ten inches in diameter.
A small bucket, metal can, or section of large pipe can serve as the forming guide.
Leave approximately 18 inches of straight tubing at the beginning.
Slowly wrap the tubing around the form, creating an even coil. Do not force the copper into tight turns.
The completed coil should have:
- Smooth bends
- No kinks
- No flattened sections
- Space between turns
- A continuous downward slope
- A straight outlet section at the bottom
Leave another 18 inches of straight tubing after the final turn.
Condensed water must be able to flow downhill through the complete coil. An upward loop or low pocket may trap water and restrict the vapor path.
When the tubing develops a severe kink, replace the damaged section rather than repeatedly bending it back and forth.
Step 2: Prepare the Cooling Bucket
Place the coil inside a large bucket.
The upper connection should remain above the rim. The lower outlet should pass through the bucket wall near the bottom.
Mark the outlet location approximately one to two inches above the bucket floor.
Drill a hole sized for the grommet or bulkhead fitting.
Smooth the edges and remove all plastic shavings.
Pass the condenser outlet through the opening and install the seal. Keep sealant away from the inside of the copper tubing.
Allow every sealant to cure according to its manufacturer’s instructions before operating the system.
Step 3: Stabilize the Coil
The coil must not float or shift when the bucket is filled.
Secure it with:
- Stainless-steel brackets
- A removable crossbar
- Copper-compatible clips
- Temperature-appropriate plastic restraints
Leave open space around the tubing so cooling water can circulate between the turns.
The bottom outlet should extend far enough beyond the bucket to drip into the collection container without touching its rim.
Step 4: Prepare the Boiler Lid
The simplest safe option is a commercial atmospheric distillation lid that fits the selected stockpot.
It should include:
- An unrestricted steam outlet
- Heat-resistant gasket material
- A lid that rests or latches as designed
- No mechanism intended to create operating pressure
- No valve capable of closing the steam path
A fabricated lid should be assembled by someone experienced with food-contact plumbing and steam equipment.
Do not attempt to make the connection airtight by overtightening the lid or adding clamps around the pot.
A small amount of leakage around a nonpressurized lid is less dangerous than a blocked outlet, although leakage will reduce efficiency and can cause steam burns.
Step 5: Connect the Boiler to the Condenser
Connect the boiler’s steam outlet to the upper end of the condenser.
Use either:
- A direct copper connection, or
- A short section of high-temperature food-contact hose
The connecting line should:
- Be as short as practical
- Slope toward the condenser
- Remain clear of the flame
- Avoid sharp bends
- Contain no shutoff valve
- Have no collapsed sections
- Be mechanically supported
Ordinary vinyl hose, garden hose, aquarium tubing, and unidentified clear tubing may soften or collapse when exposed to steam.
Use components rated for the expected temperature and water-contact application. NSF guidance recommends verifying that every plumbing material touching drinking water is certified for that purpose. (NSF)
Step 6: Test the Vapor Path With Cold Water
Before using heat, disconnect the steam line from the boiler.
Slowly pour clean water into the upper end of the condenser.
Water should travel through the coil and flow freely from the outlet.
Look for:
- Restricted flow
- Leaks
- Kinked copper
- Upward loops
- Loose fittings
- Water trapped inside the coil
Correct every problem before reconnecting the boiler.
The outlet must remain fully open.
Step 7: Conduct the First Heated Test With Safe Water
The first test should use ordinary potable tap water—not seawater or questionable surface water.
Fill the boiler no more than approximately halfway.
Leaving generous headspace reduces the risk of foaming or boiling water entering the steam tube.
Fill the condenser bucket with cool water.
Place the open collection jar beneath the outlet.
Connect the steam line and inspect the entire setup.
The boiling pot, cooling bucket, and collection container should all rest on stable surfaces. The condenser should sit lower than the boiler outlet so the condensate flows downhill.
Choosing a Heat Source
A normal kitchen range may be used when the boiler is suitable for stovetop operation and the room is appropriately ventilated.
A propane camping stove, charcoal burner, or outdoor wood stove must be used outdoors only, away from windows, doors, and vents.
Fuel-burning camping equipment can produce carbon monoxide, an odorless and poisonous gas. CDC warns against using camp stoves, grills, and similar combustion appliances inside homes, garages, basements, campers, or other enclosed spaces. (CDC)
Keep the heating system away from:
- Children
- Pets
- Walkways
- Dry vegetation
- Flammable liquids
- Loose clothing
- Plastic tubing
- The collection container
Keep an appropriate fire extinguisher nearby.
Step 8: Bring the Water to a Controlled Boil
Begin with low or moderate heat.
At sea level, water boils at approximately 212°F. The boiling temperature decreases as elevation increases. The source tutorial’s recommendation of 150°F to 200°F is therefore not a reliable general target for producing steam in an atmospheric system. (practicalsurvivalist.com)
You do not need a violent boil.
A steady, controlled boil is preferable because excessive bubbling may:
- Carry salty droplets into the steam line
- Cause foaming
- Waste fuel
- Overwhelm the condenser
- Increase burn risk
- Boil the pot dry more quickly
Watch the complete system throughout operation.
Never leave it unattended.
Step 9: Watch for Condensation
As steam reaches the cold copper coil, liquid should begin dripping from the outlet.
The time required depends on:
- Starting water temperature
- Burner output
- Pot size
- Condenser length
- Cooling-water temperature
- Ambient conditions
The distilled water should emerge as liquid—not as an uncontrolled stream of steam.
When hot vapor escapes from the collection end:
- Reduce the heat.
- Replace some warm condenser water with cooler water.
- Add ice when available.
- Confirm that the complete coil is submerged.
- Check for sections of tubing sitting above the cooling bath.
Do not place your face, hands, or body near the outlet while testing.
Step 10: Maintain the Cooling Water
The cooling bath gradually absorbs heat from the steam.
Check it regularly.
For a short run, occasional ice or cool replacement water may be sufficient.
For a longer run, create a simple flow-through cooling bath:
- Introduce cold water near the bottom.
- Allow warmer water to overflow from the top.
- Keep the cooling water completely separate from the distillate.
Do not splash condenser water into the collection container.
The cooling bath is not treated drinking water.
Step 11: Discard the Commissioning Batch
For a newly constructed system, discard the first complete test batch.
This conservative commissioning step helps flush:
- Metal particles
- Manufacturing residue
- Flux residue
- Sealant contamination
- Dust
- Cleaning material
After the system cools, flush the condenser again with safe water and inspect every joint.
Use only properly certified water-contact components. Discarding the initial batch cannot make unsafe materials suitable for drinking-water use. (NSF)
Step 12: Distill Saltwater
After the clean-water test succeeds, the system can be tested with known saltwater.
Use water from a source that is not suspected of containing:
- Fuel
- Solvents
- Industrial waste
- Pesticides
- Chemical runoff
- Radioactive contamination
- Unknown oily residue
Do not use water taken near:
- Fuel docks
- Shipyards
- Industrial discharge points
- Marinas with visible spills
- Storm drains
- Sewage outlets
Distillation can remove sodium and many other dissolved substances, but some volatile chemicals can vaporize and pass through the condenser. CDC states that water containing fuel or toxic chemicals should be replaced with bottled water or another source rather than relying on household treatment. (CDC)
Pretreating Cloudy Source Water
When the saltwater contains visible sediment:
- Let it settle.
- Pour off the clearer upper water.
- Pass it through a clean cloth or sediment prefilter.
- Add the clarified water to the boiling pot.
This step keeps sand, plant matter, and debris out of the boiler.
Prefiltering does not make the water safe by itself. Its purpose is to reduce fouling and make the distiller easier to clean.
Prevent Saltwater From Entering the Condenser
The vapor outlet should capture steam—not splashing liquid.
Reduce carryover by:
- Keeping the pot less than half full
- Using moderate heat
- Leaving sufficient headspace
- Installing a purpose-built splash separator
- Keeping the steam outlet above the highest liquid level
- Avoiding vigorous boiling
When salty water is mechanically carried into the condenser, the collected product may still contain substantial salt.
Stop the run if liquid surges through the steam tube.
Allow the system to cool, clean the condenser, reduce the fill level, and restart with gentler heat.
Is the Collected Water Automatically Safe?
No homemade device can guarantee the safety of every source.
A correctly operating distiller can greatly reduce:
- Salt
- Bacteria
- Viruses
- Parasites
- Many dissolved metals
- Many nonvolatile chemicals
However, certain volatile organic compounds, volatile solvents, and pesticides may pass through with the vapor. Bacteria may also grow on cooling coils while systems are stored if they are not cleaned and dried properly. (CDC)
The safety of the collected water depends on:
- The original source
- Materials used in construction
- Condenser cleanliness
- Whether salty water splashed into the steam line
- Collection-container sanitation
- Storage practices
- Presence of volatile chemicals
Do not judge safety by clarity, smell, or taste alone.
Safe Collection and Storage
Use a clean, sanitized container.
The condenser outlet should drip into the container without touching:
- The jar rim
- Hands
- Dirty tools
- The ground
- Source-water containers
Cover the water after the run ends.
CDC recommends storing treated water in durable, clean containers with tight covers and avoiding containers that previously held pesticides, petroleum products, or other toxic chemicals. (CDC)
Label the container with:
- “Distilled water”
- Source used
- Processing date
- Batch number
Keep it away from direct sunlight and chemicals.
How Much Water Will It Produce?
Do not promise a fixed output.
Production depends on:
- Boiler size
- Heat input
- Condenser capacity
- Cooling-water temperature
- Steam leakage
- Tubing length
- Weather
- Elevation
A small system may produce only a slow drip or narrow stream.
Distillation is usually energy-intensive and slower than other water-treatment methods. (CDC)
Test your completed system and record:
- Starting source-water volume
- Final collected volume
- Time required
- Fuel consumed
- Cooling water used
- Brine remaining
These measurements will reveal whether the system has a realistic role in your preparedness plan.
Never Let the Boiler Run Dry
Remain beside the distiller and monitor its water level.
Stop heating while liquid remains inside the pot.
Running dry may:
- Overheat the vessel
- Damage the gasket
- ruin fittings
- concentrate salt into a hard crust
- expose the boiler to extreme temperatures
- create an unstable hot surface
Do not open the system immediately after stopping the heat.
Allow the pot, tubing, and condenser to cool completely.
Steam can remain inside hot components after visible dripping has stopped.
Managing the Concentrated Brine
Distillation removes water while leaving most salt behind.
The remaining liquid therefore becomes increasingly concentrated.
Do not continually refill the pot without emptying it.
After each run:
- Allow the boiler to cool.
- Pour out the concentrated brine.
- Rinse the pot.
- Remove scale.
- Inspect the steam opening.
- Begin the next run with fresh source water.
Do not pour concentrated brine onto garden plants, lawns, freshwater streams, septic systems, or metal surfaces.
Dispose of it according to local requirements and the source water’s known contamination.
Cleaning the System
After every run
- Empty the boiler.
- Rinse away salt.
- Flush the condenser with clean water.
- Clean the lid and gasket.
- Wash the collection container.
- Empty the cooling bucket.
- Allow all parts to dry.
Periodically
Inspect for:
- Mineral scale
- Green or blue copper corrosion
- Loose fittings
- Cracked tubing
- Discolored seals
- Mold
- Unusual odor
- Restricted flow
Replace damaged or corroded components.
Do not scrape the inside of copper tubing with steel wire or introduce cleaning chemicals that cannot be completely removed.
CDC notes that microorganisms may grow on cooling coils while distillation equipment is not being used, making regular cleaning and dry storage important. (CDC)
Common Mistakes
Heating a closed steel bottle
A tightly closed vessel can pressurize as steam forms.
Use an unrestricted atmospheric-pressure boiler.
Wrapping the condenser around the hot pot
The condenser must lose heat.
Place it in a separate cold-water bath.
Operating at a claimed 150°F to 200°F target
At ordinary sea-level atmospheric pressure, water boils near 212°F. The temperature is lower at elevation, but there is no universal 150°F-to-200°F desalination setting. (USGS)
Using old copper tubing
Refrigeration and industrial tubing may contain oil, refrigerant, solder, or other contamination.
Use new certified water-contact tubing.
Using electrical solder
Use lead-free plumbing materials intended for drinking-water contact. (US EPA)
Allowing the coil to rise and fall
Trapped condensate can obstruct the vapor path.
Maintain a continuous downhill slope.
Submerging the outlet
The collection end must remain open to the atmosphere.
Do not allow it to sit below the water level in the jar.
Filling the boiler completely
Insufficient headspace allows salty water to splash into the condenser.
Begin below half capacity.
Using chemically contaminated water
Distillation does not reliably remove every volatile chemical.
Use another approved water source when fuel or toxic contamination is suspected. (CDC)
Leaving the system unattended
A blocked tube, overheated boiler, empty cooling bath, or dry pot can become dangerous quickly.
Optional Improvements
Use a stainless-steel condenser
Stainless tubing is durable and avoids some copper-related water-chemistry concerns.
It is more expensive and harder to form.
Add a splash separator
A purpose-built separator between the boiler and condenser can help prevent droplets of saltwater from entering the vapor line.
It must not restrict the open steam path.
Add continuous condenser cooling
A lower cold-water inlet and upper warm-water overflow can improve condensation during longer runs.
Add temperature monitoring
Thermometers can help track the boiler and condenser, but they do not replace an unrestricted steam outlet or continuous supervision.
Add a certified carbon stage
A certified activated-carbon treatment stage may reduce specified volatile organic chemicals.
Carbon performance varies by product and contaminant, and the cartridge must be replaced according to its rating. EPA recognizes granular activated carbon as an established treatment for many VOCs. (US EPA)
Do not place loose barbecue charcoal in the collection container.
Is This Project Worth Building?
Yes—when it is approached as a small, carefully monitored desalination experiment.
Its advantages include:
- Simple operating principle
- No replacement filter media
- Removal of dissolved salt
- Use with several heat sources
- Easy-to-observe operation
- Valuable hands-on preparedness experience
Its limitations include:
- High fuel demand
- Slow production
- Steam-burn risk
- Need for continuous supervision
- Regular cleaning
- Limited chemical protection
- Potential material-contamination problems
- No independent performance certification
Build it before an emergency.
Test it with safe tap water.
Inspect every fitting.
Measure the output.
Practice cooling and cleaning it.
A small system that has been safely tested is more useful than an impressive-looking device assembled for the first time when drinking water is already scarce.
Final Safety Note
This distiller must operate at atmospheric pressure.
Never heat a tightly sealed bottle, alter a pressure cooker, block a steam outlet, install a shutoff valve in the vapor path, or submerge the condenser outlet.
Use only materials rated for hot drinking-water contact. Steam, boiling brine, hot copper, and heated metal can cause severe burns.
Distillation can remove salt, germs, and many nonvolatile contaminants, but it cannot make every chemically contaminated source safe. Never process water suspected of containing gasoline, solvents, pesticides, toxic industrial chemicals, or radioactive material.
Use bottled or officially approved water whenever it is available.