A cold window can make an otherwise comfortable room feel almost impossible to heat.
Even when the window is closed, outdoor air may enter through worn weatherstripping, loose sash joints, gaps around the trim, or an imperfect latch. The glass itself also remains much colder than the room, making anyone sitting nearby feel chilled.
Replacing the entire window can be expensive.
A removable interior window insert offers a much simpler option.
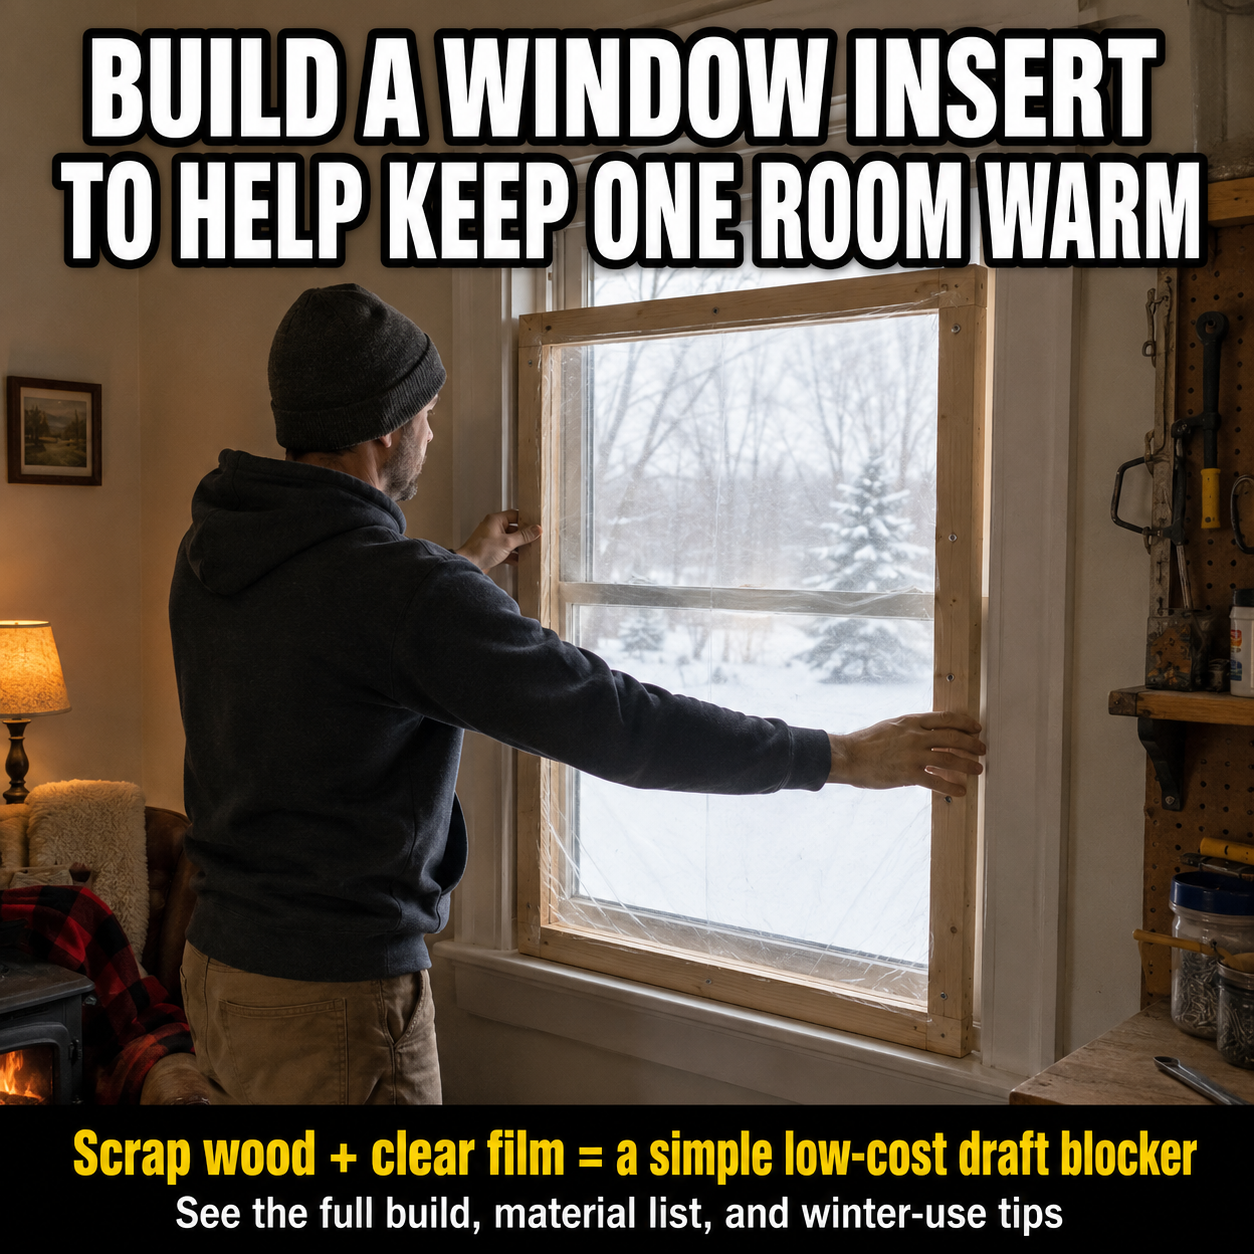
The insert is a lightweight wooden frame covered with clear window-insulation film. Soft weatherstripping around its perimeter allows it to press against the interior window opening, helping reduce drafts while creating an additional trapped layer of air.
It does not generate heat.
It does not transform an old window into a new high-performance unit.
But it can help the heat already inside the room escape more slowly.
ENERGY STAR explains that properly installed plastic over windows can reduce air leakage and create an additional insulating air layer. The Department of Energy also recognizes interior insulating panels and storm windows as affordable attachments for improving older windows. (ENERGY STAR)
For households trying to keep one room comfortable during cold weather, that can be a practical improvement.
What This Window Insert Actually Does
The insert works in two ways.
It helps block drafts
When weatherstripping seals the insert against the window jamb or trim, less room air can move toward the cold window and less outdoor air can enter through small gaps.
Draft reduction often makes a room feel more comfortable even when the thermometer changes very little.
It creates another air space
The clear film and existing window are separated by a still layer of air.
That air space slows heat transfer through the window assembly. Conventional storm windows use the same general principle: an extra glazing layer, additional air sealing, and an insulating air space improve the performance of the existing window. (The Department of Energy’s Energy.gov)
The insert is best described as a removable interior storm panel, not as permanent wall insulation.
Where This Project Is Most Useful
A removable insert can be particularly helpful for:
- Older single-pane windows
- Loose double-hung windows
- Windows with noticeable winter drafts
- Rental homes where permanent alterations are restricted
- Bedrooms used as designated warm rooms
- Living rooms occupied during a winter outage
- Workshops, cabins, and seasonal properties
- Windows that are rarely opened during winter
- Households unable to replace every old window at once
It may offer less improvement when the window is already a modern, tightly sealed, high-performance unit.
Before building several inserts, make one for the coldest window and test it for a week.
Important Limitations
This project can reduce heat loss, but it cannot correct every cold-room problem.
It will not repair:
- Missing wall insulation
- Major air leakage in the attic or basement
- A damaged exterior window
- Water entering around the window frame
- A broken or rotten sill
- Failed insulated-glass seals
- An undersized heating system
- An unsafe heating appliance
- Structural damage around the opening
ENERGY STAR notes that some of the largest air leaks in a home may be hidden in attics and basements rather than around the windows occupants can feel. A window insert should therefore be one part of a broader draft-control plan, not the only improvement considered. (ENERGY STAR)
Safety Check: Do Not Block an Emergency Exit
Before selecting a window, determine whether it serves as a required emergency escape or rescue opening.
This is especially important in:
- Bedrooms
- Basement sleeping areas
- Finished attics
- Rooms with only one practical exit
Building codes commonly require designated emergency escape windows to remain operable from inside without keys, tools, or special knowledge. Any screen, grille, cover, or similar device placed over such an opening must also be releasable or removable from inside. Local requirements can differ, so check with your building or fire department. (ICC Digital Codes)
For a required escape window, either:
- Choose a different window for this project, or
- Build an extremely lightweight insert that releases immediately from inside with one obvious motion
Do not screw, nail, permanently caulk, or lock an insert over an emergency escape window.
Everyone who sleeps in the room should know how to remove it in darkness.
Materials
For the wooden frame
- Straight, dry 1×2 lumber
- Exterior-grade or general-purpose wood screws
- Wood glue
- Small metal corner braces, optional
- One thin center brace for large windows
- Sandpaper
- Non-toxic finish, optional
Scrap wood is suitable when it is:
- Dry
- Straight
- Structurally sound
- Free of rot
- Free of mold
- Free of oil or chemical contamination
- Light enough to lift easily
Avoid unidentified pallet wood, pressure-treated scraps, or lumber that smells strongly of chemicals.
For the transparent covering
Choose one of the following:
- Clear shrink-to-fit window insulation film
- Heavy clear polyethylene film
- Clear reinforced window film
- Thin clear acrylic sheet
- Thin clear polycarbonate sheet
Shrink film is the least expensive and lightest option.
Acrylic or polycarbonate produces a more durable insert but costs more and requires different cutting and fastening methods.
For the perimeter seal
- Closed-cell adhesive foam weatherstripping
- Compressible silicone weatherstrip
- Felt weatherstrip for very light-duty use
- Removable magnetic tape, optional
- Turn buttons or rotating clips, optional
- Pull handles or fabric tabs
Closed-cell foam generally creates a better draft seal than loose felt because air does not move through it as readily.
Tools
- Tape measure
- Pencil
- Carpenter’s square
- Saw
- Drill or screwdriver
- Staple gun, optional
- Utility knife
- Scissors
- Hair dryer, when required by the film manufacturer
- Clamps
- Safety glasses
- Work gloves
- Straightedge
- Small level
Do not use an open flame to tighten plastic film.
A heat gun can easily overheat or melt thin film and may damage paint or nearby materials. Use the method specified by the insulation-film manufacturer.
Choosing the Installation Location
The frame can fit in one of two places.
Inside the window jamb
This creates a clean, recessed appearance.
It works best when:
- The jamb is deep enough
- The surfaces are reasonably square
- Handles and locks do not protrude into the space
- The window remains accessible behind the panel
Against the interior trim
This covers a larger area and can seal leakage around the edges of the window opening.
ENERGY STAR notes that plastic extending over the surrounding woodwork can help eliminate air leaks around the window as well as add an insulating layer. (ENERGY STAR)
A trim-mounted insert may be better when the jamb is irregular, shallow, or crowded by window hardware.
However, it is larger and more visible.
Step 1: Inspect the Existing Window
Do not cover an active water problem.
Examine the window carefully for:
- Soft or rotten wood
- Peeling paint
- Missing glazing
- Cracked glass
- Loose panes
- Water staining
- Exterior leakage
- Mold
- Condensation
- Gaps around the sash
- Damaged locks
- Missing weatherstripping
Repair serious defects before installing the insert.
Close the window completely and engage every lock. Locking the sash often pulls the window more tightly against its existing seals. DOE recommends keeping windows fully closed and latched during extreme outdoor temperatures to reduce air infiltration and uncomfortable drafts. (The Department of Energy’s Energy.gov)
Lead-Paint Warning for Older Homes
Windows are common locations for old lead-based paint.
Homes built before 1978 are more likely to contain it, and sanding, cutting, drilling, or scraping painted window components can create hazardous lead dust. EPA recommends lead-safe work practices for DIY projects and advises using a certified lead-safe contractor when appropriate. (US EPA)
A friction-fit insert can often be built without disturbing the original painted surface.
Stop and investigate before drilling into, sanding, or scraping old window trim.
Step 2: Locate the Drafts
Choose a cold or windy day.
Check around the closed window using:
- The back of a damp hand
- A thin tissue
- A strip of lightweight paper
- A flashlight at night
- A removable smoke pencil intended for draft testing
Do not use a candle, lighter, incense stick, or other open flame near curtains, plastic film, wood trim, or an unknown air leak.
Mark the areas where air movement is strongest.
The insert can help cover these leaks, but large stationary cracks around the trim may also require appropriate caulk. Moving window components generally use weatherstripping rather than permanent caulk. DOE describes caulk and weatherstripping as simple, effective air-sealing methods: caulk is typically used on stationary gaps, while weatherstripping is used around moving components. (The Department of Energy’s Energy.gov)
Do not caulk a window shut when it must remain operable.
Step 3: Measure the Opening
Window openings are rarely perfectly square.
Measure the intended installation area in at least six places:
Width
- Across the top
- Across the middle
- Across the bottom
Height
- Along the left side
- Through the center
- Along the right side
Use the smallest width and smallest height as the starting dimensions.
Also measure both diagonals.
When the diagonal measurements differ, the opening is not square. The frame must be made slightly smaller or shaped to match the opening.
Record all measurements clearly.
Do not rely on a single measurement taken across the middle.
Step 4: Plan the Finished Size
The correct allowance depends on the weatherstripping.
As a general starting point, build the wooden frame approximately:
- ¼ inch narrower than the smallest opening width
- ¼ inch shorter than the smallest opening height
This leaves roughly ⅛ inch around each side for compressible weatherstripping.
Thicker foam may require a larger allowance. Very soft foam may require less.
Before cutting the final frame, test a short piece of the chosen weatherstripping between two scraps. Compress it enough to create a seal without crushing it completely.
The insert should fit firmly, but it should not require pounding or prying.
Step 5: Cut the Wooden Frame
Cut two vertical pieces and two horizontal pieces.
There are several joint options.
Simple butt joints
The horizontal rails fit between the vertical side pieces.
This is the easiest method for beginners.
Fasten each corner with:
- Wood glue
- Two small screws
- An optional corner brace
Half-lap joints
Part of each overlapping board is removed so the two pieces meet at the same thickness.
These joints are stronger and flatter, but they require more careful cutting.
Pocket-hole joints
Pocket screws create a clean front surface.
Use short screws that cannot emerge through the opposite face.
Whichever method you use, assemble the frame on a flat surface.
Measure both diagonals before the glue dries. Adjust the frame until they match.
Step 6: Add a Center Brace When Needed
A large film-covered frame may bend or twist.
Add a narrow center brace when the insert is:
- Wider than approximately 30 to 36 inches
- Taller than approximately 48 inches
- Made from thin or flexible wood
- Likely to be removed frequently
Position the brace vertically or horizontally to interfere as little as possible with the view.
The brace should sit flush with the frame so it does not prevent the clear film from lying flat.
For very large windows, two smaller inserts may be easier and safer than one oversized panel.
Step 7: Test the Bare Frame
Place the unfinished wooden frame into the opening.
Check that:
- It enters without force
- It sits flat
- It does not rock
- It does not interfere with locks
- It can be removed easily
- It leaves room for weatherstripping
- It does not block a required escape route
- It does not press against the glass
Mark any high spots and sand them gradually.
Do not force a rigid wooden frame into an uneven opening. Excess pressure may damage the trim, crack the frame, or make emergency removal difficult.
Attach two small pull tabs or handles before applying the film. These make the finished panel easier to remove.
Step 8: Sand and Finish the Frame
Round sharp corners and remove splinters.
Pay special attention to the surfaces that will touch the clear film. A small splinter can puncture it.
An optional clear finish can make the frame easier to clean and help reduce seasonal wood movement. Apply paint or finish in a ventilated area and allow it to cure completely before bringing the frame into the room.
EPA recommends applying finishes outside when practical and bringing materials indoors only after they are dry. (US EPA)
Do not install a frame that still smells strongly of paint, glue, or sealer.
Step 9: Apply the Clear Film
Place the frame on a clean, flat surface.
Follow the instructions supplied with the film product. A typical method is:
- Clean dust from the wooden frame.
- Apply double-sided mounting tape around the full perimeter.
- Add tape over the center brace.
- Cut the film several inches larger than the frame.
- Lay it across the adhesive without stretching excessively.
- Press it firmly along every edge.
- Trim excess film carefully.
- Use a hair dryer only when the product calls for shrinking.
- Move the warm air continuously until wrinkles tighten.
Do not hold the dryer in one place.
Keep it away from water, curtains, bedding, loose paper, and other combustible materials.
The finished film should be smooth but not tightened so aggressively that it bends the wooden frame.
One Layer or Two?
Single-layer insert
Film is applied to the room-facing side of the frame.
Advantages:
- Simple
- Lightweight
- Inexpensive
- Easy to repair
- Creates an air space between the insert and window
Double-layer insert
Film is applied to both faces of the wooden frame.
Advantages:
- Adds another enclosed air space
- Makes the frame more rigid
- Protects the center opening from either direction
Disadvantages:
- More difficult to assemble
- More vulnerable to trapped moisture
- Harder to repair internally
- May bow if the two layers are tightened unevenly
For most first-time builds, one carefully sealed layer is sufficient.
Step 10: Install the Weatherstripping
Turn the completed frame over.
Apply weatherstripping around the perimeter that will contact the window opening.
Use one continuous run whenever possible.
At the corners:
- Cut clean square joints, or
- Create neatly fitted 45-degree joints
Avoid gaps and overlapping lumps.
Do not stretch adhesive foam during installation. Stretched foam may shrink later and create open corners.
Press the weatherstrip firmly and allow its adhesive to bond for the time specified by the manufacturer.
Step 11: Install the Insert
Clean and dry the window jamb or trim.
Place the lower edge of the insert into position first. Then press the top and sides gently into the opening.
Check the entire perimeter.
The weatherstripping should be compressed consistently without being flattened completely.
A correctly fitted insert should:
- Remain in place
- Have no obvious perimeter gaps
- Be removable without tools
- Avoid contact with the original glass
- Leave the pull tabs accessible
For non-egress windows, removable turn buttons or rotating clips can provide additional security.
Do not drive screws through the clear film.
Do not permanently fasten the frame into place.
Step 12: Test for Air Leakage
Repeat the draft test around the insert.
Pay attention to:
- Corners
- The meeting point between weatherstrip ends
- Warped trim
- The center of long frame members
- Locations around pull tabs
A visible gap can often be corrected with:
- Slightly thicker weatherstripping
- An additional retaining clip
- A straighter frame
- A small shim behind a loose clip
- Repositioning the insert
Do not use permanent caulk between the removable frame and trim.
Managing Condensation
Condensation deserves close attention.
Warm indoor air can hold moisture. When that moist air reaches a sufficiently cold window, water may form on the glass or frame.
A well-sealed interior panel can reduce condensation by limiting the amount of humid room air reaching the cold original window. However, a leaky interior panel may allow warm air into the cavity, where it can cool and condense against the exterior glass.
EPA recommends keeping indoor relative humidity below 60%, ideally around 30% to 50%, and responding quickly when moisture collects on windows or other surfaces. (US EPA)
Check the insert daily during the first week
Look for:
- Fogging between the layers
- Water droplets
- Wet weatherstripping
- Damp wood
- Frost on the existing window
- Peeling paint
- Musty odor
- Dark spots
When condensation appears:
- Remove the insert.
- Dry the window and frame completely.
- Check the insert’s room-side seal.
- Reduce indoor humidity.
- Use kitchen and bathroom exhaust fans.
- Avoid drying wet clothes in the room.
- Check for an exterior water leak.
- Reinstall only after everything is dry.
Do not leave moisture trapped behind the panel for an entire winter.
Persistent condensation can damage finishes and contribute to mold growth.
How Much Warmer Will the Room Become?
There is no honest universal answer.
The improvement depends on:
- Existing window type
- Amount of air leakage
- Outdoor temperature
- Wind
- Insert fit
- Weatherstrip quality
- Window size
- Heating system
- Wall and ceiling insulation
- Number of windows treated
- Indoor humidity
The most noticeable result may be reduced drafts and better comfort near the window rather than a dramatic rise in the room’s air temperature.
Do not advertise a specific percentage of energy savings for a homemade insert unless the project has been tested properly.
Commercially rated storm windows can deliver measurable savings, but those products have controlled materials and performance ratings that a scrap-wood DIY panel does not. ENERGY STAR estimates that certified low-emissivity storm windows can reduce annual heating and cooling costs when installed over certain single-pane windows, but that figure should not be transferred directly to this homemade design. (ENERGY STAR)
Creating a “Warm Room” During an Outage
A window insert becomes more useful when combined with a sensible one-room strategy.
Choose a room that:
- Is small enough to heat efficiently
- Has few exterior windows
- Has a door that can close
- Is above ground when possible
- Has working smoke and carbon-monoxide alarms
- Contains enough room for household members
- Does not require unsafe heating equipment
Then:
- Install removable window inserts
- Close unused rooms
- Use draft snakes at appropriate doors
- Open curtains during sunny daytime hours
- Close insulated curtains after sunset
- Wear layered clothing
- Use blankets and sleeping bags
- Keep beds and seating away from cold exterior walls when possible
- Monitor indoor temperature
Do not seal a room so tightly that required ventilation, combustion-air supply, or indoor air quality is compromised.
A house operates as a system. Air sealing changes can interact with furnaces, fireplaces, water heaters, and other fuel-burning equipment. Larger air-sealing projects should be evaluated by a qualified professional when combustion appliances are present. (ENERGY STAR)
Heating Safety Still Matters
A warmer-feeling room can tempt people to use improvised heating methods.
Do not use:
- A charcoal grill indoors
- A propane barbecue indoors
- A camping stove as a room heater
- A generator inside a house or garage
- An oven or kitchen range to heat the room
- An open flame near the plastic insert
CPSC warns that generators must be operated outside, far from windows, doors, and vents. Opening a window or garage door does not provide enough ventilation to prevent lethal carbon-monoxide accumulation. (U.S. Consumer Product Safety Commission)
Keep portable space heaters at least three feet from film, curtains, bedding, furniture, papers, and other combustible materials. (U.S. Consumer Product Safety Commission)
Maintain working smoke alarms and carbon-monoxide alarms.
The window insert helps retain heat. It does not make unsafe heating equipment safe.
Do Not Cover These Openings
Never use the insert to obstruct:
- A required emergency escape window
- A fresh-air intake
- A combustion-air opening
- A furnace or water-heater vent
- A bathroom exhaust outlet
- A dryer vent
- A window-mounted carbon-monoxide exhaust route
- An operable window required for a specific appliance
- A damaged window that needs immediate repair
Do not install film directly over a window air-conditioning unit.
Remove or properly winterize the unit according to its manufacturer’s instructions.
Maintenance
Weekly during cold weather
- Check for condensation
- Inspect the film for punctures
- Check weatherstripping adhesion
- Look for mold or dampness
- Confirm that the panel remains removable
- Test any quick-release hardware
- Clean dust from the room-facing surface
After severe wind or temperature changes
- Repeat the draft test
- Check frame fit
- Look for newly formed moisture
- Inspect the original window for leakage
At the end of winter
- Remove the insert carefully.
- Clean both sides.
- Dry it completely.
- Inspect the wooden frame.
- Repair punctures or loose film.
- Replace crushed weatherstripping.
- Label the insert by room and window.
- Store it vertically in a dry location.
Do not store the frame near sharp tools or where heavy objects can lean against the film.
Common Building Mistakes
Measuring only once
Old openings are often tapered or out of square.
Measure at the top, middle, bottom, left, center, and right.
Building the frame too tightly
Seasonal wood movement can make a tight insert difficult to remove.
Leave room for compressible weatherstripping.
Using warped scrap lumber
A bowed frame cannot seal consistently.
Select the straightest pieces available.
Forgetting pull tabs
A tightly fitted insert can be frustrating to remove without handles.
Install the tabs before applying the film.
Stretching the film excessively
Overtightened film can bend a lightweight frame.
Tighten only enough to remove major wrinkles.
Leaving sharp corners
Splinters and screw tips can puncture the plastic.
Sand the frame carefully.
Blocking an escape window
The insert must never trap someone inside the room.
Use another opening or build an obvious one-motion release.
Ignoring condensation
Water behind the panel is not harmless.
Remove the insert, dry the area, and correct the moisture problem.
Installing it over damaged wood
An insert can conceal decay, leaks, peeling paint, and mold.
Repair the window first.
Claiming it will heat the room
The insert reduces heat loss. It does not produce heat.
Optional Improvements
Add a second film layer
Cover both faces of the frame to create another air cavity.
Monitor carefully for trapped moisture.
Use clear acrylic
Acrylic is more durable than flexible film and easier to clean.
It is also heavier, more expensive, and more likely to crack during drilling.
Use polycarbonate
Polycarbonate is lightweight and impact-resistant.
Verify that the sheet is suitable for the temperatures and indoor application.
Add magnetic mounting
Attach magnetic tape to the frame and compatible steel tape to the trim.
This creates a clean, quickly removable installation.
Test the adhesive and mounting strength before depending on it.
Add low-profile handles
Small cabinet pulls make a larger panel easier to lift.
Keep them clear of curtains and blinds.
Build separate upper and lower panels
Two smaller inserts may be easier to store and remove than one full-height frame.
Ensure the meeting joint seals properly.
Add removable insulated curtains
An insert addresses leakage and creates an air layer. A properly used insulated curtain can provide additional nighttime protection.
Avoid trapping persistent moisture between the curtain, insert, and window.
Is This Project Worth Building?
For a drafty window, yes.
It uses inexpensive materials, requires no electricity after installation, and can be removed when warmer weather returns.
Its strongest benefits are practical:
- Reduced cold drafts
- Improved comfort near the window
- A clearer warm-room strategy
- Reusable seasonal construction
- Less damage than permanently sealing the window
- An affordable test before purchasing commercial storm panels
The key is to build it accurately.
A poorly fitted frame with perimeter gaps may provide little improvement. A tightly sealed but permanently fastened panel may create an escape hazard. An insert left over a wet window may conceal a moisture problem.
Build one panel first.
Test it on a cold, windy day.
Check it for condensation.
Practice removing it.
Then decide whether additional windows are worth treating.
Final Safety Note
This insert is a temporary draft-reduction and window-insulation project. It is not a structural window repair, certified storm window, heat source, or substitute for safe home weatherization.
Do not block a required emergency escape opening, ventilation path, or combustion-air supply. Keep plastic film and wood at least three feet from portable heaters and other heat sources. Use working smoke and carbon-monoxide alarms, and never operate generators, grills, or outdoor combustion equipment indoors.
Inspect the window regularly for moisture, mold, leakage, and damaged paint.