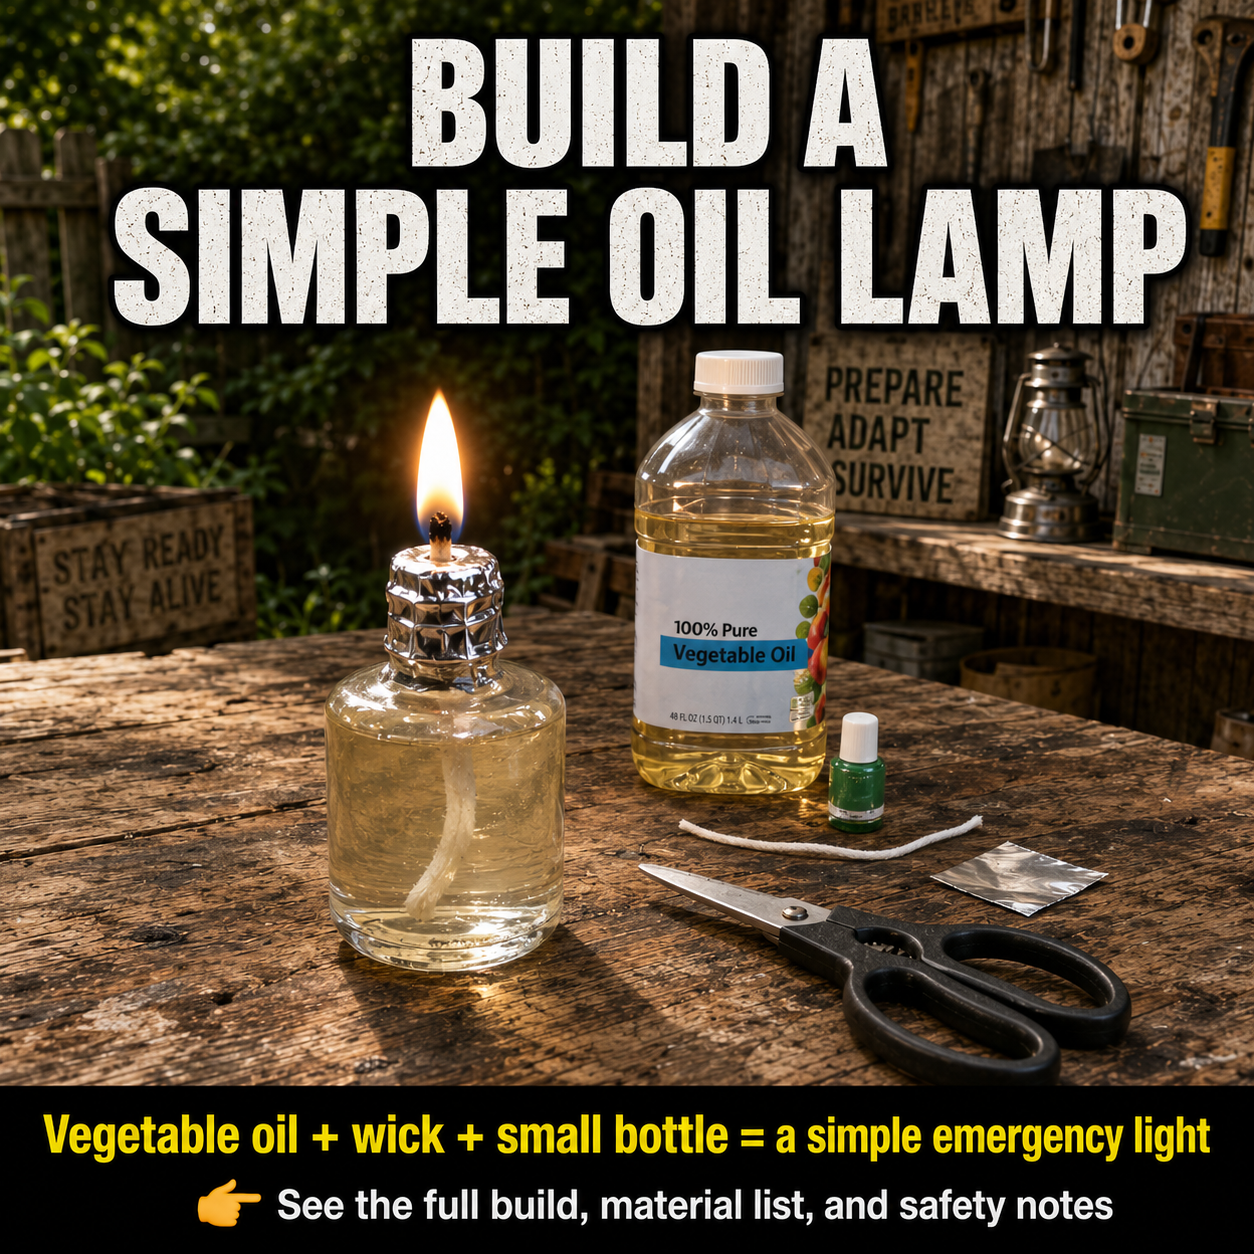
When the electricity fails, even a small amount of light can make an enormous difference.
It can help you find a flashlight, read an emergency radio, organize medicine, prepare a simple meal, or move safely through a dark room.
A homemade vegetable-oil lamp uses a basic principle that has provided light for centuries: a cotton wick draws liquid fuel upward, and the exposed tip burns above the container.
The materials appear simple:
- A small container
- Vegetable oil
- Cotton wick
- A wick holder
- A stable noncombustible base
However, this project includes an open flame and liquid fuel. It should never be treated as a toy, decoration, unattended night-light, or primary blackout-lighting plan.
The U.S. Fire Administration recommends using flashlights rather than candles during power outages. When an open flame is used, it should remain in a sturdy holder, at least 12 inches from anything combustible, and be extinguished whenever the user leaves the room or goes to sleep. (U.S. Fire Administration)
A homemade oil lamp should therefore be considered a last-resort, continuously supervised light source.
Important Correction to the Featured Design
The image shows a small glass bottle with foil wrapped around its neck to hold the wick.
That arrangement is visually simple, but it should not be copied exactly.
Potential problems include:
- The bottle may not be designed for exposure to flame or concentrated heat.
- A tall, narrow bottle may tip more easily than a low, wide container.
- Thin foil can loosen, tear, or allow the wick to fall into the oil.
- A large wick can produce an unexpectedly high flame.
- Refilling a warm container can spill oil near an ignition source.
- A closed or poorly vented cap can interfere with normal fuel movement.
- A bottle that resembles a beverage container could be mistaken for something drinkable.
CPSC has recalled decorative glass oil lamps because some could tip, crack, or shatter during use, creating fire, burn, and laceration hazards. (U.S. Consumer Product Safety Commission)
The safer version described below uses a short, broad container, a rigid metal wick holder, and a separate metal tray.
What a Vegetable-Oil Lamp Actually Does
The wick does not burn alone.
Vegetable oil moves upward through the cotton fibers through capillary action. Heat from the flame vaporizes a small amount of oil near the wick tip, and that vapor supports the flame.
The container acts as the fuel reservoir.
The wick controls how much oil reaches the flame. Its exposed height has a major effect on the result:
- A very short wick produces a small flame.
- A taller wick produces more light but also more heat, smoke, and fuel consumption.
- An excessively long wick may flare, soot heavily, or become difficult to control.
A vegetable-oil lamp generally provides much less useful illumination than a modern LED lantern.
Its value is simplicity—not brightness or efficiency.
Use Electric Emergency Lighting First
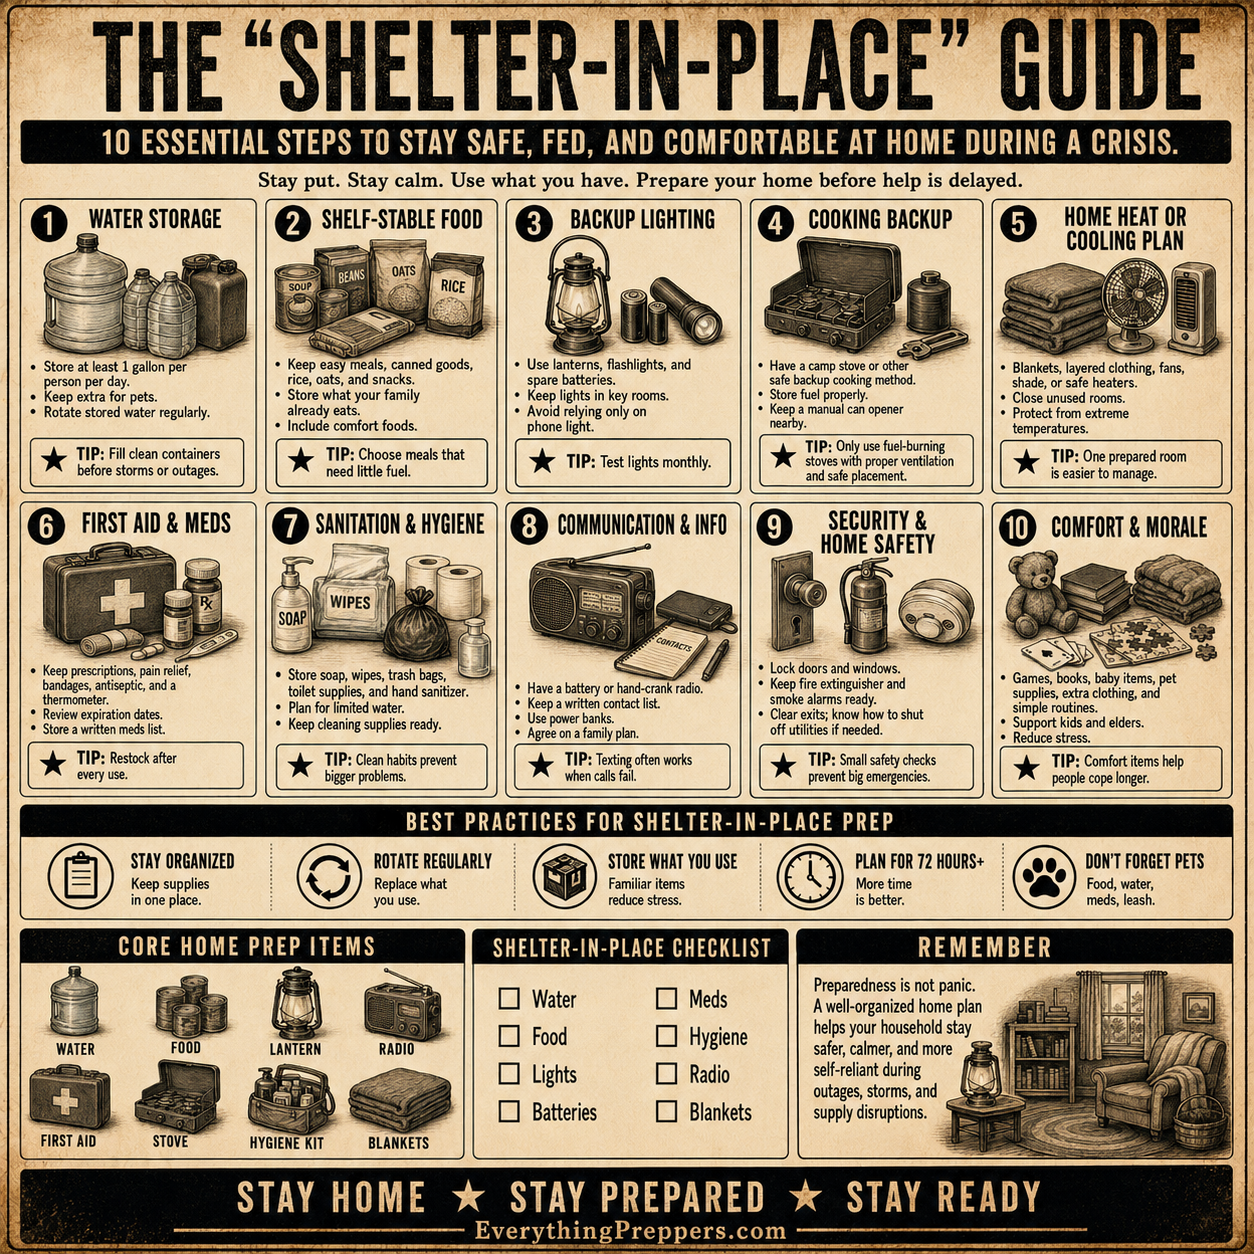
Before building an open-flame lamp, assemble a safer blackout-lighting kit.
Ideally, keep:
- LED flashlights
- Headlamps
- Battery-powered lanterns
- Rechargeable lanterns
- Power banks
- Solar-rechargeable lights
- Hand-crank lights
- Spare batteries in the correct sizes
CDC preparedness guidance includes flashlights, headlamps, and battery-powered lanterns among recommended emergency power and lighting supplies. (CDC)
CPSC also recommends battery-powered flashlights or lanterns instead of candles during power outages. (U.S. Consumer Product Safety Commission)
Build the oil lamp as a backup skill, but do not make it your first lighting choice.
Materials
Lamp reservoir
Choose a low, stable container such as:
- A small heavy glass jar designed for candle use
- A short metal container
- A purpose-made oil-lamp reservoir
- A shallow ceramic vessel confirmed to be heat-resistant
The container should be:
- Clean
- Dry
- Broad at the base
- Difficult to tip
- Free from cracks
- Free from sharp edges
- Clearly labeled
- Used only for the lamp
Do not use:
- Plastic bottles
- Thin beverage bottles
- Baby-food jars of uncertain heat resistance
- Cracked glass
- Tall narrow containers
- Containers previously used for chemicals
- Decorative pottery of unknown composition
- Containers resembling drink bottles
A metal reservoir avoids the risk of glass breakage, although the metal can become hot.
Wick
Use:
- Purpose-made cotton lamp wick
- Untreated braided cotton cord
- Clean cotton shoelace with synthetic tips removed
Avoid:
- Nylon
- Polyester
- Paracord
- Plastic rope
- Waxed cord
- Dyed or chemically treated string
- Fiberglass insulation
- Paper towel as a permanent wick
Synthetic fibers may melt rather than draw oil properly.
Wick holder
The safest choice is a purpose-made metal wick holder.
A simple homemade holder can be made from:
- A clean metal jar lid
- A short piece of small-diameter metal tubing
- A metal washer
- A metal grommet designed to fit securely
The holder must keep the wick upright without sealing the reservoir completely.
Do not rely on loose aluminum foil as the lamp’s only structural wick support.
Fuel
Use one fresh cooking oil, such as:
- Canola oil
- Sunflower oil
- Soybean oil
- Olive oil
- Corn oil
Do not mix vegetable oil with:
- Gasoline
- Kerosene
- Diesel fuel
- Alcohol
- Paint thinner
- Camping fuel
- Lighter fluid
- Essential oils
- Unidentified liquids
Never try to make the flame larger by adding a more volatile fuel.
Safety equipment
Have these ready before lighting:
- Metal baking tray
- Snuffer or metal lid
- ABC-rated fire extinguisher
- Working smoke alarms
- Heat-resistant gloves
- Flashlight
- Long-reach lighter or match
- Damp cloth for cleaning unlit spills
USFA identifies Class B fire extinguishers as suitable for fires involving combustible and flammable liquids such as oil. Multipurpose ABC extinguishers are common household options. (U.S. Fire Administration)
Do not use water on burning oil.
Step 1: Select the Safest Location
Choose a room where someone can remain awake and supervise the lamp continuously.
Place it on:
- A sturdy table
- A stone countertop
- A metal workbench
- A stable noncombustible shelf
Keep it away from:
- Curtains
- Paper
- Bedding
- Clothing
- Upholstered furniture
- Wood shavings
- Cardboard
- Plastic
- Aerosol cans
- Cleaning products
- Stored fuel
- Medical oxygen
- Children and pets
USFA recommends keeping open flames at least 12 inches from anything that can burn. More distance is better for a homemade oil lamp because its fuel can spill if the container is disturbed. (U.S. Fire Administration)
Do not use the lamp:
- In a bedroom
- In a bathroom
- In a sleeping area
- Inside a tent
- Inside a vehicle
- In a crowded hallway
- On the floor
- Near an exit route
- Where someone may bump the table
USFA specifically advises against lit candles in bedrooms, bathrooms, and sleeping areas. (U.S. Fire Administration)
Step 2: Make the Metal Wick Holder
Use a clean metal lid that fits the chosen reservoir without creating an airtight seal.
Mark the center.
Create a small opening just wide enough for the cotton wick or metal wick tube. Smooth every sharp edge.
When using a short metal tube:
- Insert it through the lid.
- Secure it with metal washers where appropriate.
- Confirm that it cannot fall into the reservoir.
- Leave enough space around the assembly for air to enter.
- Check that the lid can be lifted off without tools.
Do not solder, glue, or seal the holder using unidentified materials directly above the fuel.
A purpose-made wick insert is preferable because it is designed to hold the wick consistently.
Step 3: Prepare the Wick
Cut a piece of cotton wick long enough to reach the bottom of the reservoir while extending slightly through the holder.
A practical starting length is approximately:
- Container depth
- Plus one to two extra inches
Thread the wick through the holder.
Leave only about ⅛ inch exposed above the metal at first.
A very tall exposed wick is not needed. The large flame shown in the image is more dramatic than desirable for emergency indoor lighting.
The lower end should lie naturally in the oil without being tightly knotted.
Step 4: Add the Vegetable Oil
Place the empty lamp on its metal tray before filling it.
Add enough oil to cover most of the lower wick while leaving generous empty space at the top of the reservoir.
Do not fill the container to the rim.
A starting fill level of one-half to two-thirds of the reservoir provides space for:
- Moving the lamp before lighting
- Wick displacement
- Minor thermal expansion
- Reducing spill risk
Immediately wipe away any oil from:
- The reservoir exterior
- The lid
- The metal tray
- Your hands
- The surrounding surface
Do not light a lamp that has oil pooled around its base.
Step 5: Saturate the Wick
After installing the wick holder, allow time for the oil to travel up the cotton.
This may take several minutes.
The exposed tip should become visibly darker from absorbed oil.
Do not pour oil directly over the exposed wick while the holder is installed. Excess oil on the top surface can create an uncontrolled initial flame.
Never apply an accelerant to “help” the wick light.
Step 6: Perform the First Test Outdoors
The first lighting should occur outdoors on a calm day, on a noncombustible surface and away from dry vegetation.
This allows you to observe:
- Flame height
- Smoke
- Wick movement
- Container temperature
- Holder stability
- Oil leakage
- Unusual odor
- Glass behavior
Light the wick using a long match or lighter.
Remain to the side rather than leaning over the reservoir.
A suitable flame should be small and steady.
Extinguish it immediately when:
- The flame grows rapidly
- Black smoke appears continuously
- The container cracks
- The wick holder shifts
- Oil leaks
- The flame reaches the lid
- The lamp becomes unstable
- Burning oil appears outside the wick
CPSC oil-lamp recalls show that glass failure, tipping, fuel leakage, and unexpected flare-ups are credible risks—not merely theoretical concerns. (U.S. Consumer Product Safety Commission)
Step 7: Adjust the Wick
Allow the lamp to cool completely.
When the flame was too large or smoky, trim the exposed wick shorter.
When it repeatedly extinguished, expose only a very small additional amount.
Make adjustments in tiny increments.
Do not:
- Pull the wick while it is burning
- Push it into hot oil
- Cut it over the open reservoir
- Touch the holder while it is hot
- Add oil while the flame remains lit
A small flame is the goal.
This is an emergency marker or task light—not a room heater.
Step 8: Move It Indoors Only After Testing
Before bringing the cooled lamp inside, check that:
- The reservoir is undamaged.
- The lid fits securely.
- The wick cannot fall into the oil.
- The exterior is completely dry.
- The base is broad and stable.
- The metal tray is large enough to catch the reservoir’s contents.
- A snuffer is within reach.
- The smoke alarm works.
- A flashlight remains available.
Carry the lamp while it is unlit and cool.
Never carry a burning oil lamp from one room to another.
How to Light It Safely
Before every lighting:
- Clear the surrounding area.
- Place the lamp in the center of its tray.
- Confirm that the tray is stable.
- Check the wick height.
- Inspect the reservoir for damage.
- Verify that no oil has spilled.
- Keep the snuffer and extinguisher nearby.
- Remove children and pets from the area.
- Tie back long hair and loose clothing.
- Light from the side with a long match or lighter.
Remain in the room and remain awake.
Do not use the lamp when you are tired, impaired, distracted, or likely to fall asleep.
How to Extinguish the Lamp
Do not blow forcefully toward the lamp.
Blowing can disturb the flame, splash oil, or tip a lightweight holder.
Instead:
- Approach from the side.
- Place a purpose-made snuffer or noncombustible metal cap over the wick.
- Wait until the flame is completely out.
- Leave the cover in place briefly.
- Watch for re-ignition.
- Allow the entire lamp to cool before touching it.
Do not seal the complete hot reservoir tightly.
Never pour water into hot vegetable oil.
Keep the lamp in place until it is fully cool.
Never Refill a Burning or Hot Lamp
This rule is critical.
Before refilling:
- Extinguish the flame.
- Wait until the reservoir and wick holder are completely cool.
- Move the lamp to a well-lit filling area.
- Remove the lid.
- Add oil slowly.
- Wipe every spill.
- Reinstall the holder.
- Return it to the tray.
- Wait for the wick to saturate again.
Keep the large cooking-oil bottle away from the burning lamp.
Do not store the fuel bottle on the same small table as the flame.
How Much Light Will It Produce?
A single vegetable-oil wick usually creates a small pool of warm light.
It may be sufficient for:
- Marking a doorway
- Identifying a table
- Reading a label briefly
- Finding emergency supplies
- Providing limited task lighting
It will not illuminate a large room as effectively as an LED lantern.
You can make better use of its limited output by placing a noncombustible reflector at a safe distance behind it, such as a purpose-made metal lantern reflector. Do not surround the flame with cardboard, foam board, fabric, wood, plastic, or loose aluminum foil.
Maintain at least the recommended clearance from combustible objects.
Never place the lamp beneath a shelf.
Do Not Add Multiple Wicks
Adding more wicks may appear to increase brightness, but it also increases:
- Heat
- Fuel consumption
- Smoke
- Container temperature
- Chance of flare-up
- Risk of glass damage
- Difficulty extinguishing the lamp
A small reservoir should use one small wick.
For greater illumination, use several LED lights in different locations rather than building a multi-flame homemade lamp.
Indoor Air Considerations
Any flame consumes oxygen and produces combustion byproducts.
A properly adjusted wick should not produce heavy visible smoke. Persistent soot indicates poor combustion, an excessively long wick, unsuitable fuel, contamination, or insufficient air movement.
Extinguish the lamp when it produces:
- Black smoke
- Strong irritation
- Persistent odor
- Headache
- Eye watering
- Difficulty breathing
- Soot on nearby surfaces
Do not use open flames near anyone receiving supplemental oxygen.
Do not use the lamp as a heating source.
Children, Pets, and Poisoning Risks
Keep the lamp and fuel where children cannot reach them.
Oil lamps can cause injury through:
- Flame contact
- Hot surfaces
- Broken glass
- Spilled burning fuel
- Ingestion
- Aspiration of lamp fuel
- Tipping
CDC has documented severe poisoning after a child ingested household lamp oil. (CDC)
Although this project uses cooking oil rather than commercial hydrocarbon lamp oil, the lamp should still be clearly labeled and never stored in an ordinary beverage bottle.
A child-resistant location is essential.
Smoke Alarms and Escape Planning
A homemade lamp should never be operated in a home without working smoke alarms.
CPSC recommends smoke alarms on every level and inside each bedroom, with monthly testing and battery backup for outages. (U.S. Consumer Product Safety Commission)
Before using the lamp:
- Test the nearest smoke alarm.
- Keep exits unobstructed.
- Know where the extinguisher is located.
- Make sure everyone knows how to leave the home.
- Keep a flashlight beside the lamp.
- Never position the flame between occupants and an exit.
Do not disable an alarm because the lamp produces smoke.
Extinguish the lamp and correct the problem.
Cleaning and Maintenance
After each use
Once the lamp is completely cool:
- Check the container for cracks.
- Inspect the wick holder.
- Wipe the exterior.
- Clean oil from the tray.
- Trim charred wick material.
- Confirm that the lid remains secure.
- Store the lamp upright.
Periodically
Replace the wick when it becomes:
- Hard
- Heavily charred
- Frayed
- Contaminated
- Difficult to adjust
- Too short to reach the oil
Discard the reservoir when it becomes:
- Cracked
- Chipped
- Warped
- Heavily corroded
- Difficult to clean
- Unstable
Do not reuse spilled or contaminated lamp oil for cooking.
Common Mistakes
Using a tall beverage bottle
A tall narrow container is easier to knock over.
Choose a short, broad reservoir.
Holding the wick with loose foil
Foil can tear or shift.
Use a rigid metal wick holder.
Exposing too much wick
A large flame increases heat, smoke, and risk.
Begin with approximately ⅛ inch.
Filling the container to the top
Leave substantial headspace to reduce spills.
Moving the lamp while burning
Extinguish it and allow it to cool first.
Refilling while hot
Never add fuel to a burning or warm lamp.
Leaving the oil bottle nearby
Store the main fuel supply away from the flame.
Using it around curtains
Maintain at least 12 inches from anything combustible; greater separation is preferable. (U.S. Fire Administration)
Leaving it unattended
USFA and CPSC advise extinguishing open-flame lights when leaving the room and before sleeping. (U.S. Fire Administration)
Using it as overnight lighting
Never sleep with a homemade lamp burning.
Using water on burning oil
Do not pour or spray water onto an oil fire.
Evacuate when the fire cannot be safely controlled and call emergency services.
Optional Safer Improvements
Use a commercially manufactured wick assembly
A purpose-built burner provides better control than an improvised foil cap.
Ensure it is compatible with the reservoir and chosen fuel.
Use a metal reservoir
Metal avoids glass-shattering risk.
Remember that metal surfaces can become hot.
Add a wide steel tray
The tray should be large enough to contain the reservoir’s fuel if the lamp leaks.
Do not use a plastic tray.
Add a metal guard
A broad wire guard can help prevent accidental contact, but it must not trap heat or make extinguishing difficult.
It does not make the lamp child-safe.
Add a metal reflector
A purpose-made reflector can direct more light toward the room.
Keep it outside the flame’s heat zone and maintain adequate clearance.
Replace the flame with a wick-shaped LED
The best improvement is removing combustion entirely.
A small rechargeable LED placed inside the same decorative enclosure can provide similar visual orientation without liquid fuel or an open flame.
Is This Project Worth Building?
It is worth understanding as a traditional emergency-lighting skill.
The project demonstrates:
- How a wick transports fuel
- Why flame size depends on wick exposure
- How simple materials can provide limited light
- Why container stability matters
- Why preparedness requires several backup methods
But it should remain near the bottom of your emergency-lighting hierarchy.
A safer order is:
- Headlamp
- LED flashlight
- Battery-powered lantern
- Rechargeable or solar lantern
- Hand-crank light
- Homemade open-flame lamp only as a last resort
The safest time to prepare is before the outage.
Buy lights.
Charge batteries.
Test smoke alarms.
Keep the vegetable-oil lamp as a supervised backup skill—not the only thing standing between your household and darkness.
Final Safety Note
A vegetable-oil lamp contains an open flame and liquid fuel.
Use flashlights or battery-operated lanterns whenever possible. Never leave the lamp unattended, carry it while burning, refill it while warm, use it in a sleeping area, or place it near anything combustible.
Use a low, stable, heat-resistant container with a rigid metal wick holder. Set it inside a wide metal tray, expose only a small amount of wick, and keep a proper snuffer and fire extinguisher nearby.
Extinguish the lamp before leaving the room or going to sleep. Keep it away from children, pets, medical oxygen, curtains, bedding, and all exit routes.