A power outage can stop a well pump, interrupt municipal treatment, or leave you depending on water collected from an uncertain source.
That is when a gravity-fed water station becomes useful.
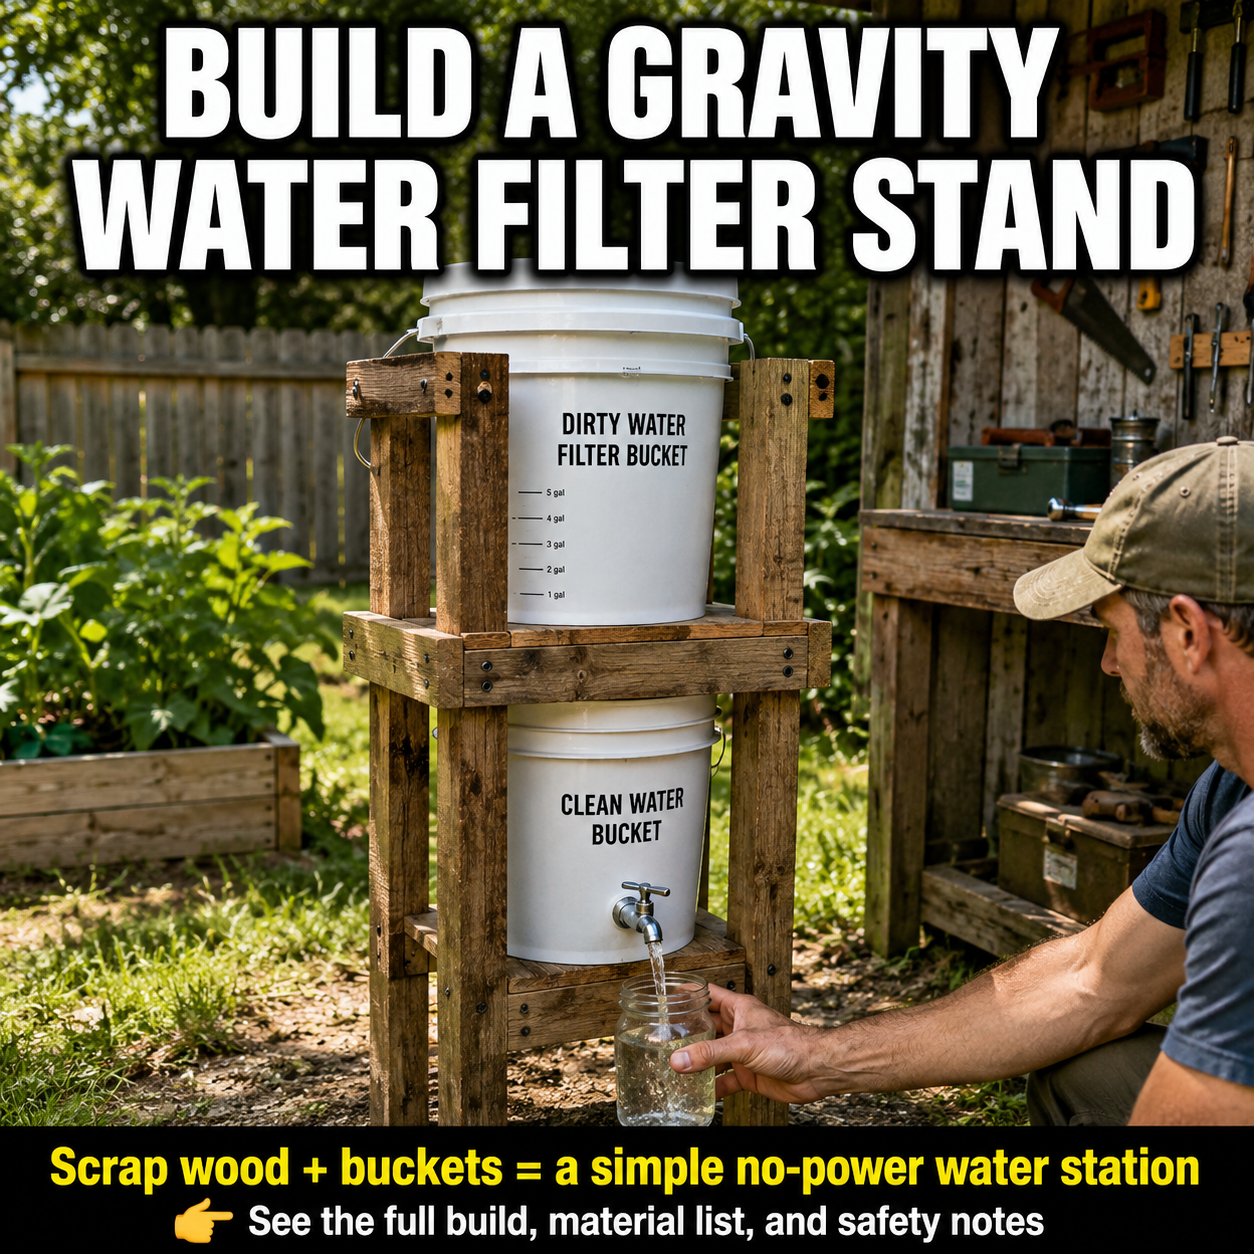
It requires no electricity, no pressure pump, and no complicated controls. Water placed in an upper bucket moves through compatible filter elements and collects in a covered lower bucket. A spigot allows the treated water to be dispensed without repeatedly removing the lid.
The wooden stand does not purify the water by itself.
Its purpose is to elevate, protect, and stabilize a properly assembled gravity-filter system. It also creates enough clearance beneath the spigot to fill a glass, cooking pot, or water bottle.
Built correctly, this is a practical project for:
- Temporary power outages
- Storm preparation
- Remote cabins
- Campsites
- Workshops
- Backup household water treatment
- Community emergency stations
However, the performance of the station depends entirely on the filter installed inside it.
A bucket filled with random layers of gravel, sand, and charcoal may improve the appearance of cloudy water, but that does not prove the water is safe to drink. Filters differ greatly in their ability to remove bacteria, viruses, parasites, chemicals, and other contaminants. CDC guidance specifically warns that filters that remove germs may not remove chemicals, while filters intended mainly for taste and odor may not make unsafe water microbiologically safe. (CDC)
For drinking-water use, install commercially manufactured gravity-filter elements that are rated for the contaminants you expect to encounter, and follow their instructions exactly.
What This Project Actually Builds
This project has three separate parts:
1. The wooden stand
The stand raises the system, protects it from tipping, and supports the weight of approximately ten gallons of water.
Because one US gallon of water weighs about 8.3 pounds, two full five-gallon buckets can place more than 80 pounds of water on the structure before accounting for the buckets, filters, and hardware.
Build the stand sturdily. Do not treat it like a lightweight plant shelf.
2. The upper source-water bucket
This bucket holds the water awaiting treatment.
One or more compatible gravity-filter elements are installed through its bottom according to the filter manufacturer’s instructions.
3. The lower treated-water bucket
Filtered water drips into this covered collection bucket.
A spigot installed near the bottom allows you to dispense water without dipping cups, hands, or utensils into the stored supply.
For clarity, label the buckets:
- SOURCE WATER
- TREATED WATER
Avoid labeling the lower bucket “safe water” unless you know the filter is appropriate for the water source and the system has been operated and maintained correctly.
Why Put the Buckets on a Stand?
You can operate many two-bucket systems by stacking the buckets on a table. A dedicated stand offers several advantages.
It can:
- Raise the spigot to a convenient height
- Prevent the buckets from sliding
- Protect the lower bucket from pets and accidental impact
- Keep the system off dirty ground
- Create space for filling larger containers
- Provide storage for cleaning supplies
- Make the system easier to move as one prepared station
- Reduce the temptation to place it on an unstable chair or folding table
The stand is especially helpful when the station will remain assembled for several days.
Choose the Filter Before Building the Stand
Do not begin by buying random buckets and drilling holes.
Choose your filter elements first.
The manufacturer’s instructions will determine:
- Required hole diameter
- Number of filter elements
- Minimum spacing between filters
- Maximum water depth
- Installation order for washers and gaskets
- Initial flushing or priming procedure
- Replacement interval
- Rated flow
- Which contaminants the filter is designed to reduce
Look beyond broad marketing phrases such as “pure,” “natural,” or “emergency grade.”
Check the label for specific reduction claims. NSF explains that certification standards cover different purposes: for example, NSF/ANSI 42 generally addresses aesthetic effects such as chlorine taste and odor, while NSF/ANSI 53 covers specified contaminants associated with health effects. Certification should match the particular reduction claim you need; the presence of a standard number alone does not mean a filter removes every contaminant. (NSF)
A filter designed for treated tap water may not be suitable for untreated surface water.
Materials
The dimensions below are suitable for many standard five-gallon buckets. Measure your actual buckets before cutting anything.
For the wooden stand
- Four sound 2×2, 2×3, or 2×4 wooden posts
- Scrap lumber for horizontal rails
- Scrap plywood or sturdy boards for the lower platform
- Two diagonal braces
- Exterior-grade screws
- Waterproof wood glue
- Sandpaper
- Exterior paint or wood sealer, optional
- Four rubber feet, optional
- Two metal corner braces, optional
- One retaining strap, optional
Use clean, solid lumber.
Do not use wood that is:
- Rotten
- Cracked through
- Oil-soaked
- Moldy
- Heavily warped
- Contaminated by pesticides
- Taken from an unidentified industrial pallet
- Unable to support the expected weight
The wood should never touch the water inside the buckets.
For the water system
- Two new or verified food-grade five-gallon buckets
- Two tight-fitting food-grade bucket lids
- One or more compatible gravity-filter elements
- One food-safe dispensing spigot
- Food-safe washers and gaskets
- Optional replacement gasket set
- Permanent labels
- Covered food-grade water containers
Avoid repurposing buckets that previously held paint, cleaning products, pesticides, oil, drywall compound, or unidentified chemicals.
Tools
- Tape measure
- Pencil
- Carpenter’s square
- Level
- Drill
- Drill bits
- Hole saw specified by the filter manufacturer
- Saw
- Screwdriver or impact driver
- Clamps
- Adjustable wrench
- Safety glasses
- Work gloves
Suggested Stand Dimensions
For standard five-gallon buckets, a practical starting size is:
- Overall height: 46 to 50 inches
- Outside width: 18 inches
- Outside depth: 18 inches
- Lower platform height: 12 to 14 inches above the floor
- Upper retaining rail: positioned around the middle of the top bucket
- Minimum spigot clearance: 8 to 10 inches above the platform below it
These are suggested measurements, not universal specifications.
Set both empty buckets in their intended positions before final assembly. Confirm that:
- The buckets fit between the posts
- The lids can be removed
- The spigot is accessible
- A pitcher fits beneath the spigot
- Filter elements have sufficient clearance
- The upper bucket cannot tip sideways
- The stand does not block access to hardware
Example Cut List
For an 18-by-18-inch stand constructed from 2×3 lumber:
- Four vertical posts at 48 inches
- Four lower-platform rails at 15 inches
- Four upper retaining rails at 15 inches
- Four base rails at 15 inches
- Four or five platform slats at 15 inches
- Two diagonal braces cut to fit
- Optional lower storage shelf slats
Exact rail length will depend on whether your rails sit between the posts or overlap their outer faces.
Measure twice before cutting.
Step 1: Inspect and Prepare the Scrap Wood
Remove protruding nails, staples, screws, and splinters.
Cut away any rotten or damaged sections.
Sand the surfaces that will be handled during assembly and operation. Pay particular attention to corners near the spigot and bucket handles.
Lay the four posts beside one another and mark:
- Bottom rail height
- Lower platform height
- Upper retaining-rail height
- Optional storage-shelf height
Transferring the marks across all four posts helps keep the frame level.
Step 2: Build the Lower Platform Frame
The lower platform supports the treated-water bucket and most of the system’s weight.
Arrange four rails into a square.
Check both diagonal measurements. When the diagonals are equal, the frame is square.
Apply wood glue at each joint and fasten the frame with exterior screws. Use at least two properly sized screws at each structural connection.
Attach platform boards or plywood across the frame.
Leave small gaps between wooden slats so spilled water can drain rather than collect beneath the bucket.
Do not leave openings large enough for the bucket base to tilt or fall through.
Step 3: Attach the Four Posts
Position one vertical post at each corner of the platform frame.
Clamp the posts temporarily.
Use a carpenter’s square to check that each post is vertical, then secure it with screws through two directions whenever possible.
One screw driven through a single face can allow a joint to pivot. Multiple fasteners installed from different directions create a more stable connection.
Metal corner braces can be added beneath the platform when the scrap lumber is thin or the station will be moved frequently.
Step 4: Add the Base Rails
Connect the four posts close to the floor with another square of rails.
These rails prevent the legs from spreading.
Confirm that the stand remains square before tightening all fasteners.
Place the frame on a flat surface and test for rocking. If one leg is slightly shorter, correct it before continuing rather than trying to stabilize the completed station with loose objects.
Optional rubber feet can improve traction and protect an indoor floor.
Step 5: Install Diagonal Bracing
A tall, narrow stand can rack sideways even when every joint appears tight.
Add at least two diagonal braces:
- One across the rear
- One across a side
The braces can be short corner blocks or longer boards running diagonally between rails.
Test the stand by pushing gently from each side.
It should not sway, twist, or produce cracking sounds.
If it moves, add more bracing.
Step 6: Build the Upper Bucket Retainer
The upper source-water bucket needs protection from sideways movement.
Place the empty lower bucket on the platform and stack the empty source bucket above it in the arrangement recommended for your filter system.
Mark the height near the middle or lower third of the upper bucket.
Install four horizontal retaining rails around the posts at this height. Leave enough clearance to lift the upper bucket out when necessary.
The rails should act as guards, not clamps. Do not squeeze or deform the bucket.
For additional security, attach a removable strap around the upper bucket. This is useful in homes with children, large pets, or uneven floors.
Step 7: Finish the Stand
Sand sharp edges.
Apply exterior paint or sealer if the stand will be kept in a damp area. Allow the coating to cure fully before placing the buckets on it.
Keep coatings on the wood only. They should not be applied to the inside of either bucket or to filter components.
A removable plastic tray beneath the lower bucket can catch drips without allowing the wooden platform to remain wet.
Step 8: Install the Lower-Bucket Spigot
Follow the spigot manufacturer’s specified hole size.
The spigot should sit:
- Low enough to dispense most of the water
- High enough that the inner washer rests on a flat surface
- Above the bucket’s heavily curved bottom edge
- Where a cup or pitcher can fit beneath it
Mark the hole carefully.
Drill slowly to avoid tearing or cracking the plastic. Remove plastic shavings from both sides.
Install the washers and gasket in the specified order. Hand-tighten the hardware, then tighten only enough to prevent leaks.
Overtightening can deform the bucket wall or squeeze the gasket out of position.
Fill the bucket with safe tap water and leave it over a dry paper towel for several hours. Any leak will be easier to spot on the paper.
Step 9: Install the Filter Elements
Install the filter elements only according to their manufacturer’s instructions.
Do not guess at:
- Hole size
- Washer position
- Nut torque
- Filter spacing
- Priming procedure
- Cleaning method
Drill the required holes in the source-water bucket.
Remove every plastic shaving.
Insert the filters, install their gaskets and retaining hardware, and tighten them as directed.
The filter outlets must drip only into the treated-water bucket. They must not rest against contaminated surfaces or discharge outside the receiving bucket.
Some systems require corresponding openings in the lower bucket’s lid. Keep those openings only as large as necessary.
Step 10: Wash and Assemble the System
Before first use:
- Wash your hands.
- Wash both buckets and lids with dish soap and safe water.
- Rinse thoroughly.
- Clean the spigot.
- Prepare or flush the filter elements as directed.
- Place the treated-water bucket on the stand.
- Install its lid.
- Place the source-water bucket above it.
- Confirm that all filter outlets align correctly.
- Secure the upper bucket with the retaining rails or strap.
Do not place tools, filter packaging, or untreated-water containers inside the lower bucket.
Step 11: Test With Known Safe Water
Conduct the first full test using tap water that is already considered safe.
This allows you to check:
- Leaks
- Flow rate
- Bucket alignment
- Stand stability
- Spigot operation
- Gasket placement
- Filter installation
Fill the upper bucket only partially for the first test.
Watch the system for movement as the weight increases.
Dispense several containers from the spigot and inspect them for plastic fragments, loose carbon, unusual odor, or leakage around the hardware. Follow the filter manufacturer’s flushing instructions before consuming the water.
How to Operate the Station
Keep separate equipment for source and treated water.
A simple system uses:
- One container for collecting untreated water
- One scoop reserved for source water
- One covered container for treated water
- One cleaning cloth reserved for the spigot area
Pour source water into the upper bucket without splashing the lower bucket, its lid, or the dispensing spigot.
Replace the source-bucket lid.
Allow gravity to move the water through the filters.
Dispense from the spigot rather than opening the lower bucket.
Do not touch the end of the spigot with:
- Dirty hands
- Cup rims
- Water-bottle openings
- Cleaning rags used on the source bucket
The lower bucket is a protected storage container. Every unnecessary opening increases the opportunity for recontamination.
WHO identifies treatment together with safe storage as an important emergency intervention because treated water can become contaminated again during handling and storage. (World Health Organization)
Important Drinking-Water Limitations
A filter does not automatically remove viruses
CDC emergency guidance notes that many portable filters do not remove viruses. It also states that an absolute pore size of 0.3 micron or smaller is needed to remove bacteria mechanically, while an absolute pore size of 1 micron or smaller is needed for parasites such as Giardia and Cryptosporidium. These figures do not replace a manufacturer’s validated performance claims, and pore-size marketing may use either “nominal” or “absolute” terminology. (CDC)
Do not assume that every ceramic, carbon, or hollow-fiber gravity filter provides the same protection.
Carbon is not a universal purifier
Activated carbon can improve taste and odor and may reduce certain specified chemicals, but many common pitcher-style carbon filters are primarily intended for aesthetic improvement rather than disinfection. (CDC)
Clear water can still be unsafe
Water does not have to look dirty to contain microorganisms or dissolved chemicals.
Likewise, water that looks clearer after filtration is not automatically safe to drink.
Some water cannot be made safe with household treatment
Do not use this station for water known or suspected to contain:
- Gasoline
- Diesel fuel
- Solvents
- Toxic industrial chemicals
- Concentrated pesticides
- Radioactive material
- Unidentified oily contamination
CDC states that boiling, chlorine treatment, filtration, and sunlight will not make water contaminated with fuel, toxic chemicals, or radioactive materials safe. Use bottled water or a different approved source in those circumstances. (CDC)
Should Filtered Water Also Be Disinfected?
That depends on:
- The water source
- The filter’s validated performance
- Whether viruses may be present
- Current public-health instructions
- Whether the system was contaminated during assembly or use
When emergency officials issue a boil-water advisory, follow the advisory even when you have a household filter unless authorities or the filter manufacturer explicitly state otherwise.
CDC warns that many household filters do not remove or kill all bacteria and viruses. In an emergency, bottled, boiled, or properly disinfected water may still be required. (CDC)
Boiling is generally the preferred emergency method for killing germs when fuel and equipment are available. EPA guidance recommends bringing clear water to a rolling boil for one minute; at elevations above 5,000 feet, boil it for three minutes. If boiling is impossible, EPA provides instructions for using regular, unscented household chlorine bleach suitable for disinfection, with quantities based on bleach concentration and water clarity. Follow the current official instructions rather than relying on a remembered “drops per gallon” formula because household bleach concentrations differ. (US EPA)
Filtration does not remove salts from seawater. A standard gravity bucket filter is not a desalination system.
Protect the “Clean Side”
The system has two hygiene zones.
Source-water zone
This includes:
- Upper bucket
- Upper lid
- Source-water container
- Exterior surfaces exposed to untreated water
Treated-water zone
This includes:
- Inside of the lower bucket
- Underside of its lid
- Filter outlets
- Interior spigot components
- Treated-water storage containers
Never use the same cloth on both zones without washing and sanitizing it first.
Do not set the lower lid on the ground.
When the system must be disassembled, place treated-water components on a clean surface and protect them from insects, dust, and dirty hands.
Cleaning and Maintenance
Follow the filter manufacturer’s maintenance instructions. Different filter materials require different procedures.
Do not automatically use bleach, soap, vinegar, abrasive pads, or boiling water on filter elements unless the manufacturer specifically permits it.
After daily use
- Wipe the exterior of the spigot
- Remove standing water around the base
- Check for leaks
- Keep both lids in place
- Confirm that untreated water has not splashed onto treated-water surfaces
At regular intervals
- Wash both buckets
- Clean the spigot
- Inspect the gaskets
- Check the filter elements for cracks
- Tighten loose stand hardware
- Inspect the wooden platform for moisture damage
- Replace filters at their rated capacity or service interval
CDC advises maintaining and replacing water filters according to the manufacturer’s instructions because germs can grow within filters that are not properly serviced. (CDC)
After long-term storage
Before returning the system to service:
- Inspect the buckets for cracks and odors.
- Examine the spigot gasket.
- Check filters for damage.
- Clean the buckets and hardware.
- Prepare the filters as directed.
- Test the system with known safe water.
- Confirm that the stand remains strong and level.
Do not use a cracked ceramic element. Damage that is difficult to see can create a path that allows untreated water to bypass the filter media.
Common Mistakes
Building the stand before measuring the buckets
Five-gallon buckets are not all identical.
Test-fit the actual system before securing the retaining rails.
Using a weak furniture-style frame
A fully loaded water station is heavy.
Use structural screws, solid joints, diagonal bracing, and a level base.
Relying on homemade filter media for drinking water
Gravel, cloth, sand, and charcoal may function as prefilters, but appearance is not proof of microbiological or chemical safety.
Use a validated treatment device for drinking-water applications.
Confusing “filtered” with “disinfected”
A filter may reduce sediment while allowing certain microorganisms to pass.
Read the exact performance claims.
Using old utility buckets
A bucket’s previous contents matter.
Use containers verified as suitable for drinking-water contact.
Touching the spigot with cups
This can transfer contamination from the cup rim to the outlet.
Hold the container below the stream.
Letting children climb on the stand
The frame may support water weight but is not a ladder.
Secure the station and supervise children around it.
Filling both buckets before moving the station
Never attempt to carry the assembled stand while the buckets are full.
Drain and remove each bucket first.
Ignoring the filter replacement schedule
A slow filter may be clogged, damaged, incorrectly installed, or overdue for servicing.
Do not drill, scrape, modify, or force water through it unless the manufacturer specifically authorizes that procedure.
Optional Improvements
Add a drip tray
Place a washable tray beneath the spigot to catch small spills.
Empty it frequently so it does not become a breeding area for insects or germs.
Add a removable cup shelf
Install a small shelf beside—not directly under—the spigot.
Do not store used cups upside down on a damp surface.
Add handles
Handles attached to the empty wooden frame can make relocation easier.
Never use them to move a stand holding full buckets.
Add adjustable feet
Threaded feet can help level the stand on an uneven floor.
Add a curtain
A washable side curtain can protect the lower bucket from dust while leaving airflow around the wooden frame.
Add operating labels
Useful labels include:
- SOURCE WATER ONLY
- TREATED WATER
- DO NOT TOUCH SPIGOT
- FILTER INSTALLED
- FILTER REPLACEMENT DATE
- NEXT CLEANING DATE
Labels help multiple household members operate the station consistently.
How Much Water Should You Store?
This gravity station should supplement stored emergency water, not replace it.
Filtration takes time, filter elements can break, and the available source may become chemically contaminated or inaccessible.
Keep an independent supply of commercially bottled water or water stored in appropriate containers. Rotate it according to the container manufacturer’s recommendations and local emergency guidance.
The gravity station becomes most valuable when stored water begins running low but a treatable water source remains available.
Is This Project Worth Building?
Yes, especially when it is completed and tested before an emergency.
The stand itself is inexpensive.
The buckets are easy to replace.
The system operates without grid power.
Most importantly, building it in advance gives you time to discover problems while safe tap water is still available.
You can measure:
- Actual flow rate
- Time needed to process one gallon
- Filter lifespan
- Spigot clearance
- Whether the stand remains stable
- How easily the buckets can be cleaned
- Whether everyone in the household understands the two-zone hygiene system
Preparedness equipment is far more useful after it has been assembled, tested, cleaned, labeled, and practiced with.
Final Safety Note
This project is an elevated stand and storage system—not a guarantee that contaminated water will become drinkable.
The installed filter must be designed and validated for the intended water source. Follow the filter manufacturer’s instructions and all local emergency advisories. Do not attempt to treat water contaminated with fuel, toxic chemicals, or radioactive material. When bottled or officially approved water is available, use it.