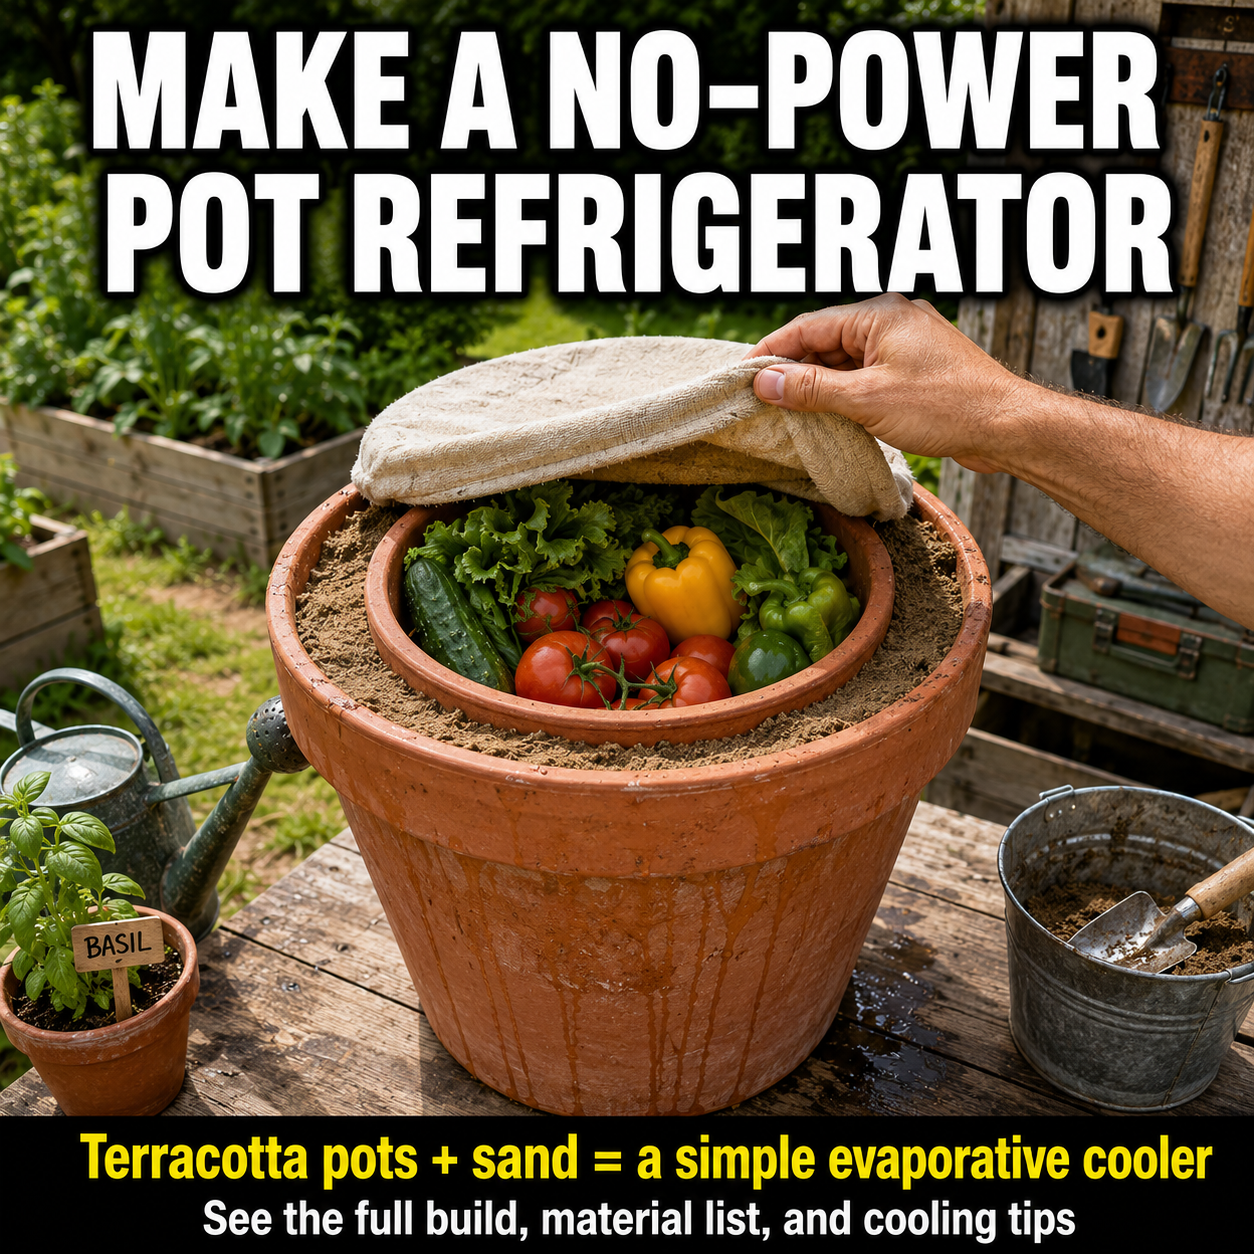
Two ordinary terracotta pots can create a cooler storage space for fresh produce without electricity.
The design is often called a pot-in-pot cooler, clay pot cooler, or Zeer pot. A smaller clay pot sits inside a larger one, with wet sand packed into the space between them. As moisture slowly evaporates through the porous outer pot, it carries heat away and lowers the temperature inside.
There is no compressor.
There is no battery.
There is no refrigerant.
But there is one critical limitation:
A terracotta pot cooler is not a true refrigerator.
It can help whole fruits and vegetables stay cooler and lose moisture more slowly, especially in hot, dry climates. It should not be trusted to keep meat, dairy products, eggs, seafood, cooked leftovers, medicines, or other temperature-sensitive items safe.
A safer and more accurate name is a no-power produce cooler.
FAO guidance describes the same basic design: a storage pot is placed inside a larger pot, and evaporation from water around the inner container produces the cooling effect. The system works best when the surrounding air is dry enough to absorb additional moisture. (FAOHome)
How the Pot-in-Pot Cooler Works
The system relies on evaporative cooling.
Water held in the sand moves through the porous wall of the outer terracotta pot. As that moisture evaporates from the exterior surface, it absorbs heat from the clay, sand, inner pot, and stored produce.
The inside becomes cooler and more humid than the surrounding air.
That combination can benefit many vegetables because:
- Lower temperatures slow deterioration.
- Higher humidity reduces water loss.
- The covered container protects produce from direct sunlight.
- The enclosure can help exclude insects and animals.
In field research conducted by MIT D-Lab in dry-season conditions in Mali, clay pot coolers averaged approximately 5°C to 7°C below the surrounding temperature and maintained relative humidity above 80%. The greatest midday reductions reached approximately 7°C to 10°C under favorable conditions.
Those results should not be treated as a universal promise.
In a more humid 2024 study, average room temperature was 27.7°C while the clay pot cooler averaged 25.6°C—a reduction of only about 2.1°C. The cooler still reduced moisture loss from leafy vegetables, but the temperature reduction was modest. (AGRIS)
Your local humidity matters enormously.
When This Cooler Works Best
A pot-in-pot cooler performs best when the weather is:
- Hot
- Dry
- Breezy
- Shaded
- Well ventilated
Dry moving air allows water to evaporate quickly. Faster evaporation generally creates more cooling.
Performance declines when the air is already humid. When surrounding air approaches saturation, it cannot absorb much more moisture, so evaporation slows and the cooling effect becomes limited. (FAOHome)
This means the project is likely to work better in:
- Dry inland climates
- Desert regions
- Hot summer weather with low humidity
- Open-sided sheds
- Shaded porches with airflow
It may work poorly during:
- Rainy seasons
- Tropical high-humidity weather
- Foggy conditions
- Cool damp weather
- Indoor rooms without ventilation
The only reliable way to know how well it works at your home is to build it and measure the temperature.
Important Food-Safety Warning
Do not use this project as a substitute for refrigeration.
FDA guidance recommends keeping refrigerated foods at 40°F or 4°C or below. Meat, poultry, fish, milk, eggs, cooked foods, and other perishables should not remain above that temperature for more than two hours—or one hour when the surrounding temperature is above 90°F or 32°C. (U.S. Food and Drug Administration)
Most homemade terracotta coolers will not consistently reach 40°F.
Never store the following inside unless a thermometer proves the unit remains at or below 40°F continuously:
- Raw or cooked meat
- Poultry
- Fish or seafood
- Milk
- Cheese requiring refrigeration
- Eggs
- Cooked rice
- Cooked beans
- Prepared meals
- Leftovers
- Cut melons
- Infant formula
- Temperature-sensitive medicine
Treat this as a whole-produce storage device—not a refrigerator.
What You Can Store
Good candidates include clean, undamaged, uncut produce such as:
- Tomatoes
- Eggplants
- Cucumbers
- Bell peppers
- Hot peppers
- Okra
- Carrots
- Cabbage
- Leafy greens
- Fresh herbs
MIT D-Lab testing found improved storage life for amaranth, spinach, cowpea leaves, tomatoes, and eggplants under the conditions studied. The coolers lowered average temperature by more than 4°C while maintaining humidity above 90%.
FAO also reports trials involving tomatoes, guavas, rocket, okra, and carrots, although results from one climate and design should not be assumed to apply everywhere. (FAOHome)
Only place sound produce inside.
Remove anything that is:
- Moldy
- Crushed
- Split
- Leaking
- Slimy
- Overripe
- Damaged by insects
One spoiled item can affect the rest of the contents.
Materials You Will Need
Main components
- One large unglazed terracotta pot
- One smaller unglazed terracotta pot
- Clean, fine sand
- Clean water
- One breathable cotton or burlap cloth
- One raised platform, tray, or wooden stand
- One refrigerator-style thermometer
- Corks or rubber plugs for drainage holes
- Food-safe silicone sealant, when needed
- A clean food-grade basket or liner, optional
Suggested pot sizes
A practical starting combination is:
- Outer pot: approximately 18 to 22 inches across
- Inner pot: approximately 12 to 16 inches across
- Gap between pots: approximately 1½ to 3 inches
Exact sizes are flexible.
The important requirements are:
- The smaller pot fits completely inside the larger one.
- A consistent sand-filled gap remains around every side.
- Both pots are deep enough to hold the intended produce.
- The outer pot is sturdy enough to support wet sand.
Wet sand is heavy. Assemble the cooler in the location where you plan to use it.
Choose the Pots Carefully
Use new or thoroughly cleaned terracotta pots.
The outer pot must be porous. Water needs to migrate through its clay wall and evaporate from the outside surface.
Avoid:
- Painted pots
- Plastic-lined pots
- Sealed pots
- Glazed outer pots
- Pots treated with water repellent
- Pots previously used with pesticides
- Pots containing chemical residue
- Cracked or badly chipped pots
- Decorative pottery labeled “Not for Food Use”
Pottery safety matters because some ceramic products may contain lead or cadmium in glazes, pigments, or contaminated clay. FDA advises against using pottery for food when its safety cannot be confirmed, particularly decorative, damaged, antique, irregular, or unidentified pottery. (U.S. Food and Drug Administration)
The simplest precaution is to place produce inside a removable food-grade basket or container that fits within the inner pot. This reduces direct food contact with the clay while still allowing cool, humid air to circulate.
Do not use a sealed plastic container because that blocks airflow and can trap condensation around the produce.
Step 1: Choose a Permanent Location
Select a location before assembling the cooler.
The ideal spot is:
- Completely shaded
- Protected from rain
- Open to moving air
- Away from animals
- Above contaminated ground
- Close to a clean water supply
- Convenient enough to check twice daily
Do not place it in direct sunlight.
Sunlight heats the clay and works against the evaporative cooling process. The garden setting in many viral images looks appealing, but the working cooler should remain in the shade.
Good locations include:
- A shaded porch
- An open-sided shed
- Beneath a roof overhang
- A screened outdoor kitchen
- A covered balcony
- Beneath a ventilated shade structure
Do not place it in an enclosed cupboard or sealed garage.
Moving air is part of the cooling system.
Step 2: Build a Stable Base
Place the outer pot on a sturdy platform.
You can use:
- A short wooden stand
- Several bricks
- A metal plant stand
- A slatted outdoor table
- A shallow waterproof tray
The base must support the combined weight of:
- Two clay pots
- Wet sand
- Water
- Stored produce
Raise the pot slightly above the ground so air can move around its lower exterior.
The base should be level. A tilted pot may place uneven pressure on the clay and make the inner pot unstable.
If the cooler sits on a wooden surface, use a tray to catch moisture.
Step 3: Seal the Drainage Holes
Most plant pots contain drainage holes.
These must be sealed before adding sand.
Insert a cork, rubber plug, or fitted stopper into the drainage hole of the outer pot. Seal around it when necessary with a suitable waterproof material.
The seal should prevent sand and water from escaping but remain removable if you later need to clean the pot.
Seal the inner pot’s drainage hole as well.
Allow any sealant to cure fully before the cooler touches produce or water.
Test the outer pot by adding a small amount of wet sand and water. The exterior should gradually become damp through the porous clay, but water should not pour from the drainage hole.
Step 4: Add the Sand Base
Pour approximately one inch of clean sand into the bottom of the larger pot.
Level it by hand.
Place the smaller pot on top of the sand.
Check that:
- It sits upright.
- Its rim is close to the outer pot’s rim.
- It is centered.
- It does not rock.
- A consistent gap remains around the sides.
Add or remove sand beneath it until both rims are reasonably level.
Wear gloves if the clay edges are rough.
Step 5: Fill the Gap With Sand
Slowly pour clean sand into the space between the pots.
Add a small amount at a time while keeping the inner pot centered.
Gently settle the sand using your fingers or a narrow wooden stick. Do not force it downward aggressively because concentrated pressure can crack the pots.
Continue until the sand reaches approximately one inch below the rims.
Do not allow sand to fall inside the storage pot.
Fine to medium sand generally packs more evenly than large stones or gravel. Avoid sand collected from places that may contain:
- Animal waste
- Road runoff
- Salt
- Fuel
- Pesticides
- Industrial contamination
- Sharp debris
Washed construction sand or clean horticultural sand is preferable.
Step 6: Wet the Sand Gradually
Pour clean water slowly into the sand-filled gap.
Move around the full circumference instead of pouring everything into one location.
Allow time for the water to soak downward.
The goal is to make the sand consistently damp—not to create a flooded moat.
Stop adding water when:
- The sand is evenly saturated.
- The outer surface begins feeling damp.
- Water no longer disappears immediately.
- No water enters the inner pot.
Overwatering can allow moisture to seep into the storage chamber. A 2024 clay-pot study found that seepage into the inner pot increased decay; the problem was controlled by avoiding excessive watering of the sand. (AGRIS)
If water appears inside, remove the produce, reduce the amount of water, and inspect for cracks or failed plugs.
Step 7: Add a Thermometer
Place a thermometer inside the empty inner pot.
Place a second thermometer beside the cooler when possible.
You need to compare:
- Ambient temperature
- Temperature inside the cooler
- Morning performance
- Midday performance
- Evening performance
Close the cooler with a damp cloth and allow it to operate for several hours.
Do not load it immediately with valuable produce.
First determine whether your climate provides a useful temperature reduction.
Record readings for at least two or three days.
A simple test sheet can include:
- Date
- Time
- Outdoor temperature
- Cooler temperature
- Weather
- Relative humidity
- Amount of water added
This turns a viral DIY idea into a system you understand and can rely on appropriately.
Step 8: Cover the Cooler
Wet a clean cotton, burlap, or muslin cloth.
Wring out excess water and spread it over the opening.
The cloth should:
- Cover the entire opening
- Remain breathable
- Prevent direct sunlight
- Reduce insect access
- Stay damp without dripping excessively
Do not use an airtight plastic lid during operation.
The system needs evaporation and airflow.
A lightweight wire or wooden screen can be installed beneath the cloth for additional insect protection.
Wash the cloth regularly and replace it if it develops mold, odor, or heavy staining.
Step 9: Load the Produce
Once testing confirms that the pot stays cooler than the surrounding air, add a small quantity of produce.
Do not pack it tightly.
Leave spaces between items so cool, humid air can circulate.
A removable basket is helpful because it:
- Keeps produce away from the clay
- Makes cleaning easier
- Allows faster inspection
- Prevents delicate leaves from resting in condensation
- Makes spoiled produce easier to remove
Place heavier vegetables on the bottom and delicate greens near the top.
Avoid mixing heavily aromatic, dirty, or damaged produce with leafy vegetables.
Do not wash produce immediately before storage unless you can dry it properly. Excess surface moisture can encourage decay.
Step 10: Maintain the Water Level
Check the sand at least once or twice per day.
Add water when the upper layer begins to feel dry.
In very hot, dry, or windy weather, the cooler may require water more frequently. During humid conditions, it may consume less water because evaporation slows.
Pour water only into the sand gap.
Do not pour water over the stored food.
The outer surface should usually feel cool and slightly damp during active operation. If it remains completely dry, check whether:
- The sand needs water.
- The outer pot is sealed or glazed.
- Airflow is insufficient.
- The clay is unusually dense.
- The weather is too humid for effective evaporation.
Realistic Cooling Performance
Do not advertise a specific temperature reduction without measuring your own system.
Performance depends on:
- Ambient temperature
- Relative humidity
- Wind
- Shade
- Pot porosity
- Pot size
- Sand depth
- Water availability
- Produce load
- Time of day
In dry-climate MIT D-Lab trials, pot coolers reduced average interior temperature by more than 4°C and reduced maximum daily temperatures by more than 8°C in the tested conditions. Some vegetables remained marketable substantially longer than those stored in ambient air.
However, results in humid conditions can be far smaller. The 2024 leafy-vegetable study achieved only about a 2.1°C average reduction, although the higher humidity still reduced produce weight loss. (AGRIS)
A reasonable description is:
The cooler may keep produce several degrees cooler than the surrounding air while creating a more humid storage environment.
It should not be described as achieving refrigerator temperatures unless continuous thermometer readings prove that claim.
How Long Will Produce Last?
There is no universal storage-time guarantee.
Shelf life depends on:
- Produce type
- Freshness at harvest
- Existing damage
- Starting temperature
- Local humidity
- Cooler temperature
- Cleanliness
- Air circulation
- Water management
MIT D-Lab laboratory evaluations reported that clay coolers extended the visual shelf life of tested vegetables by approximately 50% to 600% compared with ambient storage under those particular study conditions.
That does not mean every tomato or leafy vegetable will last six times longer in your backyard.
Inspect produce every day.
Use it immediately when it begins to soften, wilt, split, or develop suspicious spots.
Discard produce that becomes:
- Moldy
- Slimy
- Fermented
- Foul-smelling
- Heavily discolored
- Leaking
- Infested
Never taste food to determine whether it is safe.
Daily Operating Routine
Morning
- Check the internal temperature.
- Feel the sand near the surface.
- Add clean water when needed.
- Inspect every stored item.
- Remove damaged produce.
- Re-wet the cloth.
Midday
- Confirm that the unit remains shaded.
- Check whether the exterior clay feels damp.
- Record the inside and outside temperatures.
- Ensure insects or animals have not disturbed the cover.
Evening
- Inspect the produce again.
- Remove spoiled items.
- Wash away spills.
- Check the cloth for odor or mold.
- Record the final temperature.
A two-minute inspection can prevent one damaged vegetable from contaminating the rest.
Cleaning the Cooler
Empty and clean the system regularly.
Light cleaning
- Remove all produce.
- Wipe out loose soil and plant debris.
- Wash the removable basket.
- Rinse the cloth.
- Wipe the inner pot with clean water.
- Allow surfaces to dry before refilling.
Deep cleaning
Periodically:
- Remove the inner pot.
- Empty the wet sand.
- Scrub both pots.
- Inspect for mold and cracks.
- Wash the base and tray.
- Replace dirty or foul-smelling sand.
- Dry the pots completely.
- Reassemble with clean materials.
Porous clay can absorb odors and contamination. Replace a pot that remains foul-smelling, visibly moldy, or difficult to clean.
Do not use a pot that has developed structural cracks.
Common Building Mistakes
Placing the cooler in direct sunlight
Direct sun heats the clay and reduces the net cooling effect.
Use full shade with good airflow.
Using glazed pots
A glazed outer pot prevents water from moving through the clay wall.
Use an unglazed, porous outer pot.
Using decorative pottery for food storage
Decorative pottery may not be intended for food contact and can contain unsafe glazes or pigments. Use a removable food-grade basket and avoid pottery with uncertain safety. (U.S. Food and Drug Administration)
Flooding the sand
The sand should remain damp, not submerged.
Excess water can seep into the storage chamber and encourage decay. (AGRIS)
Sealing the top with plastic
An airtight cover prevents ventilation and can trap excessive condensation.
Use a damp breathable cloth.
Packing produce tightly
Air needs room to circulate.
Store smaller loads rather than compressing everything together.
Storing meat or dairy products
Unless the interior remains continuously at or below 40°F, it is not safe refrigeration for perishable food. (U.S. Food and Drug Administration)
Trusting the cooler without a thermometer
Cool clay may feel impressive to the hand while remaining far above refrigerator temperature.
Measure it.
Ignoring humidity
A design that works extremely well in a desert may offer little cooling during a humid rainy season.
Test it under your actual conditions.
Optional Improvements
Add a simple temperature display
Use a probe thermometer with the display mounted outside.
This allows you to check the temperature without repeatedly lifting the cloth.
Build a ventilated shade cover
Construct a small roof above the cooler using:
- Scrap wood
- Corrugated metal
- Shade cloth
- A lightweight outdoor canopy
Leave all sides open for airflow.
Add an insect screen
Place a clean fine-mesh screen over the inner pot beneath the damp cloth.
Use a foot-operated lid
A lightweight hinged cover can protect the cloth and screen while keeping the system easy to access.
Do not make it airtight.
Add a drainage tray
A shallow tray protects wooden floors and captures drips.
Empty it regularly to avoid insects and standing water.
Build a wooden stand
A low scrap-wood stand can:
- Improve airflow
- Reduce bending
- Keep the cooler away from animals
- Protect it from muddy ground
The stand must be strong enough to hold wet sand and two heavy clay pots.
Is This Useful During a Power Outage?
Yes, but only for the correct purpose.
During an outage, use a properly iced cooler for foods that must remain at 40°F or below. USDA guidance recommends transferring perishables to a cooler with enough ice or frozen packs to maintain 40°F or colder when refrigerator power will be unavailable for an extended period. (Food Safety and Inspection Service)
Use the terracotta cooler for whole produce that benefits from:
- Shade
- Lower temperature
- Higher humidity
- Protection from insects
- Reduced moisture loss
This separation matters.
Iced cooler: meat, milk, eggs, seafood, cooked foods and other perishables.
Terracotta cooler: suitable whole fruits and vegetables.
Is the Pot-in-Pot Cooler Worth Building?
It can be an excellent low-cost project when:
- You live in a hot, dry climate.
- Electricity is unreliable.
- Fresh produce spoils quickly.
- Clean water is available.
- You can place it in permanent shade.
- You are willing to monitor temperature and moisture.
It may offer little benefit when:
- Humidity remains high.
- Water is scarce.
- No ventilated shaded area is available.
- The intended food requires refrigeration.
- The pots cannot be cleaned safely.
- You cannot monitor the temperature.
The project costs little to test.
Build it before an emergency, place thermometers inside and outside, and record the temperature difference for several days.
Your measurements will tell you more than any viral headline.
Final Safety Note
A pot-in-pot cooler is an evaporative produce-storage device—not a certified refrigerator.
Do not use it for meat, poultry, fish, dairy products, eggs, cooked leftovers, prepared meals, infant formula, or temperature-sensitive medicines unless the interior remains continuously at or below the required safe temperature.
Use clean materials, food-safe containers, clean water, full shade, and a thermometer. Inspect stored produce every day and discard anything showing mold, slime, leakage, or an unusual odor.