When the electricity fails, dirty laundry may not seem like an immediate emergency.
But after several days without a washing machine, clean socks, underwear, towels, work clothes, and children’s clothing become increasingly important. Sweat, mud, food residue, and body oils accumulate quickly—especially during hot weather, evacuation, camping, or disaster cleanup.
Fortunately, you do not need electricity or an expensive manual washer to clean a small load of everyday clothing.
With two matching buckets, a lid, and a hand-operated plunger, you can build a compact emergency clothes washer that:
- Requires no electricity
- Uses relatively little water
- Stores in a small space
- Handles essential daily laundry
- Works at home, at a campsite, or in an evacuation setting
- Costs far less than most commercial off-grid washers
This device is not intended to replace a washing machine permanently. It also should not be treated as a reliable sanitation system for clothing contaminated by sewage, floodwater, hazardous chemicals, or bodily fluids.
For ordinary clothing, however, it can be an extremely practical addition to an emergency kit.
How the Two-Bucket Washer Works
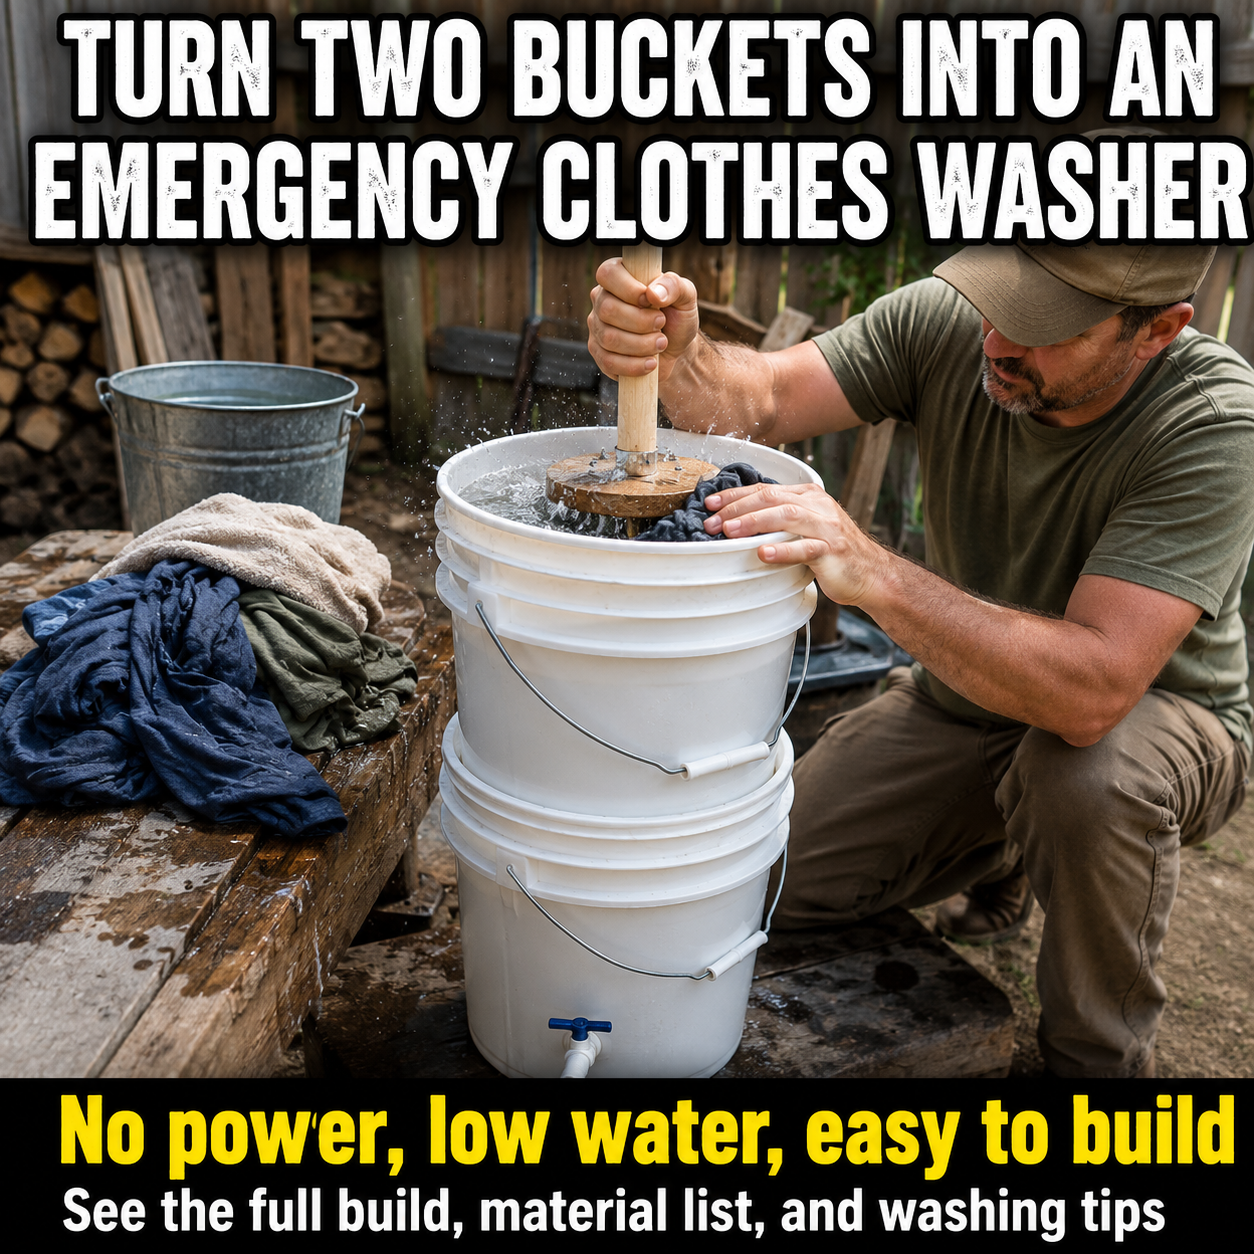
The system uses one solid bucket as the wash tub and one perforated bucket as an internal laundry basket.
The perforated bucket sits inside the solid bucket. Water and detergent move through the holes while the clothing remains contained inside.
A hand plunger pushes water through the fabric. The downward and upward movement creates agitation similar to the action inside a conventional washing machine.
After washing, the perforated bucket can be lifted from the solid bucket, allowing much of the dirty water to drain away without removing every garment individually.
The same process can then be repeated with clean rinse water.
The two buckets serve different purposes
Outer bucket: Holds the washing water and prevents leaks.
Inner bucket: Holds the clothing while allowing water to circulate and drain through drilled holes.
A lid with a central opening helps contain splashes while guiding the plunger handle.
Materials You Will Need
Main components
- Two matching five-gallon plastic buckets
- One tight-fitting bucket lid
- One new, unused toilet plunger or dedicated laundry plunger
- Laundry detergent
- Permanent marker
- Sandpaper or a deburring tool
Choose clean buckets that have never contained pesticides, solvents, motor oil, paint, strong chemicals, or unidentified substances.
The buckets do not necessarily need to be food-grade because they will not store drinking water. However, they should be sturdy, undamaged, and free from chemical odors.
Never use the laundry buckets for drinking-water storage afterward.
Tools
- Electric drill
- Quarter-inch drill bit
- Larger drill bit or hole saw for the lid
- Utility knife, optional
- Tape measure
- Safety glasses
- Work gloves
- Clamps, optional
Complete all drilling before adding water. Never operate an electric drill while standing in water or while the buckets are wet. CDC disaster-cleanup guidance specifically warns against using electrical tools while standing in water. (CDC)
Optional additions
- Bucket spigot
- Drain hose
- Rubber gloves
- Second lid
- Small laundry brush
- Drying rack
- Dedicated measuring spoon
- Labels reading “LAUNDRY ONLY”
- Non-slip rubber mat
Step 1: Choose the Inner and Outer Buckets
Place one bucket inside the other.
The buckets should nest together easily without becoming permanently wedged. There should be enough space for the inner bucket to be lifted after washing.
Designate them clearly:
- Outer wash bucket
- Inner laundry basket
Mark the outer bucket with a permanent marker so you do not accidentally drill holes into both buckets.
The outer bucket must remain completely solid unless you intentionally add a sealed drain spigot.
Step 2: Mark the Drainage Holes
Turn the inner bucket upside down.
Mark a series of evenly spaced holes across the bottom. Continue marking holes around the lower half of the bucket’s side walls.
A practical arrangement is to space the holes approximately one to two inches apart.
Leave the upper few inches undrilled. A solid upper rim helps the bucket retain its strength and gives you a safer place to grip it.
You do not need hundreds of holes. The goal is to allow water to move freely while preserving the bucket’s structural integrity.
Step 3: Drill the Inner Bucket
Secure the bucket so it cannot roll or rotate.
Drill through each marked location using approximately a quarter-inch bit. Work slowly and avoid placing your free hand behind the area being drilled.
Drill:
- Across the bottom
- Around the lower side walls
- Around the middle side walls
Avoid drilling near the handle mounts or directly through heavily reinforced sections.
Once all holes have been drilled, remove loose plastic fragments. Smooth sharp edges with sandpaper or a deburring tool.
Run your hand carefully over the interior. No sharp plastic should remain where it could snag or tear clothing.
Rinse the bucket thoroughly before proceeding.
Step 4: Prepare the Lid
Find the center of the bucket lid.
Drill or cut a hole slightly larger than the plunger handle. The handle should move up and down freely without leaving an unnecessarily large opening.
Smooth the cut edges.
Test the lid by placing it on the outer bucket and moving the dry plunger through the opening.
The lid serves three purposes:
- It guides the plunger.
- It reduces splashing.
- It helps keep dirt and debris out of the wash water.
Do not make the opening so tight that the handle scrapes against the lid during every stroke.
Step 5: Modify the Plunger
Use only a new plunger that has never been used in a toilet.
A dedicated laundry plunger with openings in its bell is ideal. When a standard rubber plunger is used without openings, it may create excessive suction and repeatedly stick to the clothes or bottom of the bucket.
You can modify a standard plunger by drilling several holes through its rubber cup.
Make approximately four to eight openings around the cup, depending on its size. These openings allow water to move through the plunger rather than trapping air and fabric beneath it.
Smooth any rough edges.
Label the handle clearly:
LAUNDRY ONLY
Never return it to bathroom use.
Step 6: Assemble the Washer
Place the perforated bucket inside the solid bucket.
Add a small test load of clothing.
Good first-test items include:
- T-shirts
- Socks
- Underwear
- Washcloths
- Lightweight shorts
- Small towels
Avoid starting with heavy jeans, blankets, coats, or large bath towels. Heavy fabric absorbs substantial water and can make agitation difficult.
Place the lid over the buckets and insert the plunger handle through the opening.
The plunger cup should rest directly on the clothing.
How to Wash Clothes in the Bucket Washer
Step 1: Sort the laundry
Separate clothing by:
- Light and dark colors
- Delicate and durable fabrics
- Lightly and heavily soiled items
- Ordinary clothing and contaminated cleanup clothing
Read garment-care labels before using warm water, strong detergent, bleach, or vigorous agitation.
Do not wash delicate fabrics with abrasive work clothes or garments containing sharp metal hardware.
Step 2: Pretreat visible stains
Scrape or brush away loose soil before placing clothing in the washer.
Apply a small amount of detergent directly to stains and gently work it into the fabric.
Removing loose mud first prevents the wash water from becoming unnecessarily dirty.
For heavily soiled ordinary work clothes, a brief presoak may help loosen dirt before agitation.
Step 3: Add clothing
Do not pack the bucket tightly.
A useful starting load might include:
- Two lightweight shirts
- Two pairs of underwear
- Several pairs of socks
- One or two washcloths
The exact amount depends on fabric thickness.
The clothes must have room to move. An overfilled bucket may appear efficient, but poor circulation can leave detergent and soil trapped inside the garments.
Wash several small loads rather than forcing one large load into the bucket.
Step 4: Add water
Add enough clean water to wet and cover the clothing while leaving several inches of space below the rim.
Depending on the load, approximately two to three gallons may be sufficient for the washing stage.
Warm water can improve the performance of many detergents, but it is not necessary for every load. Follow clothing and detergent labels.
Do not use water contaminated with sewage, floodwater, fuel, chemicals, or harmful algae.
During emergencies, safe water may be limited. Reserve drinking-quality water for drinking, cooking, brushing teeth, wound care, and other health-critical uses before using it for routine laundry. CDC emphasizes that hygiene remains important during emergencies while recognizing that clean, safe water may be difficult to obtain. (CDC)
Step 5: Add detergent carefully
A bucket load requires much less detergent than a full-size washing machine.
Begin with a very small measured amount—often around one teaspoon of concentrated liquid detergent for a light load. Check the detergent label and adjust for its concentration.
Adding too much detergent creates several problems:
- Excessive foam
- More rinse water
- Detergent residue in clothing
- Longer washing time
- Greater environmental impact
More soap does not automatically produce cleaner clothing.
Powdered detergent should be dissolved in water before being added, especially when washing in cool water.
Step 6: Agitate the clothing
Install the lid and begin moving the plunger vertically.
Use steady, controlled strokes rather than slamming the plunger into the bottom.
Push down and pull up repeatedly for approximately two to five minutes.
Change the position of the plunger occasionally so different parts of the load receive agitation.
Stop if:
- The bucket begins moving
- The lid becomes loose
- Clothing wraps around the plunger
- Water begins leaking
- The handle or rubber cup shows damage
A non-slip mat beneath the washer can make operation safer.
Step 7: Allow the clothes to soak
After the first agitation cycle, let ordinary laundry soak for approximately 10 to 20 minutes.
Soaking gives water and detergent time to loosen dirt without requiring continuous physical effort.
Do not soak:
- Colors that bleed
- Delicate fabrics
- Items prohibited by their care labels
- Clothing containing unknown chemicals
- Heavily contaminated cleanup gear
After soaking, agitate for another two or three minutes.
These times are starting points rather than strict requirements. Adjust them based on fabric, soil level, available water, and detergent instructions.
How to Drain the Washer
Remove the lid and set it on a clean surface.
Grip the perforated inner bucket by its handle and upper rim. Lift it slowly from the solid outer bucket.
Hold it above the outer bucket and allow the dirty water to drain through the holes.
Do not lift with a sudden jerking movement. Wet laundry can be surprisingly heavy.
Once most water has drained, place the perforated bucket in a separate clean basin or on a clean drainage surface.
Empty the dirty water from the outer bucket responsibly.
How to Rinse the Clothes
Return the perforated bucket to the empty outer bucket.
Add clean rinse water.
Move the plunger through the load for one or two minutes, then lift the inner bucket and allow it to drain.
Inspect the rinse water.
If it remains heavily soapy, repeat the rinse with fresh water.
Using a small amount of detergent during the washing stage greatly reduces the amount of water needed for rinsing.
For extremely limited water supplies, prioritize essential garments:
- Underwear
- Socks
- Infant clothing
- Washcloths
- Towels used for hygiene
- Clothing worn close to the skin
How to Remove More Water Without a Powered Spin Cycle
The most difficult part of hand laundry is often removing water.
Several methods can help.
Drain inside the perforated bucket
Allow the inner bucket to remain elevated over the outer bucket for several minutes.
Gravity will remove more water than lifting it briefly.
Press instead of twisting
With clean hands, press garments against the perforated sides or bottom.
Avoid aggressive twisting, which can stretch or damage fabric.
Use a clean pressing lid
A second clean bucket lid can be placed over the clothing and pressed downward carefully.
Water will escape through the perforations while the lid keeps pressure distributed over the load.
Do not put your full body weight on the bucket.
Use the towel-roll method
Place a wet garment on a clean dry towel.
Roll the towel and garment together, then press firmly. The towel absorbs part of the remaining water.
This is particularly useful for delicate clothing that should not be wrung.
Dry the Clothes Completely
Hang clothing where air can circulate around every surface.
Use:
- A clothesline
- Folding drying rack
- Hangers
- Clean fence rail
- Covered porch
- Indoor rack near ventilation
Leave space between garments.
Turn thick items over during drying. Pockets, waistbands, seams, and folded fabric can remain damp after the surface feels dry.
Avoid placing wet clothing in a pile or sealed container. Moist textiles can develop unpleasant odors and support microbial growth.
Do not hang laundry directly over an unattended flame, stove, heater, generator, or cooking fire.
A Practical Water-Saving Routine
For a small lightweight load, you might begin with:
- Two to three gallons for washing
- Two to three gallons for the first rinse
- An optional additional rinse when needed
This creates a rough total of four to eight gallons per load.
Actual use depends on:
- Load size
- Fabric thickness
- Detergent quantity
- Soil level
- Bucket shape
- Number of rinses
- Whether rinse water is reused
Do not reuse visibly contaminated laundry water for personal hygiene, dishes, food preparation, or drinking.
Relatively clean final-rinse water may sometimes be reused for flushing a toilet or cleaning outdoor equipment where local rules permit. Do not pour laundry water into a storm drain, stream, lake, or drinking-water source.
When washing at a campsite or remote location, National Park Service guidance recommends carrying wash water at least 200 feet from natural water sources and using only small quantities of biodegradable soap. Biodegradable does not mean soap should be used directly in a stream or lake. (National Park Service)
Should You Install a Drain Spigot?
A drain spigot near the bottom of the solid bucket can make emptying easier.
This modification is optional.
Advantages
- Reduces lifting
- Allows controlled drainage
- Can connect to a short hose
- Makes repeated rinse cycles easier
Disadvantages
- Creates another potential leak
- Requires additional hardware
- Can become clogged by lint
- Must be positioned above the curved bucket base
- Needs a tight, durable gasket
Use a spigot intended for water containers, not a fragile beverage dispenser.
Install it according to the manufacturer’s hole-size instructions. Test it outdoors before depending on it.
Place a removable screen inside the bucket if lint repeatedly blocks the outlet.
Laundry That Should Not Go Into This Washer
This bucket washer is best suited to ordinary household clothing.
Do not use it as the primary treatment method for garments contaminated by:
- Sewage
- Floodwater
- Vomit or feces
- Blood or other significant bodily fluids
- Fuel
- Solvents
- Pesticides
- Industrial chemicals
- Asbestos-containing dust
- Unknown hazardous substances
CDC guidance advises washing clothing contaminated by floodwater or sewage in hot water with detergent before reuse. It also recommends keeping contaminated cleanup clothing separate from uncontaminated garments. A small bucket washer may not provide the water temperature, separation, or controlled laundering needed for that situation. (CDC)
Follow local public-health instructions after a flood, sewage backup, chemical spill, or disease outbreak.
Some contaminated garments may need professional cleaning or disposal rather than ordinary hand washing.
Bleach and Disinfection Warnings
Ordinary detergent and mechanical agitation are suitable for many everyday loads.
Do not automatically add chlorine bleach to every bucket.
Bleach can:
- Damage colors
- Weaken some fabrics
- Irritate skin and eyes
- Damage metal hardware
- Create dangerous gases when mixed incorrectly
Only use bleach when the garment label and bleach-product label permit it.
Never mix chlorine bleach with:
- Ammonia
- Vinegar
- Acids
- Toilet cleaners
- Other household cleaning products
CDC advises following product-label directions, ensuring ventilation, and never mixing household bleach with ammonia or other cleaners. (CDC)
Do not invent a stronger bleach concentration because the laundry appears especially dirty.
Protect Your Hands
Wear household gloves when washing:
- Very dirty work clothes
- Clothing from disaster cleanup
- Items that may contain irritating substances
- Laundry belonging to someone who is ill
Wash your hands with soap and clean water after handling dirty laundry and wash water.
During emergencies, CDC recommends washing hands with soap and clean water whenever possible. Alcohol-based sanitizer containing at least 60% alcohol can be used when soap and safe water are unavailable, although sanitizer does not replace proper washing in every situation. (CDC)
Cover cuts before handling dirty laundry.
Seek medical guidance when a wound has been exposed to sewage or floodwater.
Cleaning the Bucket Washer
After the final load:
- Empty all wash water.
- Remove remaining lint and debris.
- Wash both buckets with detergent and clean water.
- Rinse the plunger.
- Clean both sides of the lid.
- Inspect the drilled holes.
- Allow every component to dry completely.
- Store the buckets open or upside down.
Do not seal damp buckets together.
Trapped moisture can create odors and make the buckets difficult to separate.
Store the plunger inside the dry washer only after it has been cleaned and dried.
Keep the washer away from children. Empty buckets and lids should not be left where a small child could climb inside or become trapped.
Common Building Mistakes
Drilling both buckets
Only the inner basket receives drainage holes.
The outer bucket must hold water.
Making the holes too large
Large openings can weaken the bucket or allow small garments to protrude.
Start with smaller holes. More can be added later if drainage is too slow.
Leaving sharp plastic edges
Burrs can snag fabric and cut hands.
Smooth every opening before using the washer.
Using an old bathroom plunger
Use a new plunger dedicated exclusively to laundry.
Label it clearly.
Using an electric drill as the agitator
Do not operate a drill-powered mixing attachment in a bucket of water.
The manual plunger method avoids the electrical hazard and is easier to control.
Adding too much detergent
Excess detergent wastes rinse water and can remain in the fabric.
Start with a small quantity.
Packing the bucket completely full
The clothes need room to circulate.
A smaller load generally cleans better.
Combining contaminated and regular laundry
Keep disaster-cleanup clothing separate from ordinary household laundry. (CDC)
Storing the system wet
Dry all components before nesting and storing them.
Optional Upgrades
Add measurement marks
Mark water levels inside the outer bucket at:
- One gallon
- Two gallons
- Three gallons
- Four gallons
This helps track emergency water consumption.
Add a stable base
Construct a simple wooden frame that prevents the bucket from sliding during agitation.
The base should be wider than the bucket and strong enough to withstand repeated movement.
Add a foot brace
A low wooden brace can help stabilize the washer without requiring someone to hold the rim.
Do not stand on the bucket or lid.
Add a carrying handle
The original bucket handles may be sufficient when the buckets are empty.
Never carry a full nested washer by one handle.
Build a second rinse station
A third bucket is useful when water and storage space permit. One solid bucket can hold wash water while another holds rinse water.
However, the basic design works with only two buckets by emptying and refilling the outer bucket.
Add a drying rack
A folding wooden rack makes the washer a more complete emergency laundry station.
Keep the rack separate from dirty-water disposal areas.
Emergency Laundry Priorities
During a prolonged outage, washing everything may not be realistic.
Prioritize items that affect daily hygiene:
- Underwear
- Socks
- Infant clothing
- Washcloths
- Hand towels
- Lightweight shirts
- Clothing used for food preparation
- Bedding used by someone who is ill
Heavy bedding, blankets, coats, and large towels may be too demanding for a five-gallon washer.
Spot-clean or postpone those items until larger washing facilities become available.
Is the Two-Bucket Washer Worth Building?
Yes.
It is inexpensive, simple, compact, and usable without grid power.
More importantly, it can be built and tested before an emergency.
A practice load will reveal:
- How much clothing fits comfortably
- How much detergent is actually needed
- How much water each load consumes
- Whether the holes drain quickly enough
- How physically demanding the plunger is
- How long garments take to dry in your climate
- Where dirty wash water can be disposed of safely
Preparedness tools work best when they are familiar.
Do not wait until the power has been out for a week to drill the buckets, modify the plunger, and discover that your drying line is too short.
Build it now.
Label it.
Test it.
Then store detergent, gloves, clothespins, and a length of clothesline inside the dry buckets so the complete station is ready when you need it.
Final Safety Note
This project is intended for ordinary emergency laundry, camping, and short-term outages.
It is not a substitute for professional decontamination, approved infection-control laundering, or official public-health guidance. Keep clothing exposed to sewage, floodwater, hazardous chemicals, or significant bodily fluids separate from normal laundry and follow local instructions.
Complete all drilling while the equipment is clean and dry. Never use an electrical drill as an agitator in a bucket containing water.