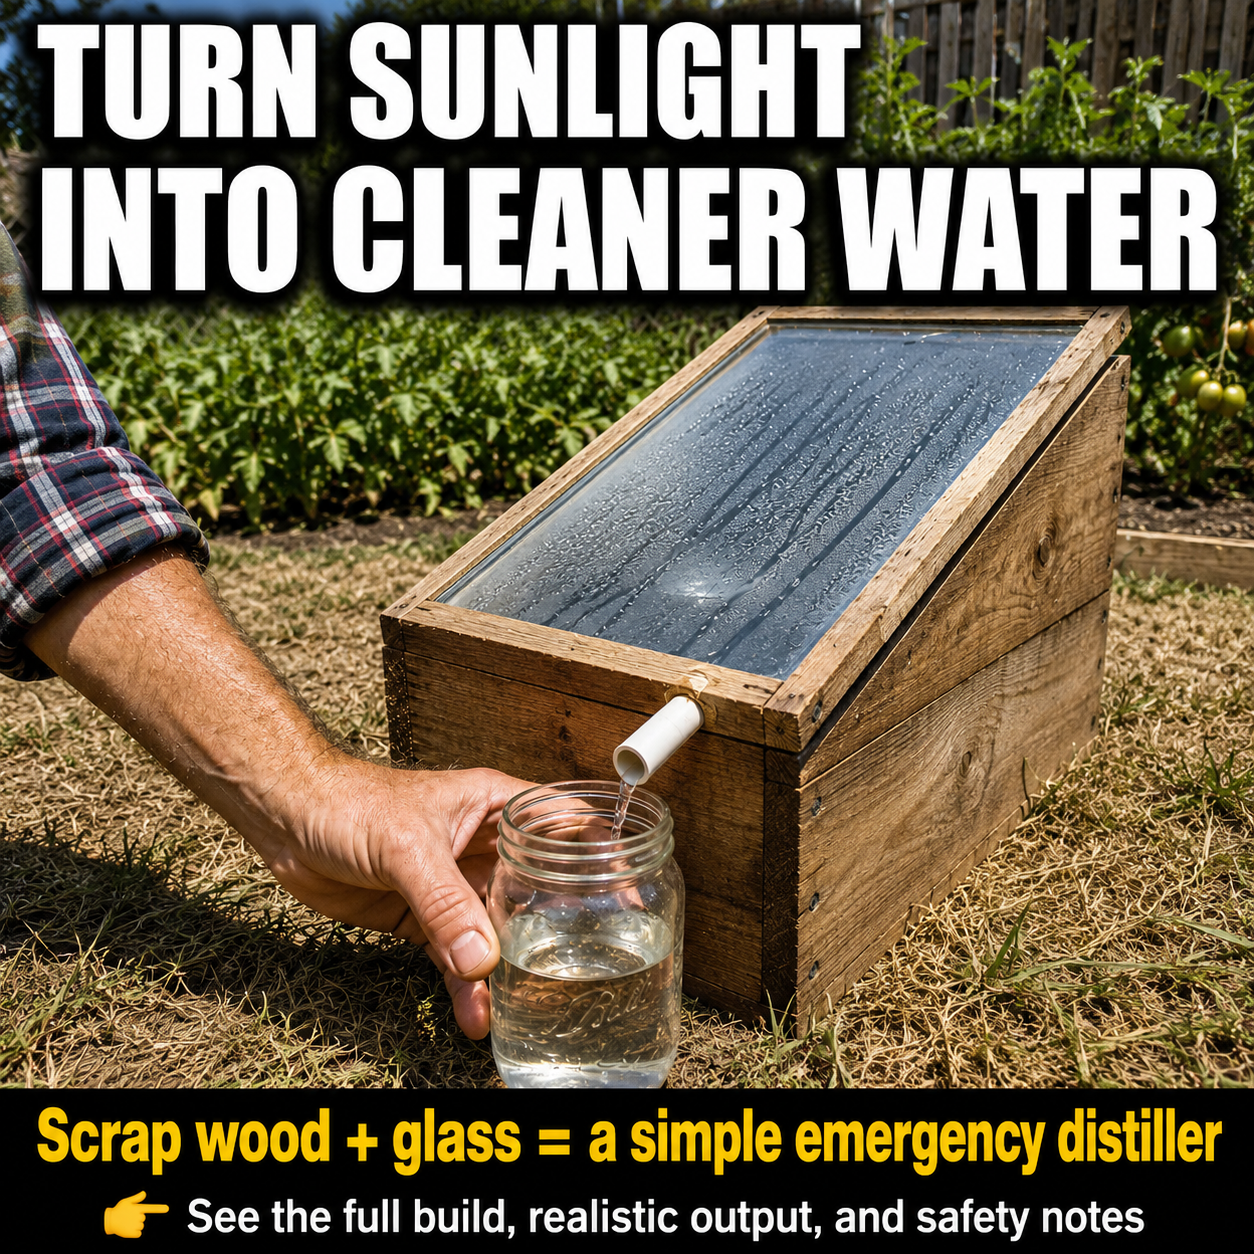
A wooden box, a piece of glass, and several hours of strong sunlight can become a small emergency water distiller.
The idea is surprisingly simple.
Sunlight warms water inside a sealed container. Some of that water evaporates, rises as vapor, and condenses against the cooler glass above it. The droplets then run down the sloped surface into a collection channel and out through a tube.
What remains behind are many of the contaminants that do not evaporate with the water.
This homemade device is commonly called a solar still.
It can be a useful preparedness project, but it is important to begin with an honest expectation: the still shown here does not normally produce “two gallons a day from thin air.”
It must be supplied with water, and a compact backyard model usually produces far less than two gallons per day. Research reviews commonly report conventional solar-still output in the general range of approximately 2 to 5 liters per square meter of basin area per sunny day, although actual production varies widely.
That does not make the project useless.
It makes it a practical backup tool that should be understood correctly.
What This Solar Still Actually Does
A solar still uses heat from the sun to imitate part of the natural water cycle:
- Water is placed in a shallow dark basin.
- Sunlight passes through the clear cover.
- The dark basin absorbs heat.
- Water gradually evaporates.
- Vapor contacts the sloped glass and condenses.
- Droplets flow into a clean collection channel.
- Distilled water exits through a food-safe tube.
Distillation can remove parasites, bacteria, viruses, dissolved minerals, salts, and many chemicals by separating water vapor from the substances left in the basin.
However, distillation is not effective against every possible contaminant. Some volatile organic compounds, solvents, and certain pesticides can evaporate with the water and enter the collected distillate.
For that reason, never use water that smells like gasoline, solvent, pesticide, industrial waste, or an unknown chemical spill.
When a Solar Still May Be Useful
A homemade solar still is best viewed as a supplemental emergency tool, not a complete household water system.
It may be useful for:
- Demonstrating basic water-distillation principles
- Desalinating small quantities of saltwater
- Processing known nonvolatile mineral contamination
- Producing limited backup water in sunny conditions
- Teaching practical preparedness skills
- Reducing dependence on electricity
- Experimenting with off-grid water systems
It is less suitable when:
- Large amounts of water are needed quickly
- The weather is cloudy or cold
- The available water may contain fuel or solvents
- The device has not been cleaned
- Safe bottled or municipally supplied water is available
- Someone has an immediate medical need for reliable drinking water
Safe drinking water is a priority during emergencies, and established household treatment and safe-storage methods remain important for preventing waterborne illness. (World Health Organization)
Materials You Will Need
The following dimensions create a medium-size demonstration still. Adjust them to fit the glass panel or salvaged window you already have.
Wooden enclosure
- One sheet of exterior-grade plywood
- Scrap 1×2 or 2×2 lumber for the frame
- Exterior-grade wood screws
- Waterproof wood glue
- Exterior sealant or weather-resistant paint
- Hinges for the glass frame, optional
- Weather stripping
Clear cover
- Tempered glass or a reclaimed glass window panel
- Wooden strips for framing the glass
- Heat-resistant silicone sealant
Glass generally resists scratching and remains clear longer than thin plastic. Tempered glass is preferable because it is less likely to break into large sharp pieces, but it still must be handled carefully.
Do not use unidentified glass that may have specialized coatings, contamination, or severe damage.
Water basin
- Shallow stainless-steel or food-grade dark basin
- Food-safe black coating, only when specifically rated for water contact
- Removable tray or pan
A removable dark-colored basin is easier to clean than painting the inside of the entire wooden box.
Collection system
- Narrow stainless-steel or food-safe plastic channel
- Food-grade silicone tubing
- Small bulkhead fitting or suitable outlet fitting
- Clean glass jar or food-grade collection container
Insulation and sealing
- Rigid insulation board, optional
- Weather stripping
- Heat-resistant silicone
- Foil-faced insulation, optional
Avoid materials that can release fumes when heated. Do not place treated lumber, unknown adhesives, roofing tar, or ordinary interior paint inside the sealed evaporation chamber.
Basic tools
- Tape measure
- Pencil
- Circular saw or hand saw
- Drill
- Screwdriver
- Clamps
- Utility knife
- Level
- Caulking gun
- Safety glasses
- Work gloves
Suggested Dimensions
A manageable backyard model can use a basin measuring approximately:
- 24 inches wide
- 36 inches long
- 3 to 5 inches deep
Build the rear wall approximately 18 inches high and the front wall approximately 8 inches high. This creates a noticeable slope for the glass.
The exact angle is less important than ensuring that condensed droplets flow downward instead of falling back into the dirty-water basin.
A shallower internal air gap can sometimes improve productivity because vapor has less distance to travel before reaching the condensing surface. Solar-still performance is also influenced by basin depth, insulation, glazing angle, ambient temperature, wind, solar intensity, and the temperature difference between the basin water and cover.
Step 1: Build the Wooden Box
Cut the plywood into five main sections:
- Bottom panel
- Front wall
- Tall rear wall
- Left triangular side
- Right triangular side
Attach the front and rear walls to the bottom panel with waterproof glue and exterior screws.
Install the triangular side walls next.
Add reinforcing strips along the interior corners, but keep untreated wood away from direct contact with the source water whenever possible.
The box must be sturdy enough to support the glass cover without flexing.
Before moving forward, place the structure on a flat surface and confirm that it sits firmly without rocking.
Step 2: Seal and Insulate the Enclosure
Seal all exterior joints with weather-resistant sealant.
Add insulation beneath the basin and along the inner side walls. Insulation reduces heat loss and helps more of the captured solar energy warm the water.
Cover any insulation that faces the interior with a stable, heat-resistant barrier so loose material cannot fall into the basin.
Do not completely seal the glass in place yet. You will need access to the interior during assembly, adjustment, and cleaning.
Step 3: Install the Dark Basin
Place the shallow basin near the bottom of the enclosure.
The basin should:
- Sit level
- Be removable
- Have no leaks
- Resist corrosion
- Be easy to scrub
- Leave enough space for the collection channel
A dark surface absorbs more solar heat than a reflective surface.
Keep the water layer shallow—often approximately one-half to one inch during testing. Heating a smaller volume of water generally requires less energy than heating a deep basin.
Do not overfill the basin. Source water must never spill into the clean-water collection channel.
Step 4: Build the Condensation Channel
Install a narrow channel along the lowest interior edge of the sloped glass.
This channel catches the droplets that run down the glass.
The channel should tilt slightly toward the outlet fitting. Even a small slope can prevent water from pooling.
Connect the outlet to food-grade tubing and route the tube through the front wall.
Seal carefully around the penetration so humid air cannot escape and insects cannot enter.
The collection channel must remain physically separated from the source-water basin.
A single splash of untreated water can recontaminate the collected distillate.
Step 5: Frame the Glass
Build a wooden frame around the glass panel.
Attach the frame to the rear of the box with hinges so it can be opened for cleaning. Add a handle and secure latches along the front.
Apply compressible weather stripping around the upper edge of the enclosure.
When closed, the glass should create a reasonably sealed chamber while remaining removable for maintenance.
Use silicone that is suitable for the temperatures involved and keep uncured sealant away from the water.
Allow all adhesives and sealants to cure completely according to their manufacturers’ instructions before operating the still.
Step 6: Test the Collection Path
Before adding questionable water, test the collection system with clean tap water.
Pour a small amount directly onto the inside surface of the glass.
Watch whether it:
- Runs down the glass
- Enters the collection channel
- Flows toward the outlet
- Passes through the tubing
- Reaches the collection jar without leaking
Correct any low spots where water remains trapped.
Then rinse the basin, channel, tubing, and collection container.
Step 7: Position the Solar Still
Place the completed unit in an open location that receives direct sunlight for most of the day.
Avoid shadows from:
- Trees
- Fences
- Buildings
- Vehicles
- Rooflines
- Garden structures
Orient the glass toward the strongest available sunlight.
The still should rest on a stable stand or level ground. Secure it against wind, pets, children, and accidental impact.
Do not place it where falling branches, lawn equipment, or reflected glare could create a hazard.
Step 8: Add the Source Water
Pour source water into the basin without wetting the collection channel.
Close and latch the glass.
After the interior warms, moisture should begin appearing on the underside of the glass. Small droplets will gradually combine, run downward, and enter the collection channel.
Production often begins slowly because the basin, water, air, and enclosure must first warm.
Check the outlet tubing periodically to ensure it remains unobstructed.
How Much Water Can It Realistically Produce?
This is where many viral claims become misleading.
A conventional solar still usually produces water slowly. Peer-reviewed reviews often place conventional output around 2 to 5 liters per square meter per day, with some designs producing less and modified systems producing more.
A 24-by-36-inch basin has an area of approximately 0.56 square meters.
Using the broad research range above, such a basin might produce roughly:
- 1.1 to 2.8 liters per favorable day
- Approximately 0.3 to 0.7 gallons
That is an illustrative estimate—not a promise.
Actual output can be substantially lower because of clouds, shade, leaks, cool air, dirty glass, poor insulation, excessive basin depth, high humidity, or an ineffective collection angle.
Producing two gallons—about 7.6 liters—in one day with a simple conventional still would generally require considerably more collection area, unusually strong conditions, or a more advanced multi-stage or enhanced design.
Factors that increase production
- Strong direct sunlight
- Larger basin area
- Dark heat-absorbing basin
- Shallow source-water depth
- Good enclosure insulation
- Clean transparent glass
- Airtight construction
- Effective condensation drainage
- Minimal shading
- Proper glass slope
Factors that reduce production
- Cloud cover
- Short winter days
- Deep basin water
- Dirty or fogged glass
- Air leaks
- Poor insulation
- Frequent opening
- Incorrect channel angle
- Condensate falling back into the basin
- Shade during peak sunlight
Is the Collected Water Safe to Drink?
Distillation can leave behind many pathogens, minerals, salts, and nonvolatile chemicals. CDC guidance states that distillation can remove parasites, bacteria, viruses, and many chemicals.
But a homemade solar still is not a certified drinking-water appliance.
Its safety depends on:
- The original water source
- Materials used in construction
- Whether the collection path remains clean
- Whether volatile chemicals are present
- Whether untreated water splashes into the outlet
- How the collected water is stored
- Whether the system is cleaned regularly
Never assume that clear water is safe. Many contaminants cannot be detected by sight, smell, or taste.
Do not use these source waters
Avoid water suspected of containing:
- Gasoline
- Diesel fuel
- Paint thinner
- Solvents
- Industrial discharge
- Pesticide concentrate
- Chemical spill runoff
- Unknown oily residue
- Mining waste
- Toxic algae
- Radioactive contamination
Some volatile compounds and solvents may not be removed by distillation and can potentially concentrate in the collected product.
When reliable drinking water is available, use that instead.
During an official emergency, follow local public-health instructions regarding boiling, disinfection, testing, and approved water sources. CDC emergency guidance recommends using bottled water when possible and provides established instructions for boiling and disinfecting water when bottled water is unavailable.
Preventing Recontamination
Producing distilled water is only half of the process.
The collected water can become contaminated again through dirty tubing, hands, insects, containers, or splashes from the untreated basin.
Use a collection container that is:
- Food-grade
- Thoroughly cleaned
- Tightly covered
- Reserved only for treated water
- Protected from direct contact with the outlet
Do not allow the end of the tube to sit beneath the water in the collection jar.
Wash your hands before handling the clean-water components.
WHO emergency guidance emphasizes both household treatment and safe storage because treated water can be contaminated again after processing. (World Health Organization)
Cleaning and Maintenance
Drain the untreated basin after each operating cycle.
Do not continually add new water to an increasingly concentrated residue. As water evaporates, salts and other nonvolatile substances remain behind.
After each use:
- Empty the basin.
- Remove sediment.
- Wash the basin with clean water.
- Clean the condensation channel.
- Flush the outlet tube.
- Wash the collection container.
- Inspect the glass and seals.
- Allow components to dry.
Mineral scale may form inside the basin over time. Remove it before it becomes thick enough to reduce heat transfer or damage the surface.
Inspect wooden components for:
- Cracks
- Mold
- Swelling
- Loose screws
- Failed sealant
- Insect damage
- Warping around the glass
Replace damaged tubing or contaminated collection components rather than attempting to save them.
Common Building Mistakes
Using unsafe materials
Do not use pressure-treated wood, unknown recycled plastic, ordinary paint, roofing adhesive, or questionable sealants inside the heated chamber.
Making the basin too deep
A deep basin takes longer to warm and may reduce daily production.
Allowing dirty water to reach the channel
The collection channel must remain higher than the basin’s maximum water level.
Installing nearly flat glass
Condensate needs enough slope to move toward the channel.
Leaving large air gaps
Air leaks allow warm, humid air to escape before it condenses.
Expecting household-scale output
A compact solar still produces limited quantities. It should not replace stored emergency water.
Using chemically contaminated water
Distillation is not a universal solution for unknown industrial or agricultural contamination.
Ignoring storage hygiene
Clean distillate can be contaminated by a dirty jar, tube, lid, or hand.
Can It Really Pull Water From Thin Air?
Not in the way the viral headline suggests.
A standard basin-style solar still receives water from a basin placed inside the enclosure. It then evaporates and condenses that water.
It is not the same as an atmospheric water generator, which deliberately extracts moisture from ambient air.
A tightly sealed solar still may collect a very small amount of moisture that was already present in its internal air, but this is not enough to support a claim of gallons per day from the atmosphere.
A trustworthy description would be:
Scrap Wood and Glass Can Become a Simple Solar Water Distiller
That headline remains compelling without promising an unrealistic result.
Is This Project Worth Building?
Yes—provided you understand its purpose.
A scrap-wood solar still is valuable as:
- A preparedness experiment
- A science demonstration
- A small desalination device
- A backup water-processing method
- A foundation for larger solar-distillation projects
Its greatest benefit may not be the amount of water it produces.
Its greatest benefit may be teaching you how evaporation, condensation, heat capture, material safety, and clean-water storage work together.
Build it before an emergency.
Measure its daily output.
Test it during different seasons.
Identify leaks and weaknesses while safe water is still available.
Most importantly, do not depend on a viral production claim. Depend on results you have personally measured from your own system.
Final Safety Note
This project is provided for general preparedness education. A homemade solar still is not guaranteed to make every water source safe.
Never process water contaminated by fuel, solvents, pesticides, industrial chemicals, or an unidentified spill. Follow local health-department instructions during a water emergency, and use bottled or officially approved water whenever available.